Crochet a Rag Rug for Beginners
How to crochet a rag rug for beginners. This will teach you the basics and where to go for a more advanced tutorial.
This post contains affiliate links
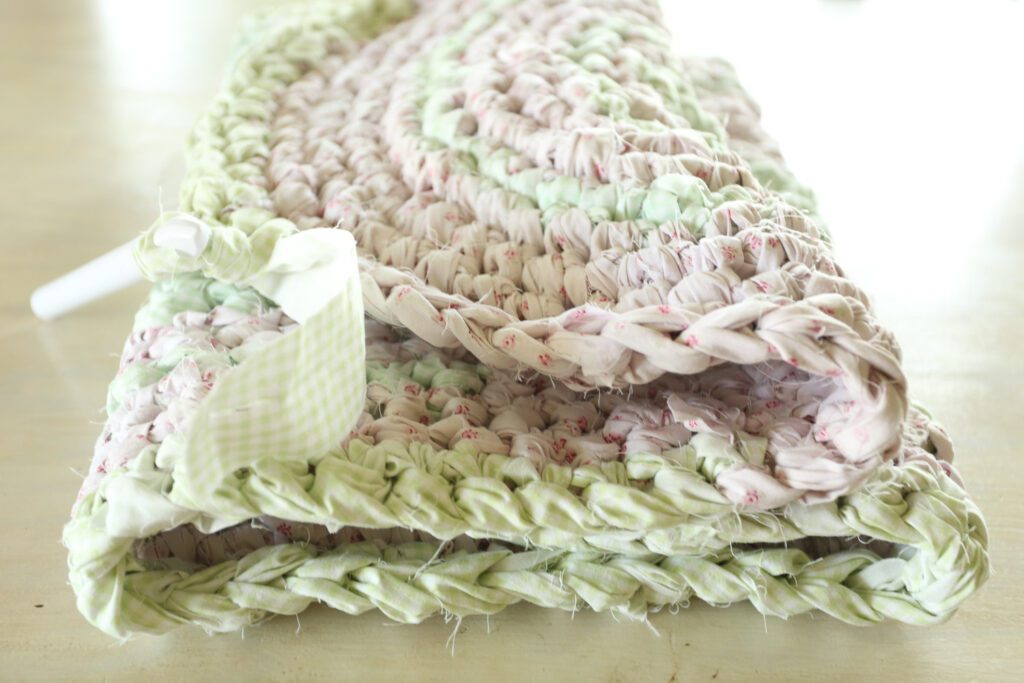
#HandmadeHome Challenge
As you may remember I am participating in the #handmadehomechallenge I am doing a handmade project every month for the year 2021. I am so happy that I have participated in this! I have learned so many new skills this year! Making a rag tug has been on my bucket list of things to do for close to 10 years! I am so delighted that I finally made one! It’s just one of those old-fashioned skills that feel so useful!
If you would like to see the other projects for the year here they are.
January- How to Crochet a Dishcloth for Absolute Beginners
February- DIY All-Purpose Cleaner & Bathroom Spray with Witch Hazel
March- Easy Farmhouse Envelope Pillow Cover Tutorial
April-How to Sew a Simple Tote Bag with Flat Bottom and Lining
May- DIY Reusable Beeswax Wraps Three Ways!
June-Best Beginner Soapmaking Tutorials and Books
Make Your Own Crocheted Rag Rug
Years ago I purchased a DVD on how to make your own Crocheted Rag Rug. It was made by Rags to Rugs by Lora. It is an older DVD, but I found it very helpful for understanding how to make a rag rug. She also has more recent videos on YouTube that I found helpful for clarifying some questions I had after watching the DVD.
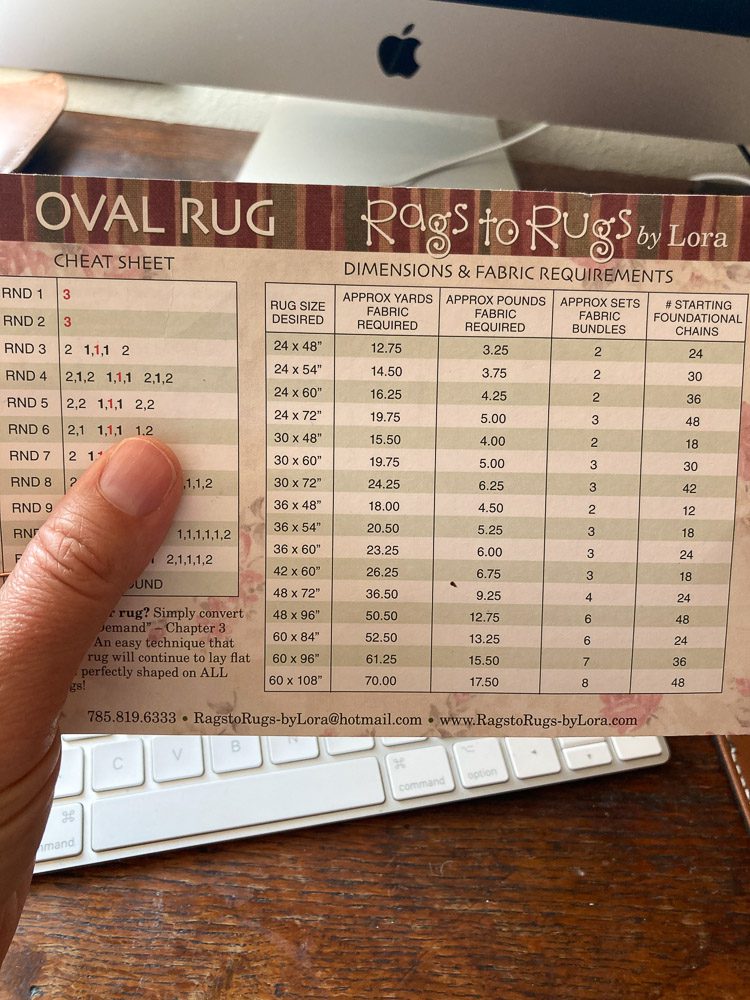
I highly recommend looking at her tutorials or purchasing her DVD if you are serious about wanting to make a rag rug. Getting the pattern that she provides with the DVD is worth the cost of the DVD. It tells you how much fabric you will need for each size rug.
Making a Rag Rug from Old Sheets
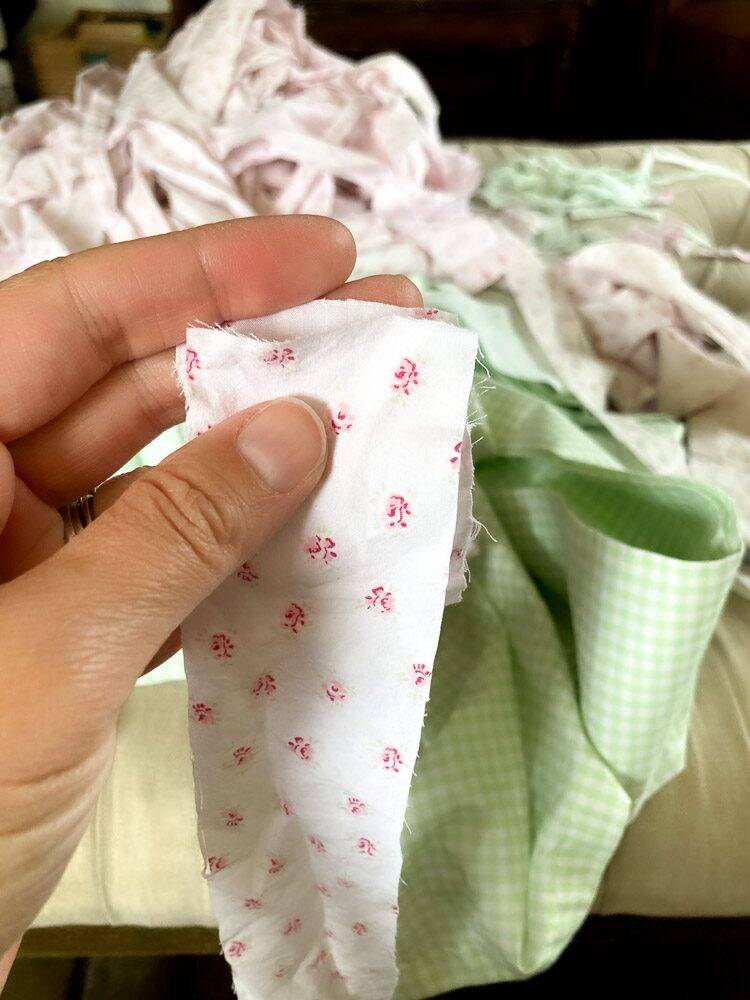
I chose to make my rug from old sheets. This seemed the most old-fashioned thing to do. Plus, it is frugal and since I wanted the rug for my girls’ room, using their old sheets kept the color palette coordinating! I have always loved these rosebud sheets. They were from the Shabby Chic line at Target many years ago. The other sheets were actually used as curtains at one point. They are a green gingham check.
Start with Stripping and Joining the Sheets or Fabric
I used a cutting mat and rotary cutter to cut the sheets into 2″ strips. I cut up all of the sheets that I had and then weighed the fabric. The pattern that came with the DVD tells you how much fabric you will need for each size rug. I decided how big the rug would be by the weight of all of my fabric. I was able to make a rug that is approximately 20×50. She also gives you the measurements for the yardage if you prefer that measurement. I had around 4 lbs of fabric.
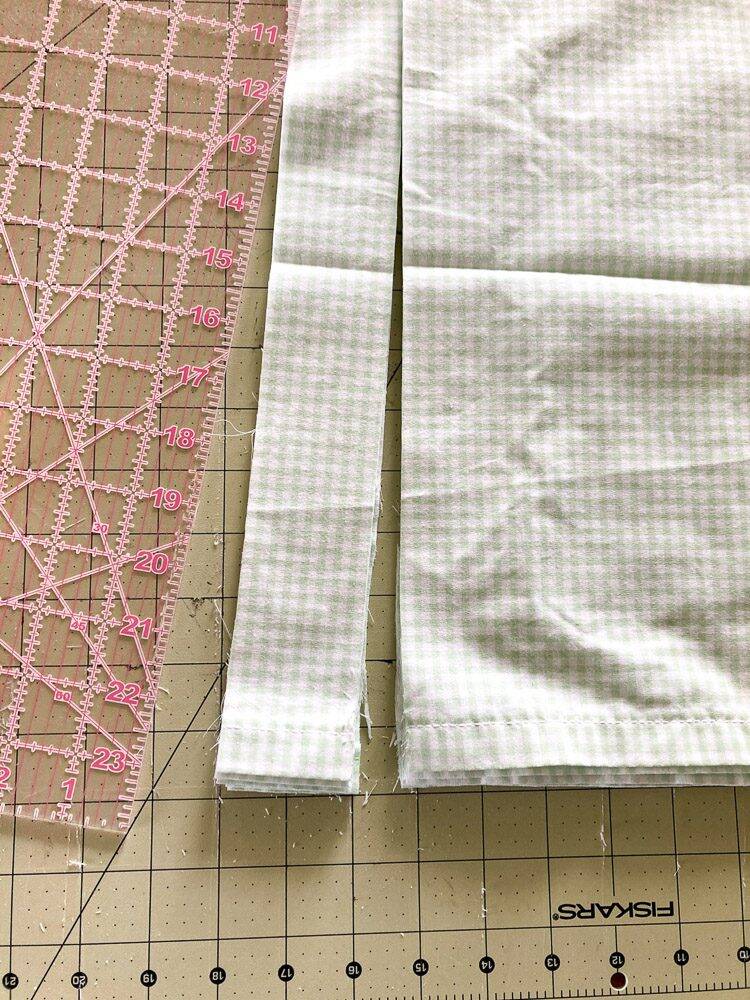
The method she teaches for joining the sheets is far better than any method I found on the internet. Many tutorials have you sewing each strip together. That seems like a lot of trouble to me. Maybe it could go quickly, but I don’t want to spend that much time at the sewing machine.
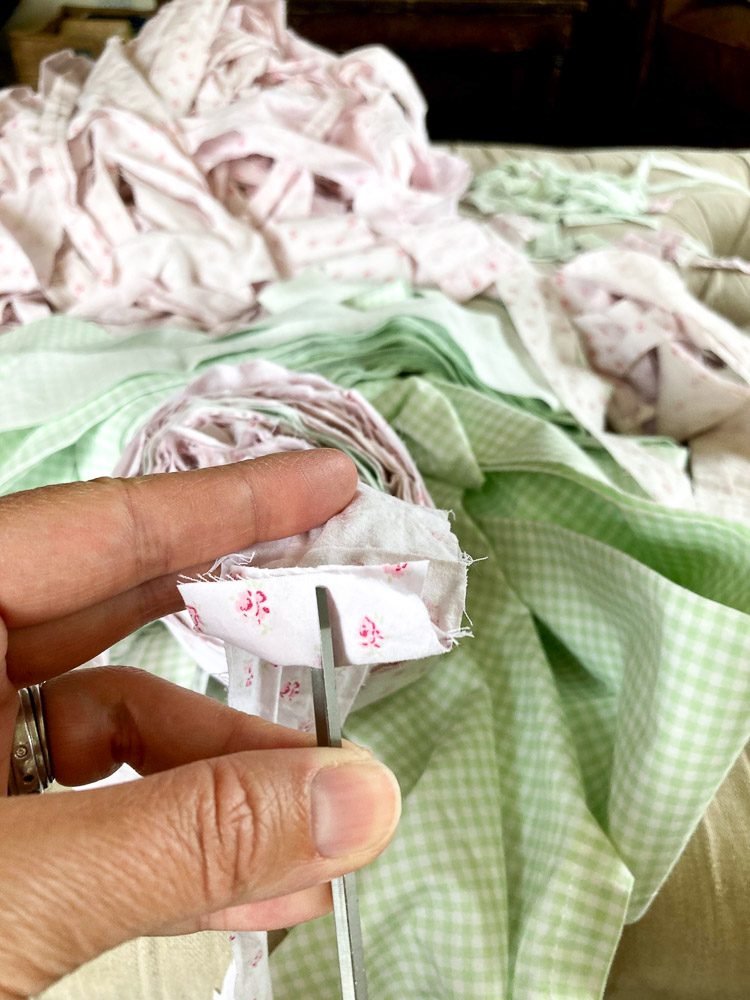
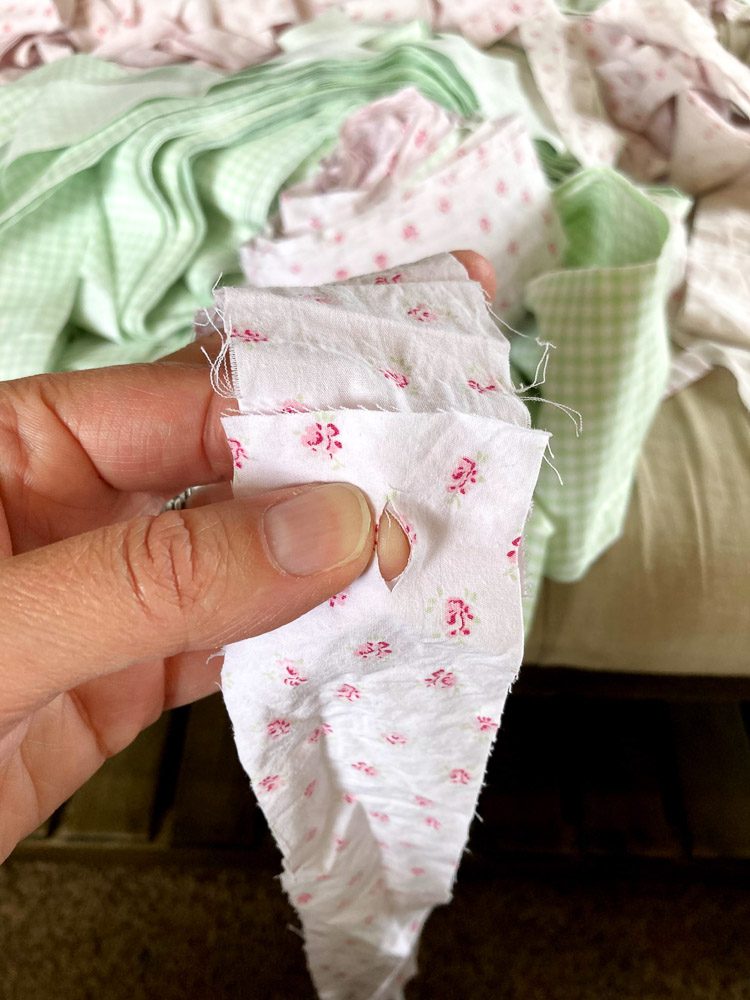
The way she teaches you to join the strips is to hold the strips right sides facing you and tops together. Fold the top down 1/2 inch and make a slit with scissors in the fabric.
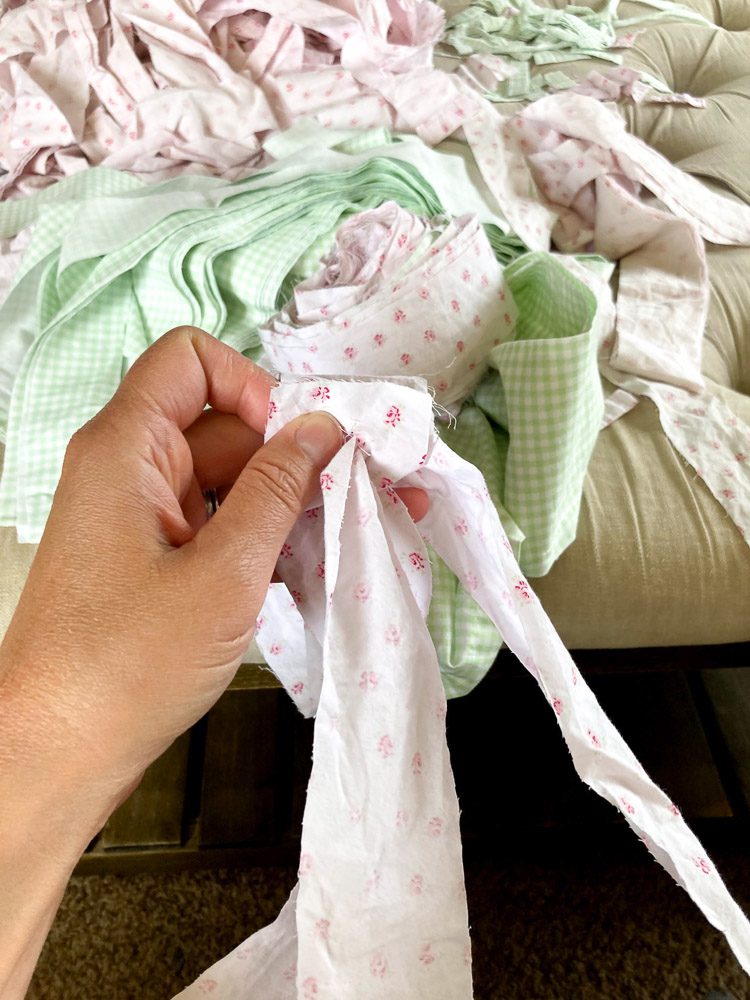
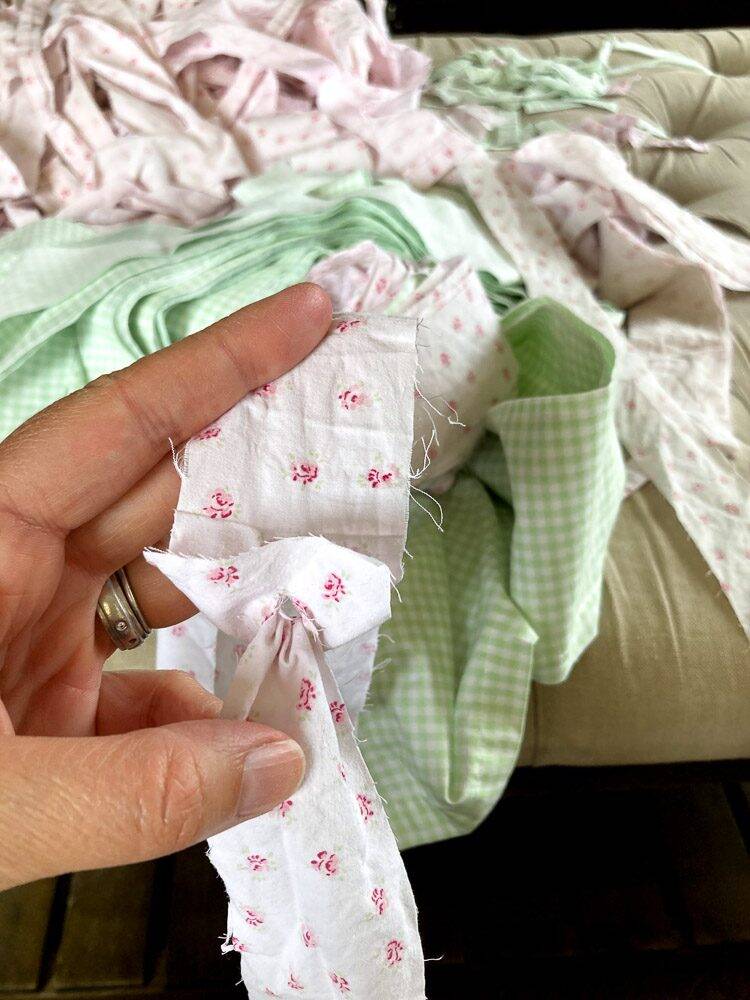
You then hold the two strips end to end with the slits lining up. Take the end of the strip that you are adding and feed it through the slits. Pull the end until you have pulled it into a sort of knot. Sounds confusing and it sort of is at first. Watch this video by Lora to get a better understanding.
Plan Your Pattern or Don’t
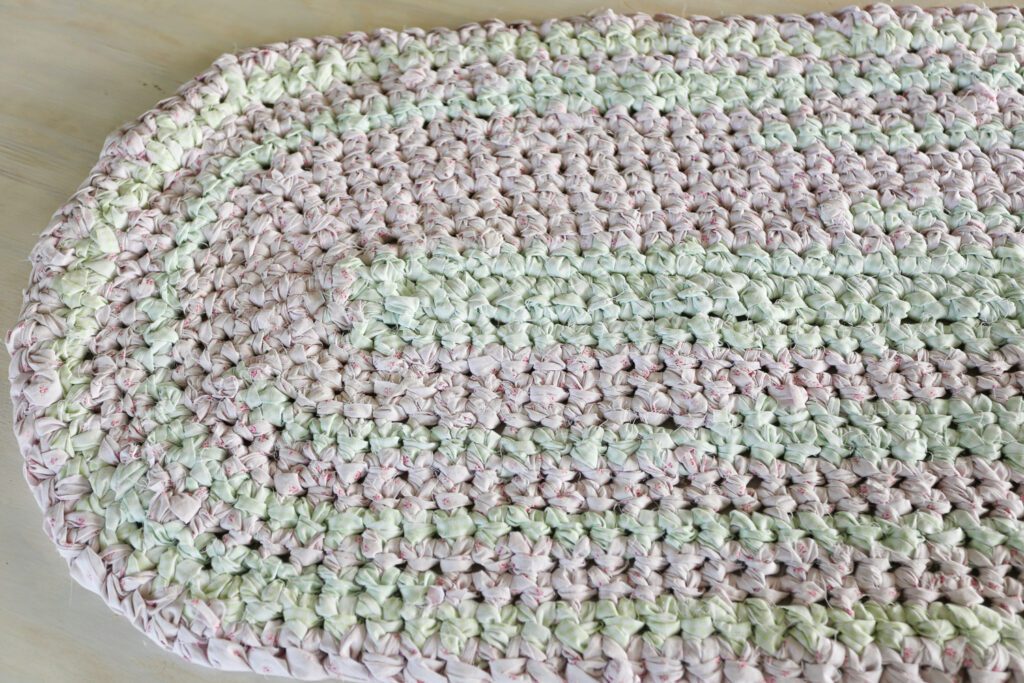
I wanted my rug to look random. I didn’t want a super-defined pattern. Now that it is done, I kind of wish I had done a more defined pattern, although I do really like it! I am rarely 100% happy with any project I do, I can always see the mistakes or overthink what I could have done differently. I’m sure many people are like me. However, I don’t let perfectionism stop me, I am happy to say that finished is better than perfect!
I joined all of my strips together like a giant ball of fabric yarn. I was thinking of it like that variegated yarn that you can buy where it switches colors along the way. If you want a more defined pattern, you probably don’t want to join all of your fabric together. Perhaps you should just join like colors into balls of fabric. However, if you plan on switching back and forth a lot you may not want huge strips to join together either.
What Size Hook for a Crocheted Rag Rug
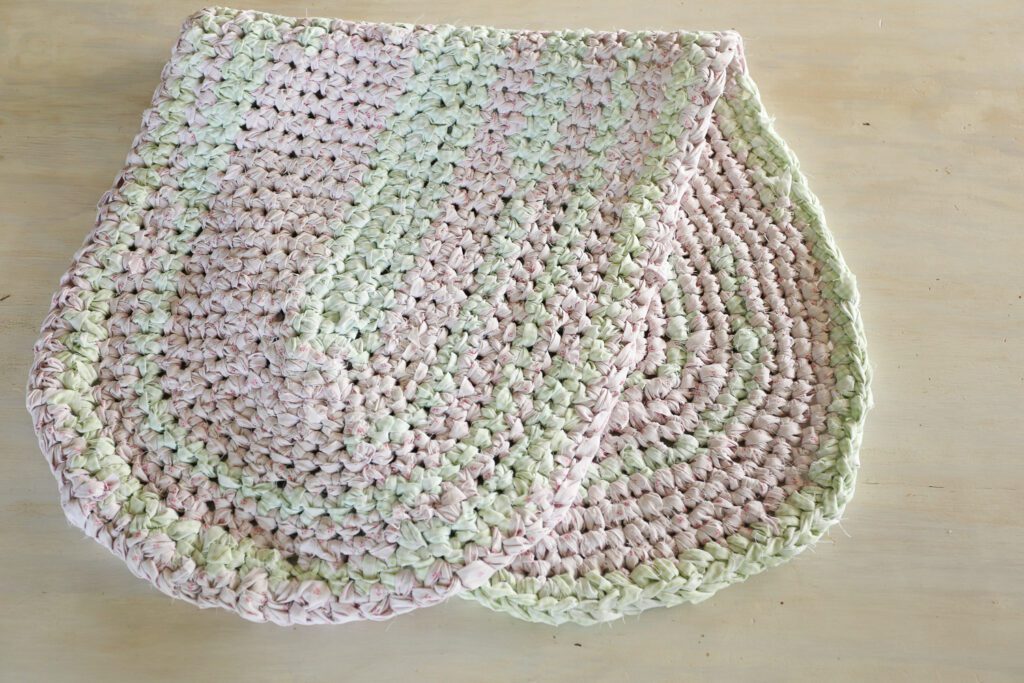
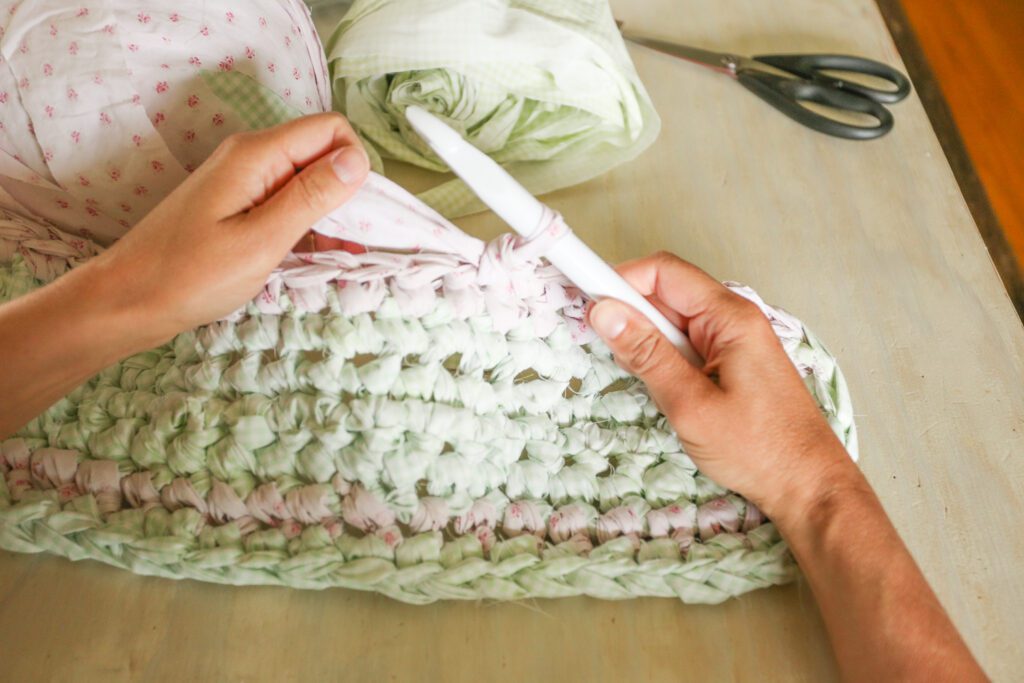
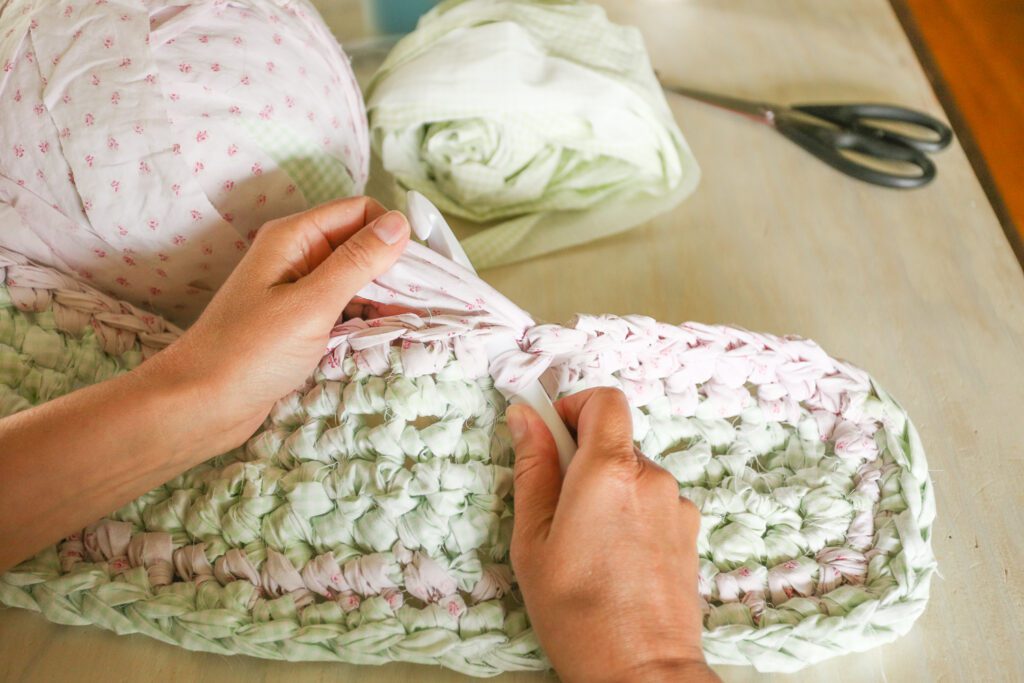
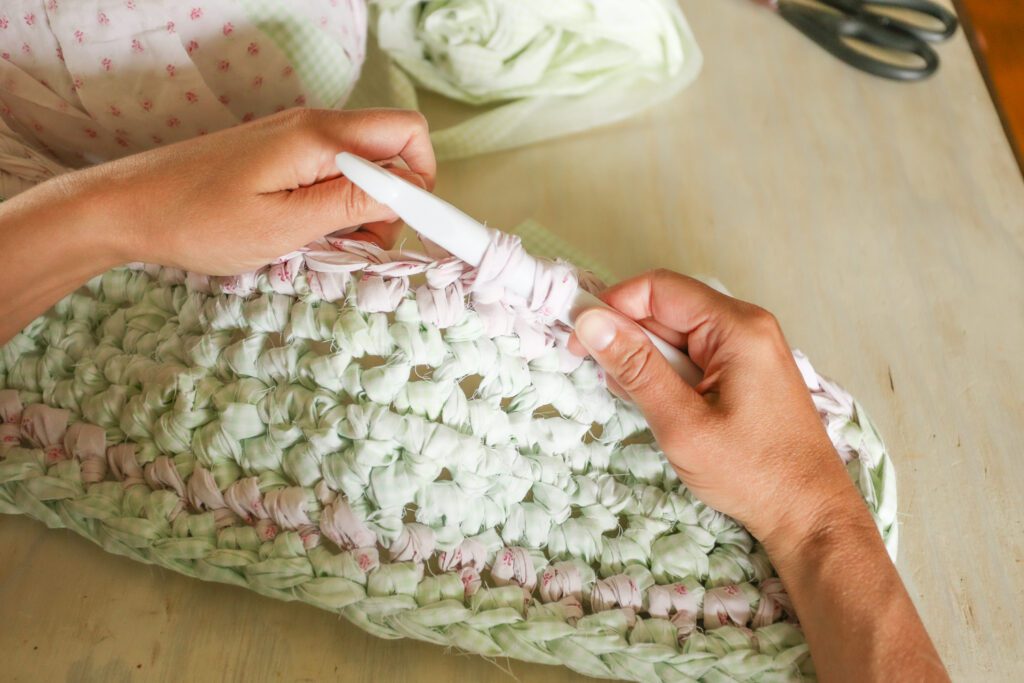
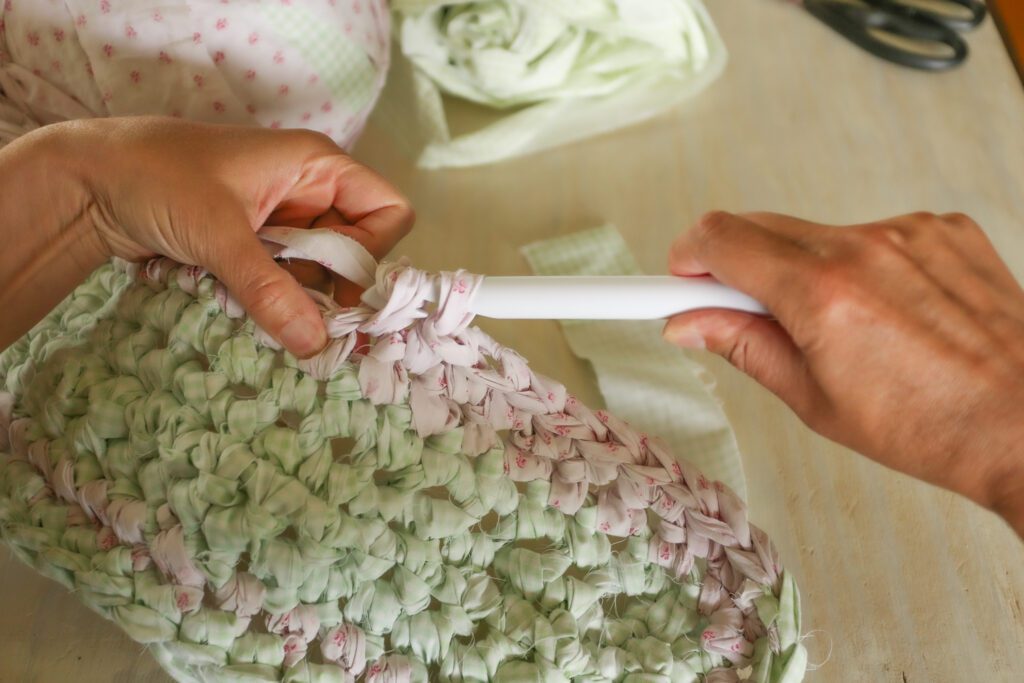
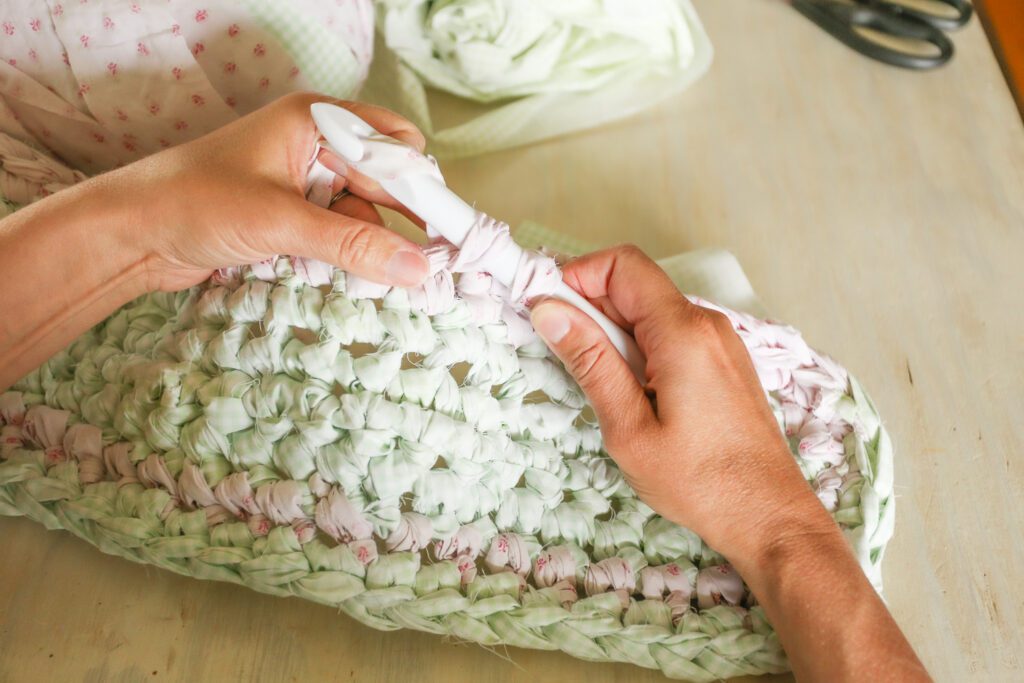
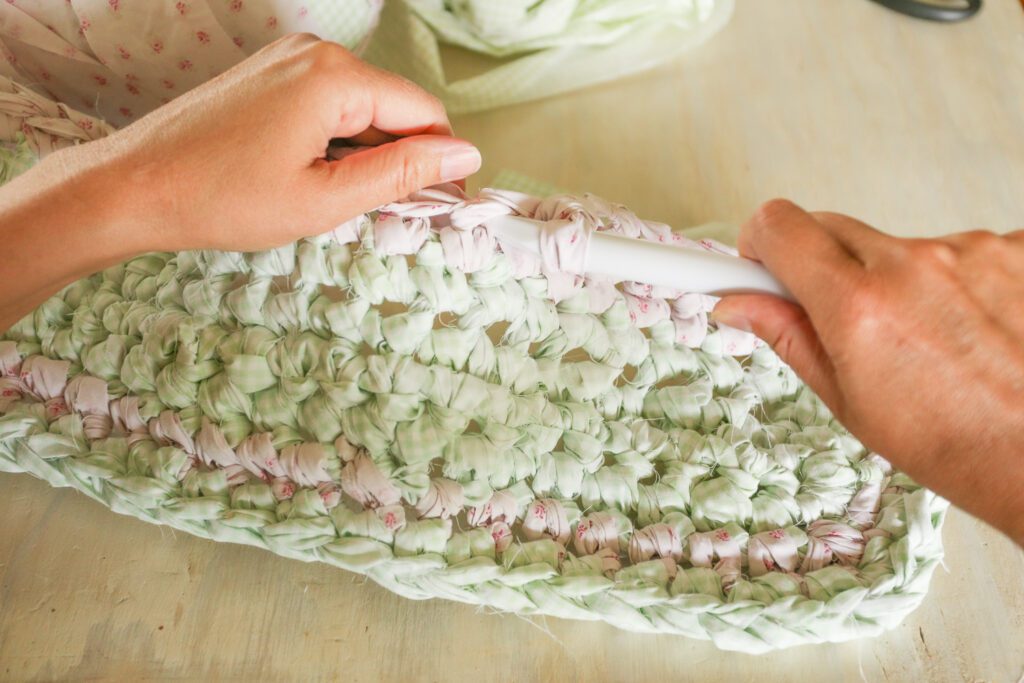
You will want just about the biggest size hook you can find. This one is a size “M” or 9mm. At first, it feels awkward using such a large hook. If you look at the pictures below, you can see that rather than holding it in a delicate fashion with your fingertips, you are really kind of holding it like a toddler holds their fork. Your whole hand is wrapped around the hook and you definitely get your arms more involved. I found it easier to sit at a table and rest my work on it while I crocheted. You can definitely sit on the couch or in a chair and have it on your lap as well. I did that too. Just be prepared to have stray strands of fabric all over you! Once the rug is finished, it does not shed. I was concerned that it might, but it really doesn’t.
If you are serious about starting to crochet, this set of hooks gets great reviews and has every size you would need! Plus a cute little case!
Learn a Single Crochet
You will only need to know how to make one stitch for this rag rug. The single crochet is the first stitch most crocheters learn. It is simple and quick and the only stitch you will need. To start you will be crocheting in a round. I had never done this before! However, it is really easy! You just go around the foundational chain rather than working back and forth in rows. The video also teaches how to crochet a rectangular rug if that interests you!
If you don’t know how to crochet, I have a beginner tutorial here to help you learn the basics. I teach you how to start, how to make a chain, and how to do a single, double and treble crochet.
Follow the Pattern for Your Size
This is where the pattern is so handy. You figure out what size you are making, and you then crochet the corresponding number of foundational chain stitches. You then begin to crochet around that foundational chain. The pattern comes in when you need to increase. She tells you exactly which stitches to add an extra stitch. This keeps the rug from rolling up. Essentially you are adding an extra stitch wherever there is tension or a stretch to reach the next stitch if that makes sense.
Finishing the Rag Rug
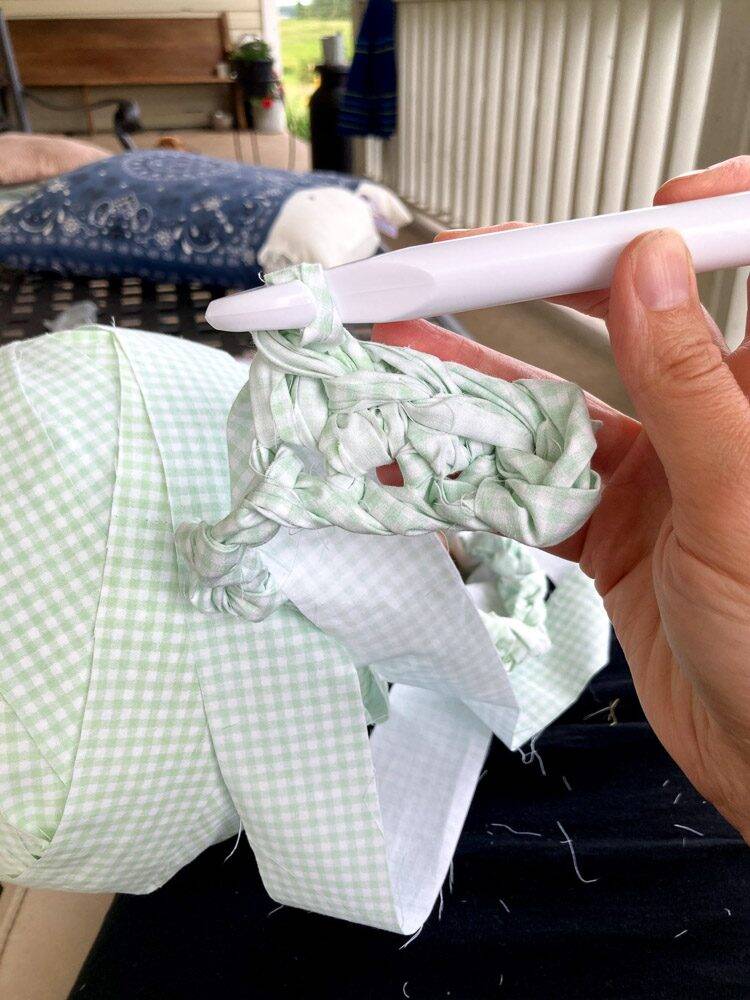
You finish the rug pretty much just like you would finish any other crocheted project like a washcloth or blanket. You simply weave the ends or tails in and out in a convenient spot. Hook a safety pin to the end of the fabric and just work the end into the rug. I’m sorry I didn’t get a picture of this step!
Tips for Beginner Rag Rug Success
- Make sure you have plenty of fabric before you start. I really wanted a much bigger rug than I got. However it takes a lot of fabric to make the rug. Weigh your fabric first, and see if you need more.
- Use old sheet or look for clearance sheets. This is such a great way to get lots of fabric with little expense.
- If you get to a place where you need to add more fabric but don’t want to feed it all the way through the way you did in the beginning, a knot will work in a pinch. I needed to add more fabric towards the end, but I had already joined lots of strips together. I just tied a knot to join them, and it isn’t super obvious.
- Buy Lora’s video or watch her YouTube videos. She is a great teacher!
- Just get started! This is a great way to use up scraps of fabric or old sheets! Plus it’s super fun to make a rug!
I Hope this Inspires You to Crochet a Rag Rug!
Let me know if you do!
Similar Rosebud Sheets
Similar Gingham Sheets- not green though…
Pin and Share!




Love the chic ideas
Thank you for freely sharing (like Jesus!). I am wanting to try this project, and wondering how I would go about laundering the finished product? After all the effort, I would not want to ruin it! Any suggestions? Thanks, in advance 🙂
Hi there! I’m so glad you found it helpful! Yes, I just launder my in the washing machine on normal, and then lay flat to dry. Depending on the fabric content of your sheets or rags I think that should work just fine!
Ms Dynys, you worried about the way you made your rug…stop worrying, it’s beautiful!
Thank you!
i love to crochet following your patterns. I am dyslexic and can’t read patterns but your charts make it so easy for me. I just wish your oval patterns would go to 20 or 25 rows for larger rugs. Than you again for your wonderful videos and cheat cards.
Sure! You may check out the lady that I mention, she does an even better job of explaining all of it in my opinion and she would be able to show you how to go larger.