Sourdough Starter Recipe | Simple Easy Sourdough Starter Step by Step
This Sourdough Starter Recipe is just about as simple as it gets. Just water, flour, and a bit of time are all you need to get your sourdough starter going. In about a week you will have a starter of your own!
For our #handmadehomechallenge we have been talking all things sourdough for the month of January. I did a post and video on how to reactivate a dried sourdough starter. I also shared several recipes to get you started. However, there were a few people who didn’t want to buy a dehydrated starter, they wanted to get their own starter going from scratch! Well, I’m here for that too! Let’s see how to get a sourdough starter going from scratch!
What Do You Need to Make a Sourdough Starter?
- A pint-size and quart-size glass jar
- A cloth, coffee filter, or beeswax wrap for the top
- Flour ( I use whole wheat, but you can use white or rye as well) we will get into the types of flour later
- Water- filtered water is best, however, you can use tap water. If your water has chlorine. you may want to use bottled or filtered water. I use the Berkey Water Filter and love it!
- Something to stir with
Sourdough Starter Feeding Schedule
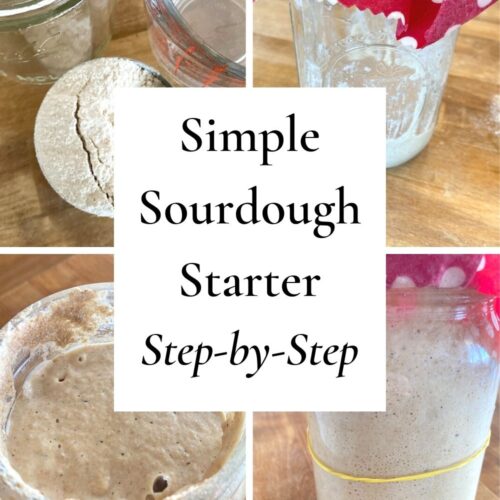
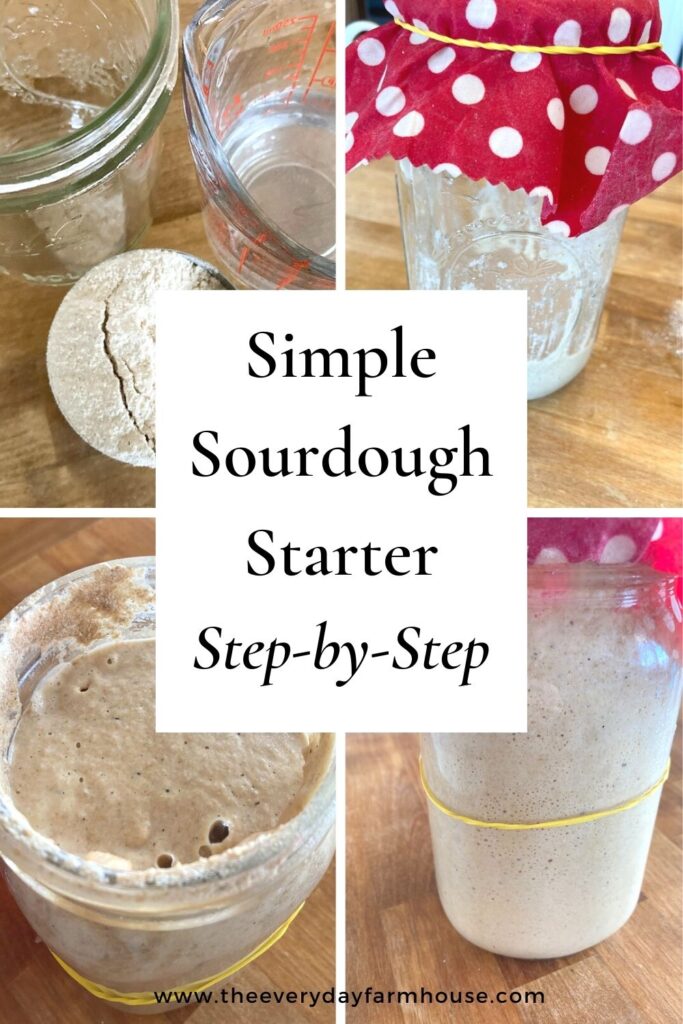
Sourdough Starter- Day 1
In your pint-sized jar mix 1/2 cup flour and 1/2 cup water. Cover with a breathable cloth or coffee filter and secure it with a rubber band
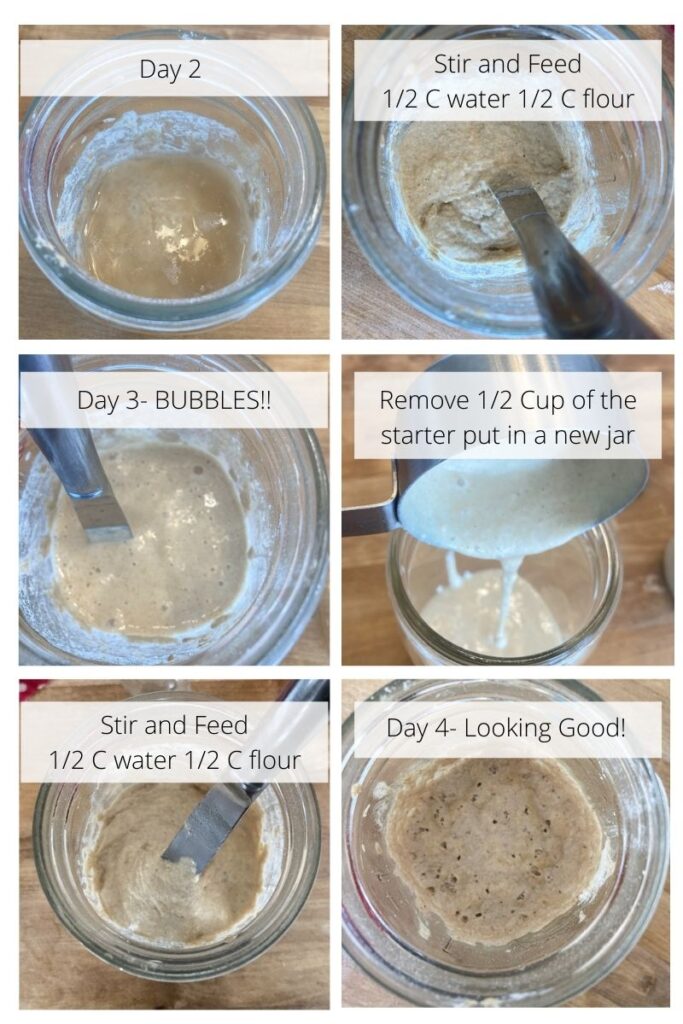
Sourdough Starter- Day 2
Stir in another 1/2 cup flour and another 1/2 cup water. Cover again and leave until the next day.
Sourdough Starter- Day 3
Today your starter may start to have some bubbles, very exciting! There may also be a layer of liquid on the top. That is normal, just give it a stir and remove about 1/2- 3/4 cup of the starter and place it in a quart-sized jar. Now feed that with another 1/2 cup water and 1/2 cup flour.
What remains in the original jar is called discard. You can toss it, compost it, feed it to your chickens or you can save it in your fridge for the rest of the week. Throughout the rest of the week, you will need to discard every day. You can save some of the discard in a jar and then try out some discard recipes, like this sourdough apple crisp.
Sourdough Starter- Day 4
Feed your starter 1/2 cup flour and 1/2 cup water. Check on it again in the evening, if it has that layer of liquid on the top, you can feed it again with the same amount.
Sourdough Starter- Days 5-7
You will continue to feed your starter 1/2 cup flour and 1/2 cup water morning and night. This means that in order for your starter to remain a reasonable size you will need to remove approximately 1/2 cup of starter each time you feed it. Again, you can discard that or you can save it for baking discard recipes.
Honestly, you may be able to get by with just feeding it once a day. I did on days 5 and 6, I just fed it a bit more. Remembering to tend to it twice a day is a bit much for some people. If you miss a feeding, just give it extra and you should be fine!
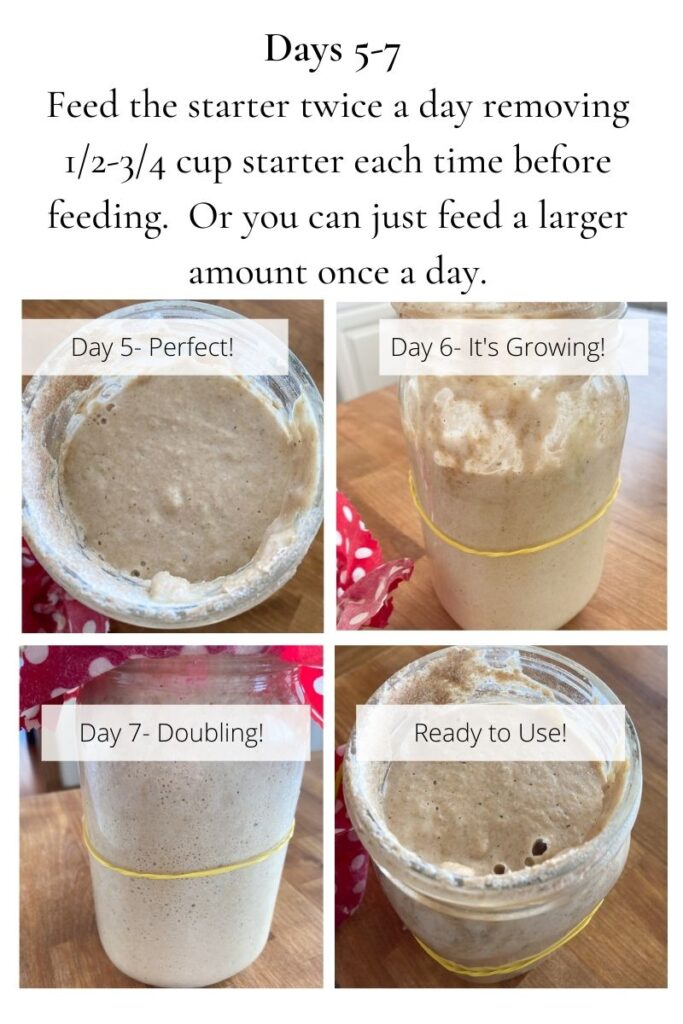
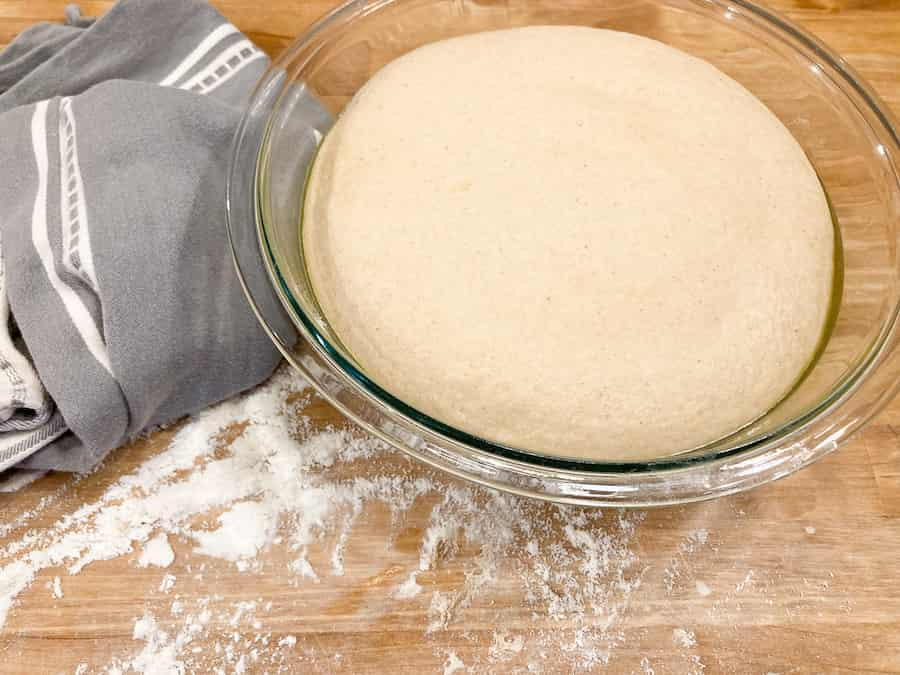
Day 7 Readiness Test
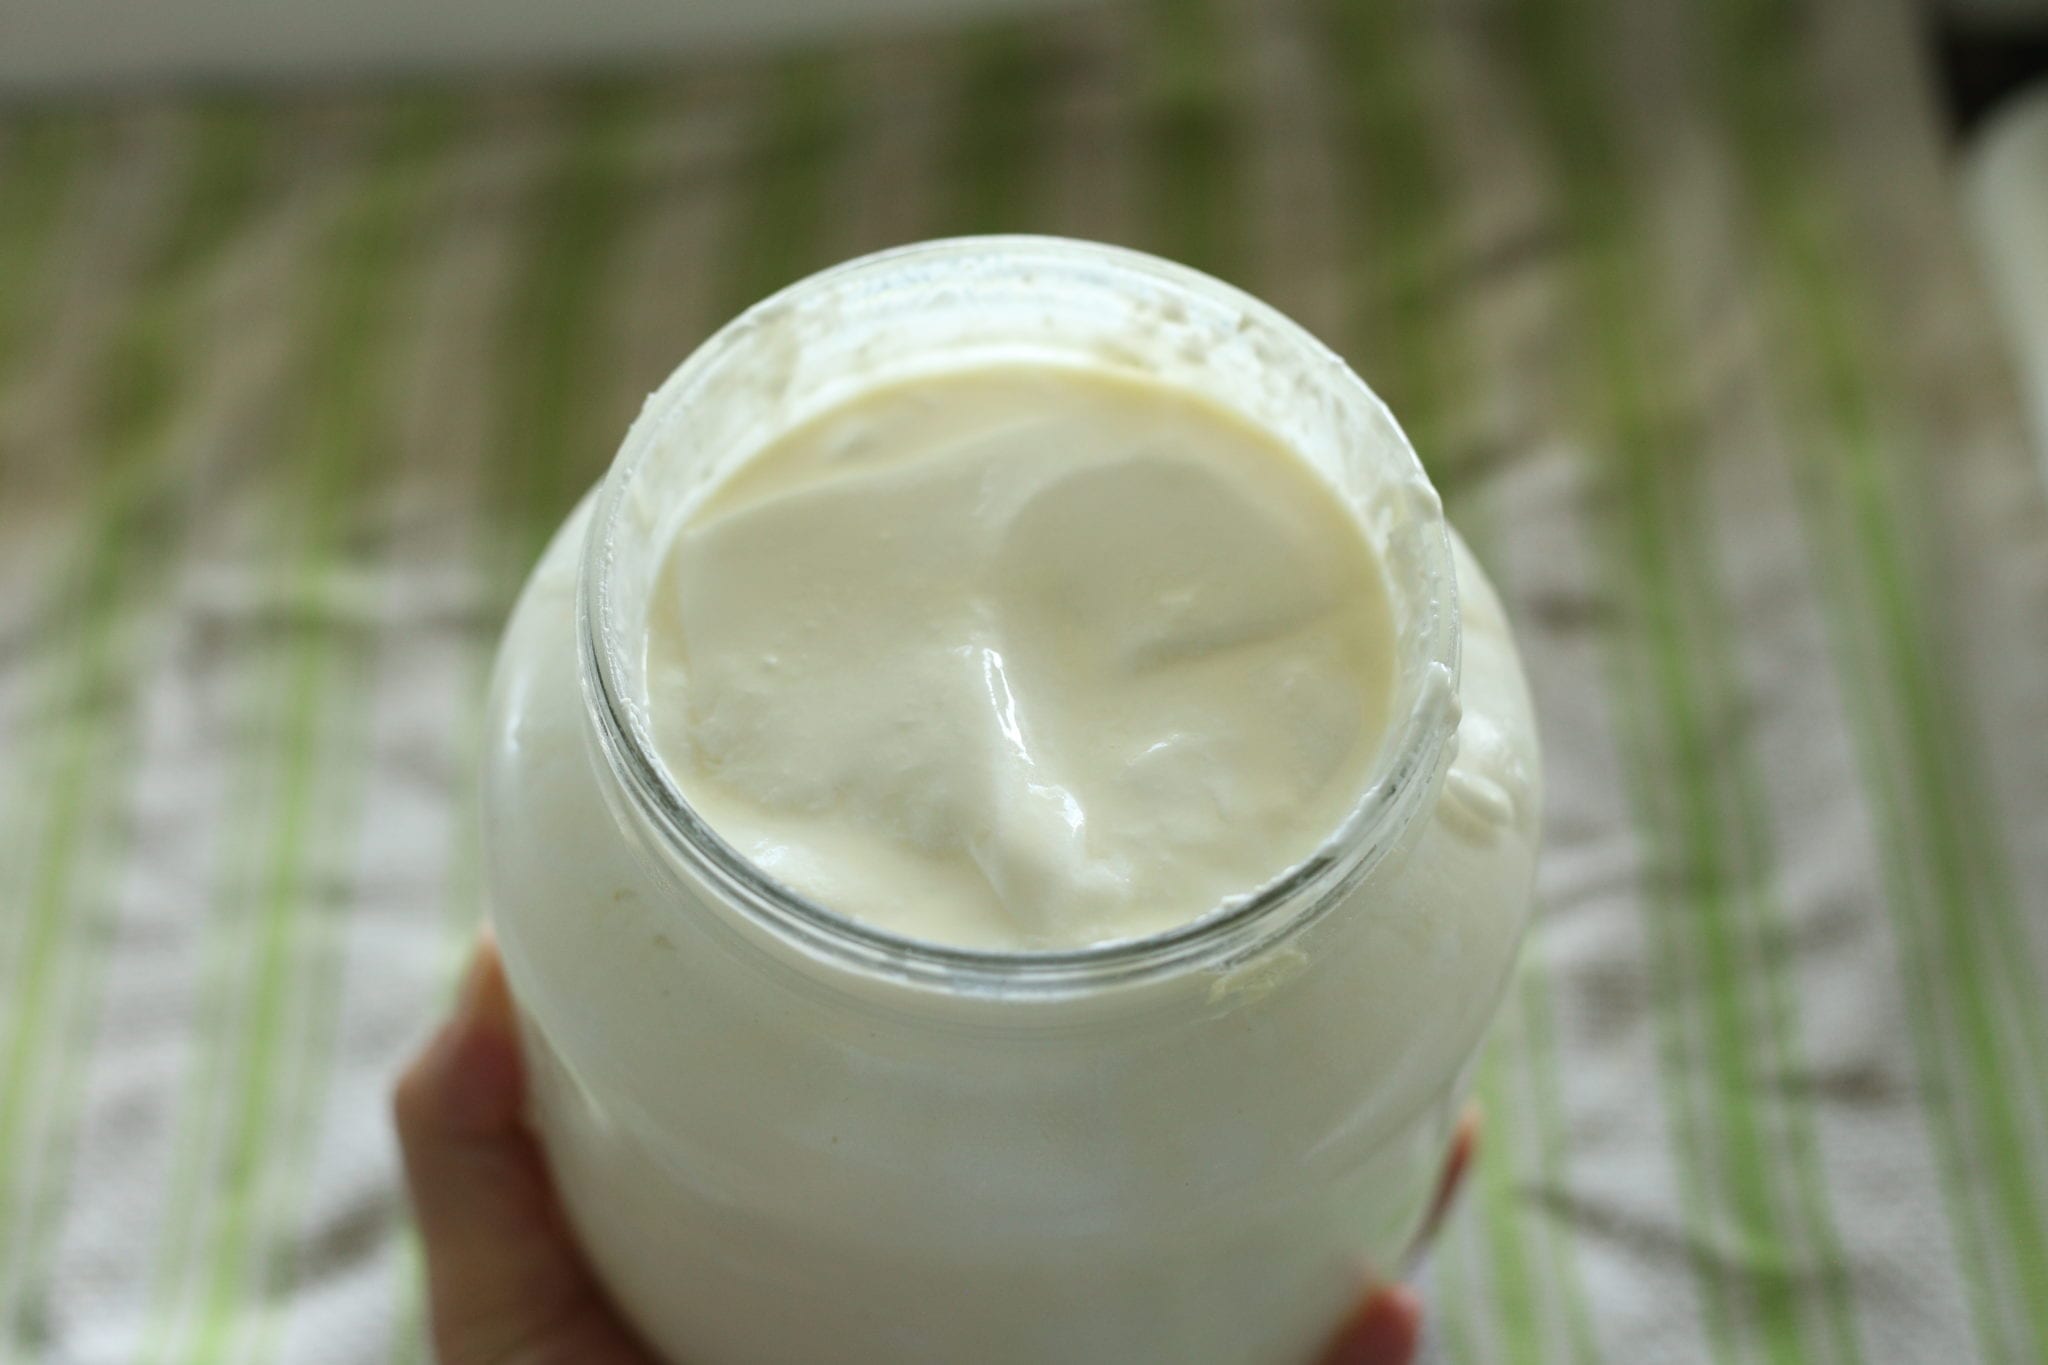
On day 7 really watch your starter to see if it is ready for baking. There is a float test, but honestly, I have never liked that test. It is said that you can drop a bit of starter in a cup of water and if it floats it is ready. I have had a portion of it float and a portion of it sink….not so sure what that meant.
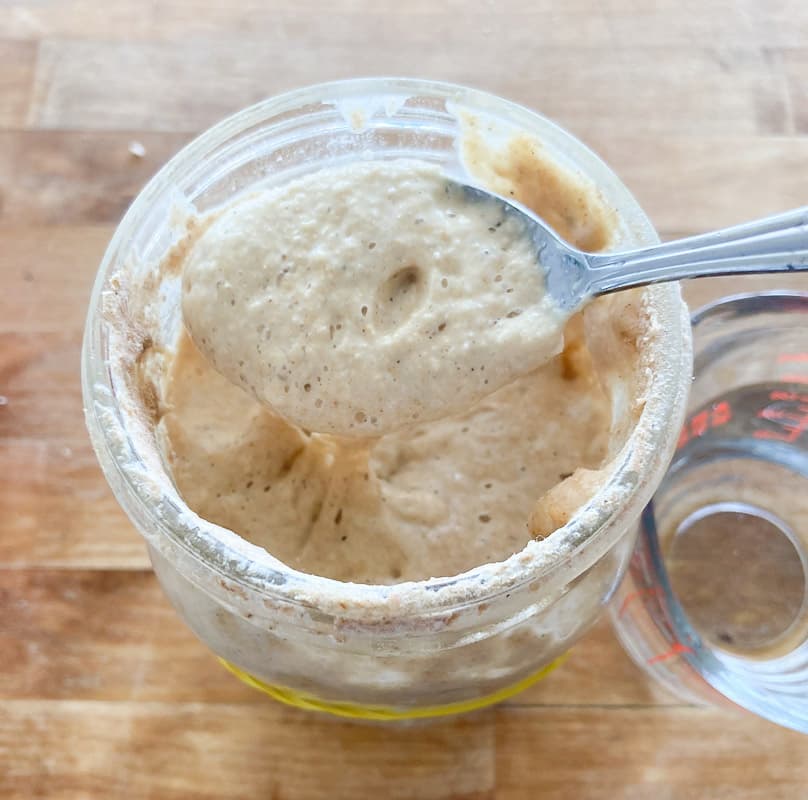
I think the best way to test the readiness of the starter is to watch it and observe it. After you feed it on day seven, place a rubber band around the jar at the level of the starter. If after 4-8 hours the starter doubles in size or rises far above the rubber band, then it is active and ready to use.
What to Do Once Your Sourdough Starter is Established?
You are now ready to bake bread. However, you need a recipe. This starter is essentially your “yeast” or “levain” for the recipe. My favorite recipe right now is this one. I have several recipes here on the blog that you can try as well. Including some recipes for discard.
Sourdough Starter FAQ’s
What Flour is Best for Sourdough?
When I was just getting into sourdough, I did a lot of research on this. I really wanted to use whole wheat flour, and I wasn’t sure if I could. I read this article and I thought it was very helpful! Turns out you can use whatever flour you want really! I use Prairie Gold Wheat Flour.
Please note that you can also change the type of flour that you are using. You can gradually add in a different type of flour as you transition to a different type of flour. Don’t switch all at once, use half of the old type of flour and half new as you switch over.
Do I Really Only Need Flour and Water?
Many recipes call for all sorts of different ingredients for sourdough starter, some call for yeast, some call for juice. I am here to tell you that it doesn’t really get more simple than flour and water and it really works!
What Container is Best for Sourdough Starter?
I think it’s easiest to start with a pint-sized jar, it is just easier to stir. However, you can start with a quart jar. Glass is really best as it doesn’t harbor bacteria like plastic can and it can be disinfected at high temperatures. Once your starter is established you will want a lid, it doesn’t need to be super tight-fitting, as in air-tight, just something to keep flies and such out.
The size of your jar will also depend on how much starter you need to keep on hand. If you have a large family like me, you will want to keep at least a quart-size jar of starter, I actually keep a two-quart size. If you only have a couple of people in your family, you won’t need a huge starter.
What is the Best Temperature for Sourdough Starter
Between 70-75 degrees is ideal for a sourdough starter. Anything cooler and you may have trouble getting the starter to ferment. Anything warmer and you will find it becoming very active and needing to be fed more often.
Why Do I Need to Discard or Throw Out Starter?
I know this is what seems annoying about sourdough. However, you won’t have to discard forever, only this first week when you are getting your starter established. If you don’t throw some out your starter will grow too big for your container. Also, the bigger the starter the more it needs to eat. If you have 2 cups of starter, to keep it healthy you will need to feed it 1 cup of water and flour. You can see that it would quickly outgrow your container.
Once it is established, you can store it in the fridge, feed it when you take it out, and only use what you need. Then you can put it back in the fridge until the next time you need it. More on this later.
What Do I Do With The Discard?
If you scroll to the bottom, I have lots of recipes. You don’t have to throw out the discard, you can bake yummy things like sourdough apple crisp with the discard. It won’t have all the benenfits of a long fermented baked good, but it is still so tasty!
What is the Black or Clear Liquid on Top?
This is an alcohol by-product called hooch. It is harmless, you can simply pour it off or stir it in. It just means that your starter is hungry…so feed it!
What if there is Mold on My Sourdough Starter?
No good. Time to toss it and start over. Don’t try to salvage moldy starter…not that you would!
What if My Starter Looks Crusty on Top?
That’s ok and normal. Just scrape it off and feed it.
How to Maintain and Keep a Sourdough Starter
This is one of the areas where people feel overwhelmed with their starter. You begin to feel like it’s a child that needs tending to each day. It really doesn’t have to be that way. Here are a couple of different ways to keep your starter alive without feeling burdened by it.
Keep it on the Counter and Feed Daily
If you keep your starter on the counter, then you need to feed it regularly to keep it alive and healthy. Feeding it once a day should work fine, however, if the starter is large, like more than a couple of cups worth, you may need to feed it twice a day. The rule of thumb is you need to feed it the same amount as is in the jar. So if you have 1 cup of starter in your jar then you need to feed it at least a cup that day. If you don’t use it, then the next day you will need to feed it more, and it will just continue to grow if you are not using it.
This is the most common way to keep a starter here in America. However, this is also what makes people want to quit. Seeing that starter sitting there and knowing you need to feed it and then bake something so that it doesn’t get large and out of hand is kind of annoying. Or knowing that you need to either make a discard recipe or throw out some of the starter feels wasteful. It’s like putting pressure on yourself for no good reason. The starter should be a blessing to you, not a burden.
If you do bake a lot of bread or if you are regularly making items with sourdough, then this method will work just fine for you.
Keeping Your Starter in the Refrigerator
This is a great method for the weekly or bi-weekly baker. You simply feed the starter after you bake and then store it in your refrigerator for a week or more. Some people say you should still tend to it every week and feed it, however, you really don’t have to. I have left mine in there for up to six weeks.
Keeping Your Starter in the Refrigerator Method 2
I just recently learned about this method from my friend Anja at Our Gabled Home. She is from Germany, and this is the way they keep their starter. She simply bakes with her starter and then she adds some flour to whatever is left, she doesn’t add any water. Then she puts a lid on it and puts it in the fridge. When she knows she is going to bake, she takes the starter out, feeds it some water stirs it up, and lets it get active. Then she uses the starter.
What Do I Do With My Starter? Try These Recipes!
- Simple Artisan Sourdough Loaf – Step by Step Recipe
- sourdough french bread
- Sourdough Blueberry Scones With Lemon Glaze | Discard Recipe
- Sourdough Discard Blueberry Muffins
- Homemade Einkorn Sourdough Bread Recipe (Easy + Nourishing)
- Whole Wheat Sourdough Sandwich Bread Recipe
- Whole Wheat Artisan Sourdough Bread Recipe
- Sourdough Apple Crisp Recipe
Printable Instructions
Sourdough Starter From Scratch
Equipment
- Quart Glass Jar
Ingredients
- 4-5 Cups Flour Divided over 7 days
- 4-5 Cups Water Filtered is best, divided over 7 days
Instructions
- DAY 1
- Stir Together 1/2 Cup Flour and 1/2 Cup Water. Cover with a breathable covering, something like a coffee filter, tea towel, or beeswax wrap
DAY 2
- Feed your starter another 1/2 Cup Flour and 1/2 Cup Water, Stir. Cover again, set aside until tomorrow.
Day 3
- Today you may see bubbles! Very exciting! There may be a layer of liquid on the top as well, this is normal, it means the starter is hungry. Stir it all together. Remove 1/2-3/4 cup of the starter and place it in a new quart jar. Now, feed that with another 1/2 cup flour and 1/2 cup water. You can save the remaining starter or toss it. You can add that starter to "discard" recipes.
Day 4
- Feed your starter 1/2 Cup flour and 1/2 cup water, stir, cover, and set aside.
Days-5-7
- Feed the starter 1-2 times a day removing 1/2 cup to 3/4 cup of the starter before feeding each time. If you only feed once a day, you may need to feed closer to a cup of flour and a cup of water. Keep the size of your starter manageable by removing some of it before each feeding.By day 7 the starter should be doubling in size 4-8 hours after it is fed. If it does, that means it is ready to bake with!
That’s It!
It may seem like a lot of steps, but really there isn’t much hands-on time. If you can be patient, you can have a healthy active sourdough starter in about a week!
Pin to Your Sourdough Board!


Thanks for sharing this recipe! I’m on day 4, so I just add flour and water to my starter or do I need to discard some? I discarded some when I fed it this morning, but now I’m questions if I just needed to add flour and water and not remove anything. Thanks!
I happened upon your blog in search of sourdough starter instructions. Found what I needed!
Out of curiosity, I went to your ‘About Me’ section, something I rarely ever do. I was surprised to see you are in Central Missouri! we also live in MO. Moved here 3.5 years ago from California. we are in very South East Texas county. How cool that we are probably close. I also homeschool my two kids…well to be honest, they do it themselves now since they are 14 and 17.
I picked up sourdough during Covid but didn’t stick with it. It was a wild time in our lives as I had just lost both my parents in Oct ’19 (car accident.) Trying to find things to keep me busy. Dealing with covid, in CA, in the midst of deep grief from tramatic loss was debilitating at times. Baking can be my happy place sometimes so it was a good distraction.
Anyway, didn’t mean to over share my life story. Just thought it was fun to see that we might be in close proximity.
Thanks for the instructions!
So neat to hear from you! Yes, it’s nice as the children get older and need less help with homeschool! I too love to bake but often neglect my sourdough starter. I can usually salvage it but have had to start over before! I’m not familiar with that part of Missouri, but I bet it is really different from California! Thanks for following along! Please keep in touch!
how do you bake with it once it’s ready on day 7? do you use the whole thing?
After day 7, what are the instructions to bake it??
That’s MY question, too!
Do you just take a portion and mix in more flour and water and let it raise just like you would normal bread? I have never done sourdough and I’m contemplating it.
I just started my sourdough starter and I’m on day three today! I am wondering tho, what’s the point in keeping the discard in the separate jar before day 7 if it’s not technically active?
Exactly my question!!! You can’t use discard that isn’t active so that doesn’t make sense
It will be better to use it in discard recipes than to just throw it out in my opinion. It will still be slightly sour and have some healthy bacteria.
I am on day 7. My consistency is right, it’s bubbling, and it smells like sourdough. But it is not growing at all! Do I just keep feeding and discarding until it does?
I am having the same issue. No growth.
Do I not discard on day 4?
You really won’t need to probably. The point of discarding is to keep the amount managable. When you feed everyday, you will need to feed it more and more. The bigger the starter, the more it needs to eat. Once it is established, you will ideally be using it regularly and won’t need to throw any out as you will be using it. I hope that makes sense!
I’m new learning how to make sourdough bread. My friend and myself really like the sourdough flavor ( not a light flavor but really tasty sourdough lol) what is the best way to make it taste better? I’m looking forward to making your recipe. Thank you.
Hi there! Usually the longer you ferment it the more rich sour flavor it will have. I am working on another sourdough bread recipe. But the way I do it is make my dough in the morning, let it sit out on the counter all day, I do some stretch and folds and then before bed, I shape it and put it in the fridge overnight. Then it’s ready to bake any time the next day. Or you can leave it in the fridge for even longer if you need to. This usually gives it a nice pleasant sour flavor.
Hi there, I would like to try this but in the long run I will be keeping it in the refridgerator. Should I start that way? Or should I start it room temp first?
You must start it at room temperature to get it going. It needs heat to get started. Once it is strong and established you can start storing it in the fridge but you usually need to bring a bring it to room temp before using. Hope that helps!
Hi! I’m on day 7, but my starter is pretty runny. I will try to move it to a warmer spot in the kitchen and feed it a little extra flour vs water. Do I just continue to feed it and perform the float tests to see if ready?
If you don’t like the consistency, definitley add a bit more flour. And yes a warmer spot should help it to grow. I would give it another day or so making sure to discard and feed enough in a warm spot. It should turn out!
So after day 7, then what?
I believe this is addressed if you continue to read the article.
What to Do Once Your Sourdough Starter is Established?
You are now ready to bake bread. However, you need a recipe. This starter is essentially your “yeast” or “levain” for the recipe. My favorite recipe right now is this one, it’s not my recipe but I do like it. I have several recipes here on the blog that you can try as well. Including some recipes for discard.
So I’m on day 6 and my started it pretty runny? Is that okay? If not what do I do to fix it?
If you feel like it is too runny, you could change your water to flour ratio. Add either a bit more flour or a bit less water. If it is bubbly and growing, fixing the consistency is easy!
Thank you! Also I started with all purpose flour but I read that it’s good to do it with wheat. Am I able to add wheat flour to the starter I have or would I need to start a new one with 1/2 Ap 1/2 wheat?
Needing advice, please. I think I killed my starter. Did all of the above, looked great until days 5, 6, and 7.
It’s no longer rising. Any suggestions. Was way bubblier and rising on days 2 and 3…
I doubt that it is dead. It could be a few things, my first thought would be temperature. If it got colder perhaps it needs to sit near your stove. The other thing would be that maybe you need to discard more or you aren’t feeding it quite enough. You should be feeding it equal amount to the volume of starter. Discard and feed for another day or two and move it someplace a bit warmer and see if that does the trick.
Hi I’m on Day 3 and it already looks like day 7 doubled in size and bubbly! Should I continue with instructions for 3.? My house here in NJ is fairly cold (70-71 ) so I read if you put starter in open lunch bag with warm water bottle that helps which is what I did for day 1&2..
Thankyou!
Hi there! Great, I am glad it is going well for you. Yes, you should keep going as this will strenghten your starter. You will have a stronger starter that is ready to bake with at the end. Great tip with the water bottle, warmer temps certainly help!
I’m on day 3, but I accidentally kept only 1/4 of a cup of discard and not 1/2 a cup. Is that bad?
Two weeks later, I thank you for the answer (NOT).
Sorry, I thought I emailed you. You can just feed it extra and make sure to discard enough tomorrow.
I’m on day ten of doing this, but I’m worried. I’ve seen lots of bubbles, but little-to-no rise. I was under the impression that this yielded a sourdough starter but, so far, it’s only yielded disappointment. Should I be worried?
Have you tried any of the tips? Usually temperature is the issue if it isn’t growing. Try moving it close to a heat source.
All of the tips. None have helped.
It is really hard for me to know what is going on with your starter without being there and being able to see the process. This post is wildly popular and I have had loads of people tell me it has turned out. What you see in the post is my exact process and mine turned out as well, I am still using it. You could start over and try again or keep going with this one.
I’ll ask again: should I be worried? I’ve reduced the amount of water lately and have felt like it’s getting closer. Maybe it’s taking longer because I live in chilly Wisconsin lol.
I am sorry you are not finding success with it.
It has been quite bubbly, though, so I’m going to assume that that is a good sign.
I must have missed the tips. I have not seen any growth and I am on day 8
Have you tried moving it closer to a heat source?
Heidi- you are being kind of mean to poor Jennifer. She has posted a great resource for us. We all get busy. Maybe you could look for other resources and do some digging instead of trolling.
Thank you Ella! Turns out I think Heidi actually is a troll. I was getting an influx of messages each one growing more and more rude. I began to notice that the messages, while having different names were coming from the same email address. I really don’t understand the point of that type of scam but after answering several of them I became suspicious and now that email address is blocked. Thanks again, kindness goes a long way!
Hello Jennifer, thank you so much for this recipe. It is very easy to follow and add into the homeschool morning routine 😉
I’m on day 8. I have noticed that the starter bubbles and seems to have a bit of growth but isn’t doubling or passing the line of day 7. I have moved it closer to the stove and have fed it mostly flour instead of water since I found it was getting more runny than the thickness you had recommended. Is there anything else I should try or start over? It seemed to grow between day 1 and 3 but stopped and just bubbles now. Thank you in advance for your reply!
Hey there! Don’t start over, keep at it! Be sure to make something with your discard so that you have some reward along the way and so that you aren’t wasting anything! It will mature and be a great starter for you!
I’m on day seven and it isn’t mature, but it is pretty bubbly. Is that a good sign? Maybe it’s just growing more slowly?
Yes, bubbles are a great sign! Keep going, it will mature and grow eventually!
Awesome, thanks. I’ll keep at ‘er! I guess that’s what I get for living in freezing Michigan haha.
I know after it’s established you can use it to make bread, but how do you continue to care for the starter after day 8. Every time you use it do you have to add more water/flour and discard, etc? Do you keep following the same process ? And is it always out of the of the fridge or do you need to refrigerate it at some point ?
You will either use it everyday and feed it the same amount that you use, or you can keep it in the fridge and feed it every week or so.
I’m on day 9 and she’s healthy and slowly maturing!! Definitely bubbling! Thank you so much for this recipe! It was so easy to follow and I’ve loved watching and tending to my very first starter! Hoping she’s ready to bake soon!
Yay! Thank you for sharing that she is doing well!
Hey! On day 3 now, pretty runny but I see your comments in “what to do”. My question is, you mention water/liquid being on top and to just stir to mix but the liquid in mine is on the bottom – does that mean anything?
The location really doesn’t mean anything specific other than your starter is hungry and you should feed it. I hope that helps
Hello there! I’m on day 7 and it looks super runny! I had nice bubbles on day 3 but it’s hasn’t done that since i transferred jars! I’ve added a little more flower to it and it’s still runny, I’ve kept it on my island and I saw you said by the stove is best but my house it at 72 normally. I’ve also been using a cheese cloth to cover, is that too thin? Would a paper towel work better?
I think what you are doing sounds good, I’m not sure changing the cover would make much difference other than fruit flies may get through the cheesecloth as the weather warms up. Add less water at your next feeding until it is the consistency you like.