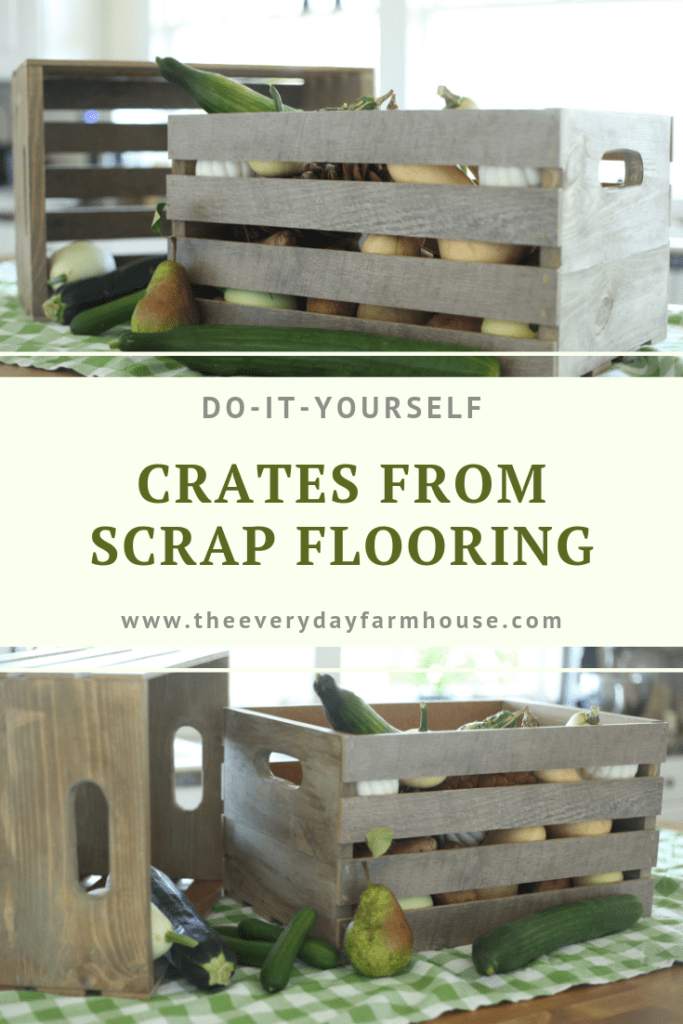
How to Make Crates from Scrap Flooring and Lumber
If you are a do-it-yourself type of person then you know you can wind up with quite an assortment of random materials. In this post I show you how to use pieces of hardwood or laminate flooring and scrap lumber to make your own crates for fall or any time of year really!
Welcome Fall Blog Hop–Scroll all the way to the end of the post for some great links to other fall projects from my blogging friends!
Why make crates?
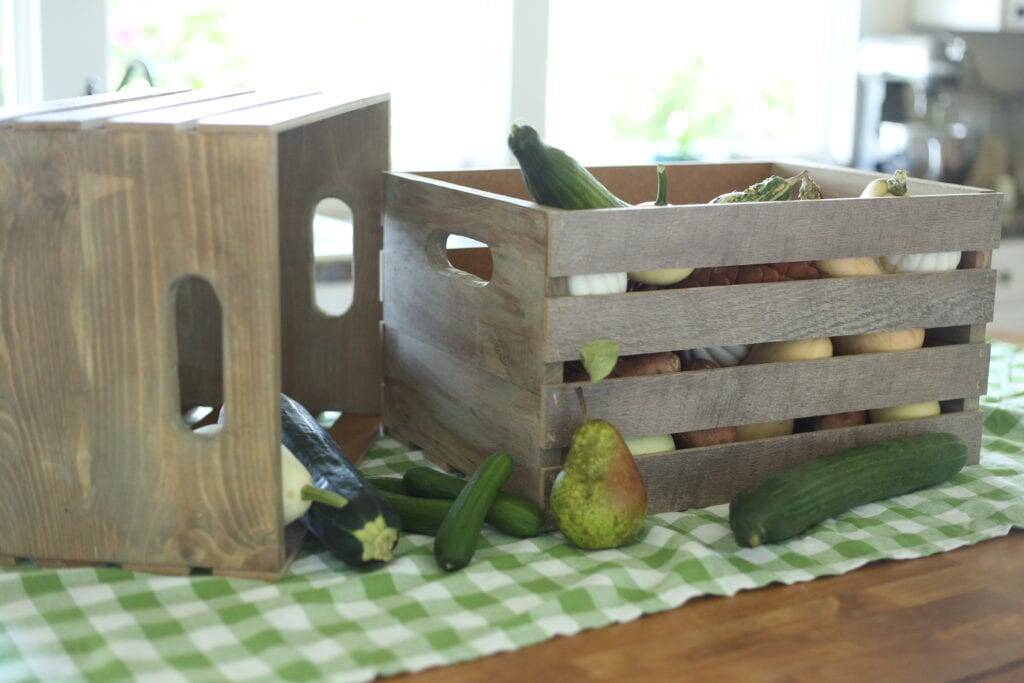
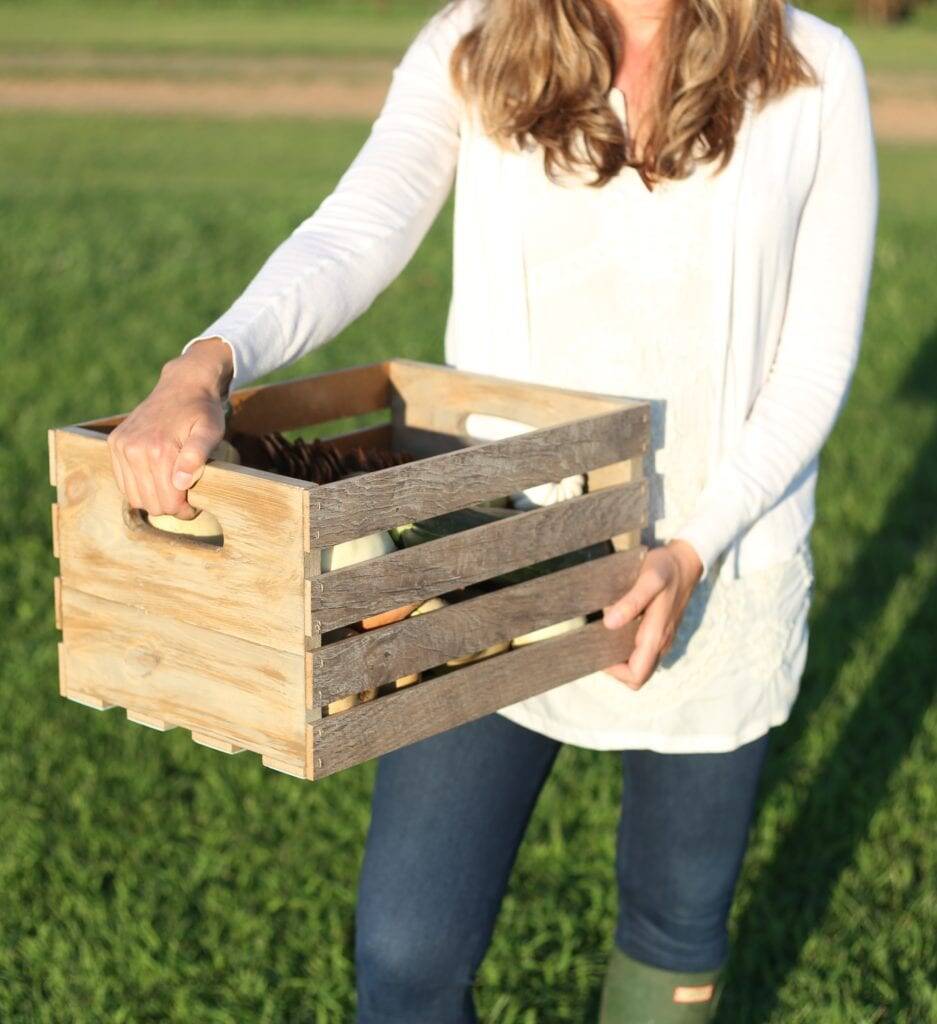
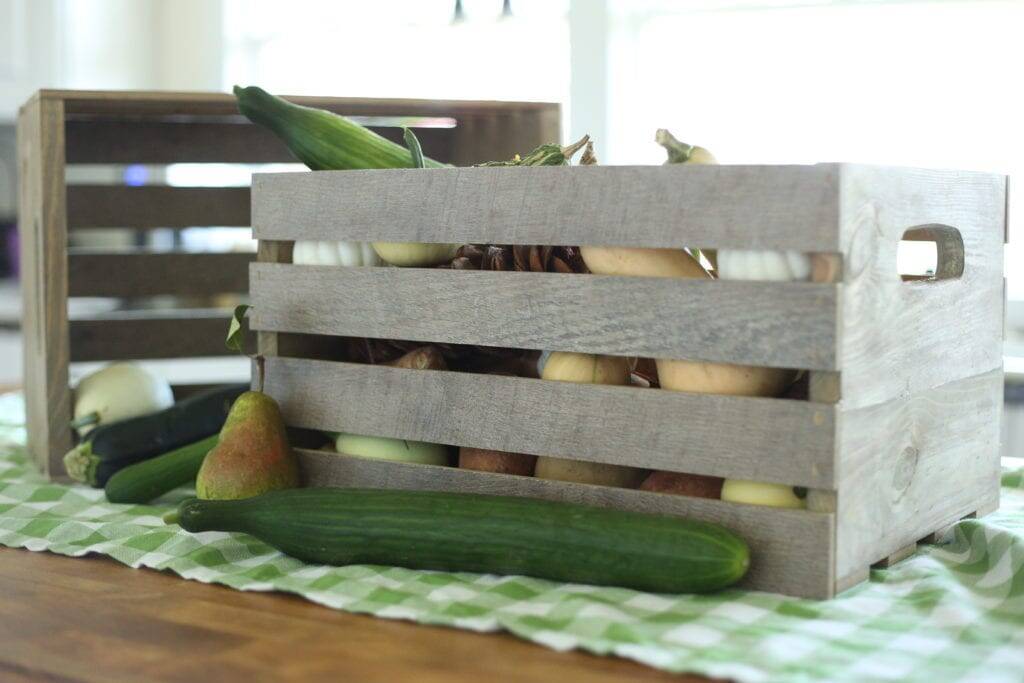
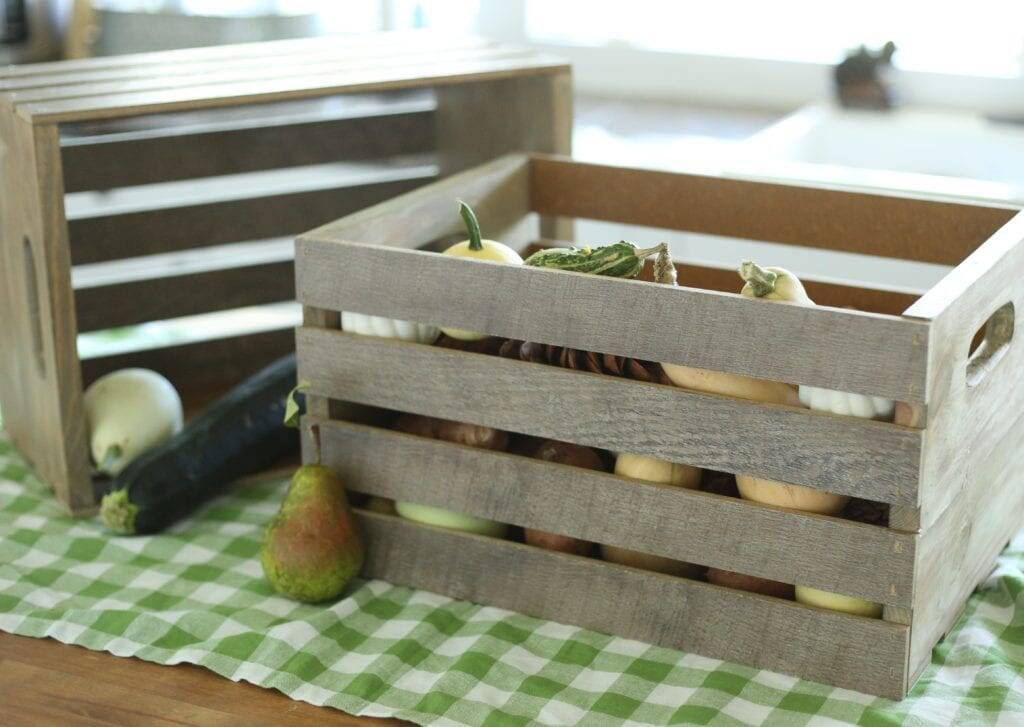
Crates are just so handy. They look perfect for farmhouse decor. You can also use them for carrying in produce from the garden. They are great for storage of fabric and other various items, plus they are cute!
I first had the idea for making crates when I priced out buying them for our upstairs barn room. You can read about that project here. I wanted at least eight crates for the built-in shelves. The best price I found was $6.99 with a rebate. I despise fooling with rebates. Full price they were $9.99. That was way more than I wanted to invest. Plus I wanted them to match the floor which would mean staining all those little slats. No thanks.
After poking around the barn, I noticed the pile of random lengths of left-over flooring from the barn loft room. I also noticed that we had a box left that was nearly full! That got me looking around for what could be used for the sides. We had a pile of pine cuts left from building the bookshelves. Could I make crates for free from what we had on hand? Turns out YES!! So let’s make crates from scrap flooring.
In full disclosure, I did buy one crate and my husband filled out and mailed in the stupid rebate. I wanted to make these exactly like the ones from the store, so I copied it as best I could. My husband also did all of the figuring and board ripping and well…he pretty much did all of the hard stuff. I did cut some slats and I nailed them together and I stained them. Basically I just have the ideas…
Material list
This is what I used. However, I believe that you could make these other ways as well if you don’t happen to have the same materials that I did. You could use real hardwood if you have some pieces of that lying around. You could also make the sides out of slats, so long as you had something solid in the corners to nail it to.
For One Crate–Finished Dimensions 17 3/4 x 9 1/2 x 12 1/2 approximately
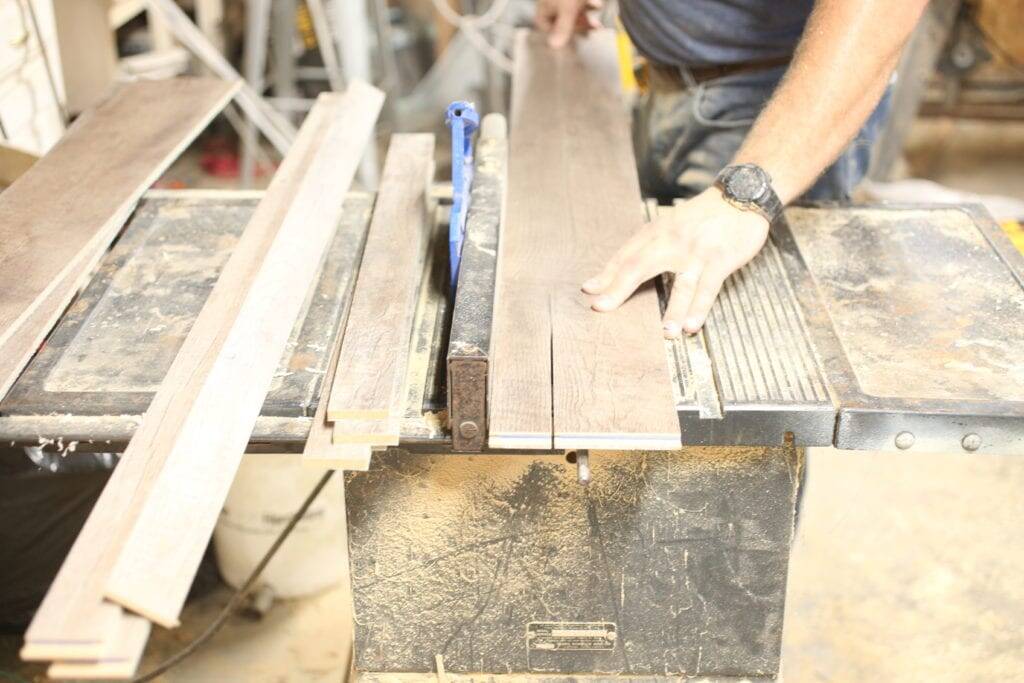
13- 17 1/2 x 2 x 1/4″ thick laminate flooring strips–this is using four slats for each side and five slats for the bottom. Our flooring had foam backer on it. I scraped it off for the side slats, but left it on for the bottom ones so they could slide in and out of the shelves without scratching them.
2-9 1/2 x 1 13/4 x 3/4″ thick pine boards–this will make up your ends with the handles.
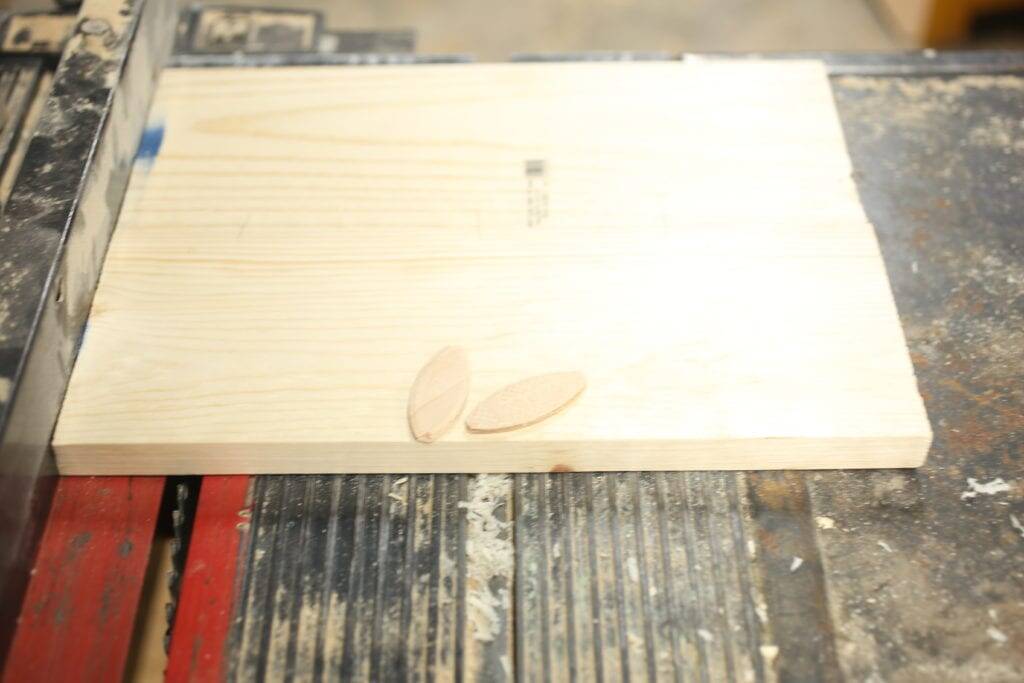
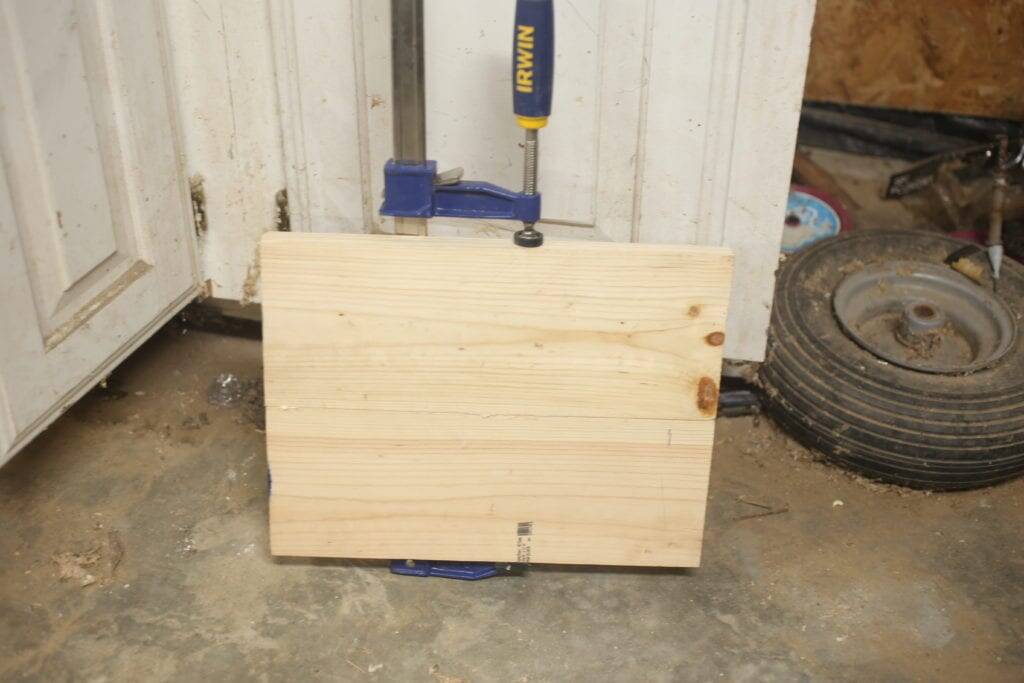
NOTE: We had some smaller cuts of pine, so my husband biscuit joined two pieces together and then cut them even to make the sides. Our pieces were approximately 5″ and 4.5″ joined together to make the 9.5″ tall sides. When you join them, you can barely tell where the seam is, so it doesn’t matter at all if your pieces are equal sizes.
Tools Needed
This project requires some tools. I am assuming that if you have a stash of flooring and scrap lumber then you probably have some tools as well. For this project we had to rip boards and cut them to length. As I told you we also had to join some boards together.
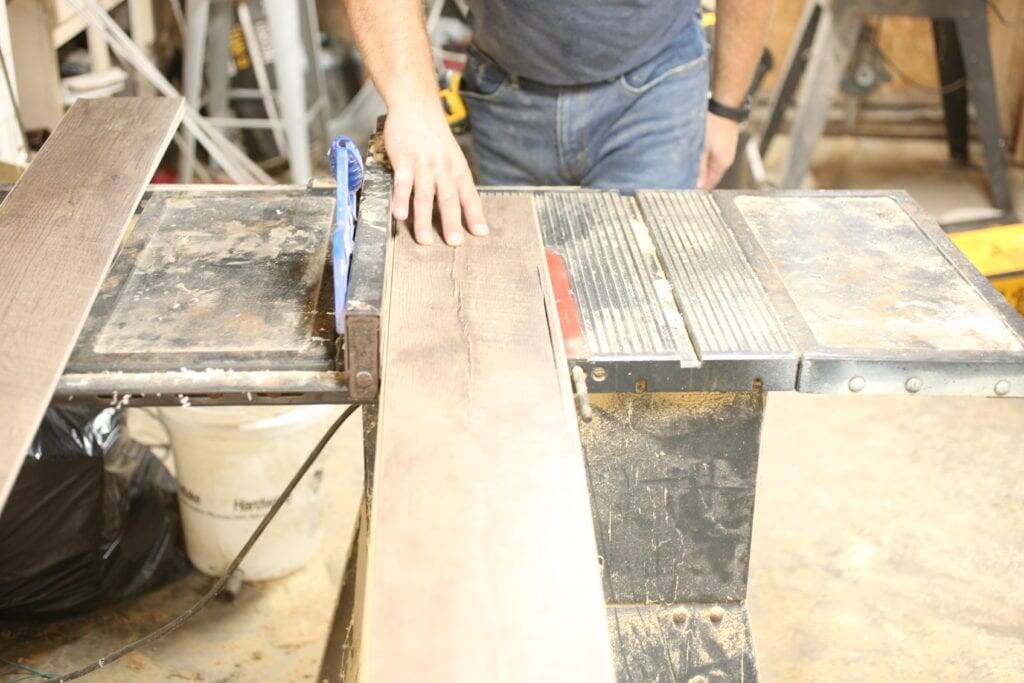
Table Saw–for ripping the tongues and the grooves off of the flooring. Also for ripping the lengths to the proper width
Mitre Saw–for cutting the end pieces to the proper length and also for cutting the slats to the proper lengths.
Biscuit Joiner–only if you don’t have the correct sizes of pine for the sides and need to join two pieces together.
Drill–for starting the handle holes and a 5/8″ bit or larger.
Jigsaw–for cutting out the shape of the handles
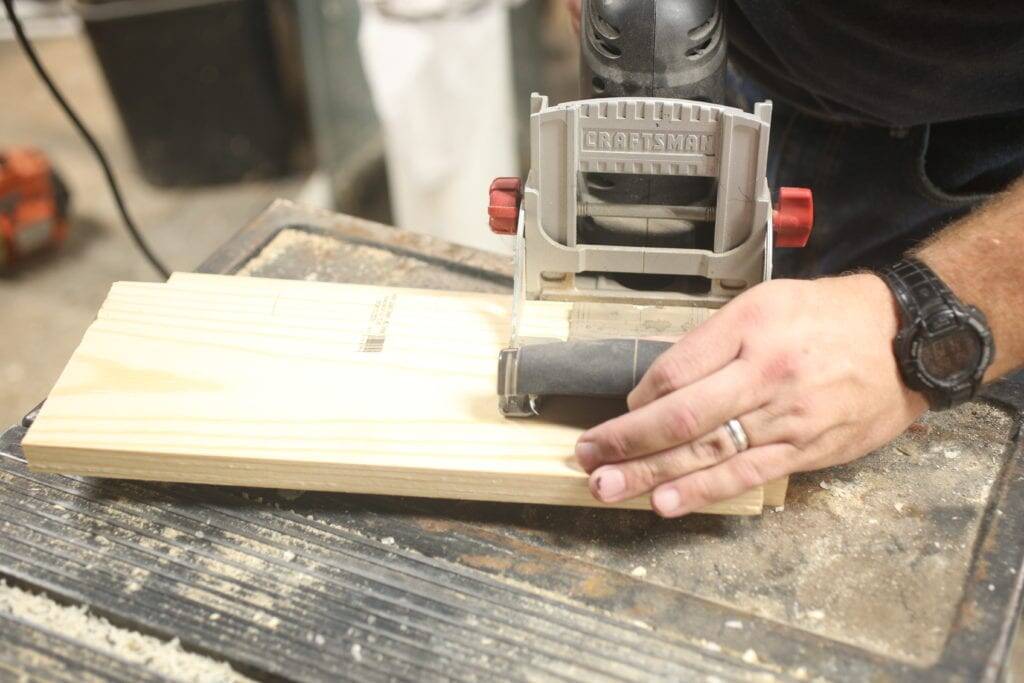
Router–for making the handle holes smooth and nice–plus a rounding bit
Sander–for finishing the handles and the sides for staining
Brad nailer or crown stapler–for assembly
Stain or antiquing wax for matching the color of your sides to the slats. NOTE: This does not need to match perfectly, mine does not, and I can still sleep at night!
Let’s Get Started!–Video included to make it a bit simpler
Once again, the video is put together by my teenage son…who is simply “hilarious” all sound effects and humor are his!
Ok, so this looks like a million steps, and it was a bit labor intensive. However, if you are needing lots of these, it is well worth the effort. Also, the whole point is to use up stuff you have lying around and not spend money on new stuff!
I listed these steps in a particular order. The order does not really matter. You are preparing your materials first then you assemble them, which is the easy part. So let’s make some crates from scrap flooring!
Step One
Rip the tongue and the groove off of your boards. Next rip the boards to the proper width (2″)
Step Two
Cut your sides to the proper size, 9 1/2 x 11 3/4. For ours we had to cut the biscuit slots, and glue the biscuits in. Hold those sides together with a clamp and let them dry overnight. If you have scrap pieces closer to the right dimensions, you could skip this step!
Step Three
Cut your slats to the proper length 17 1/2″.
Step Four
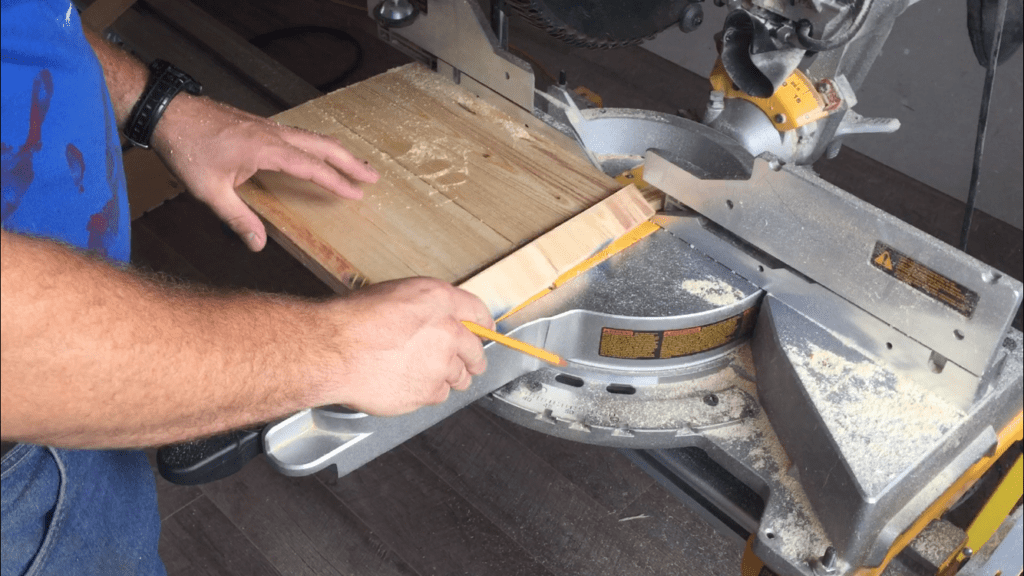
Cut your sides to the proper width 11 3/4″
Step Five
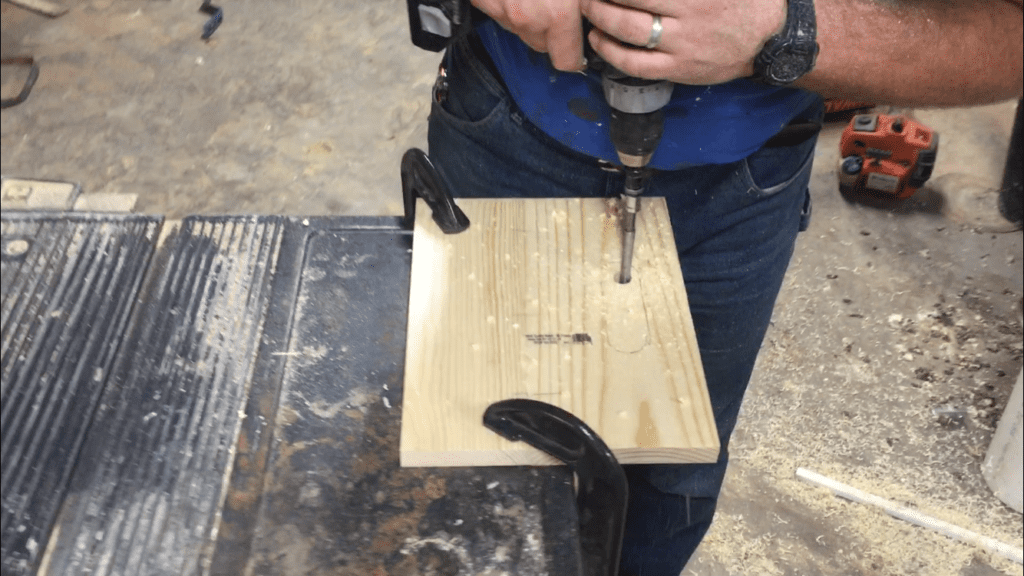
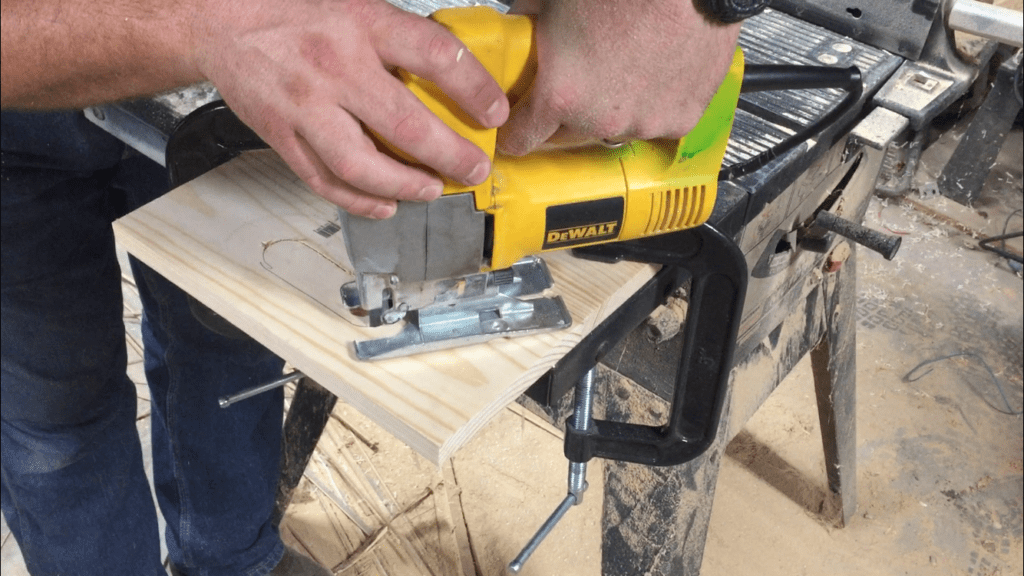
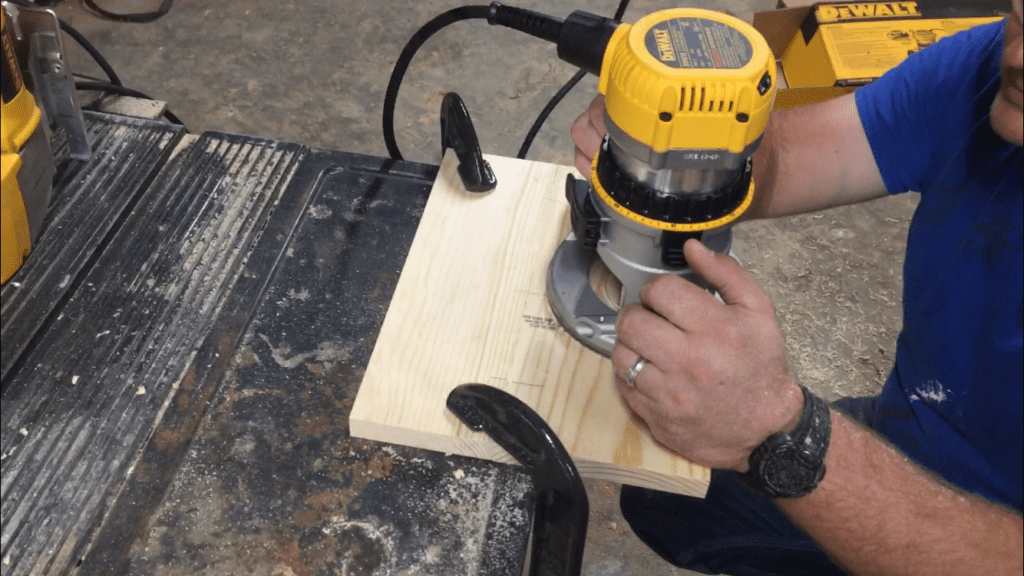
Sketch your handle shape onto the side boards. Using a drill with a 5/8″ bit make a hole so that you can get the jigsaw in there to cut the handle shape. After you have the rough shape, use a router to smooth out the shape and make it look good. We used a round off router bit.
Step Six
Sand your sides and prepare to stain or wax them to match
Step Seven
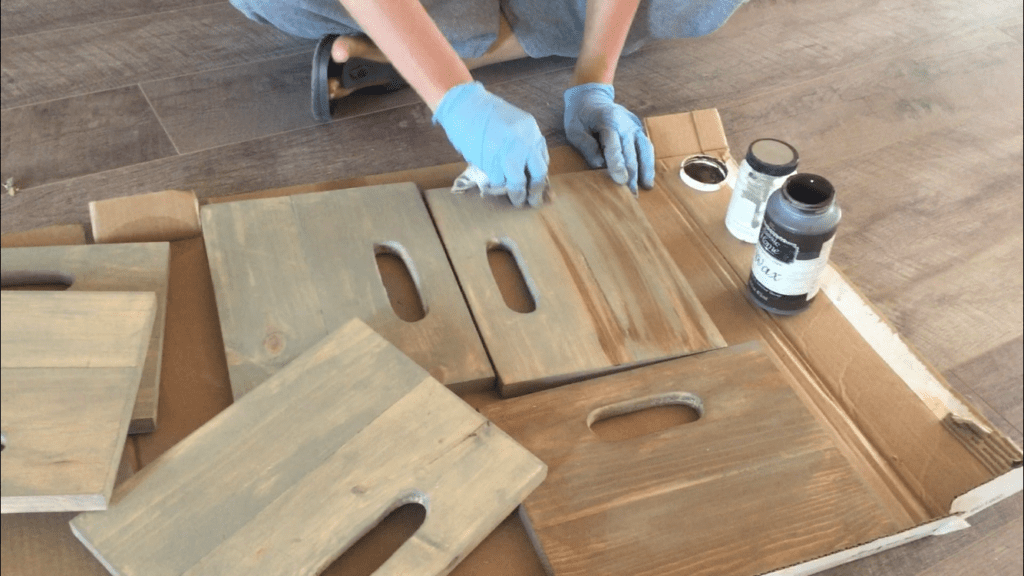
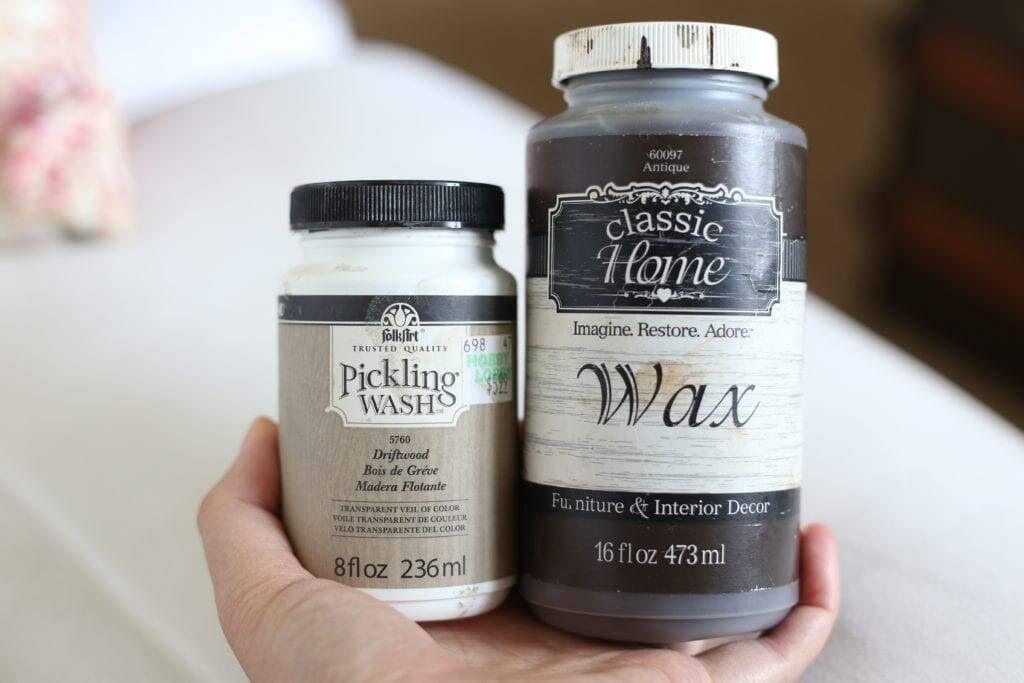
Stain or wax your sides. I just messed around with layering these two products on my end boards. I had these on hand and was trying not to buy anything for this project. It was not a perfect match, but they are “rustic” crates and good enough is perfect for me! Plus you really can’t tell that the match isn’t exact.
Step Eight
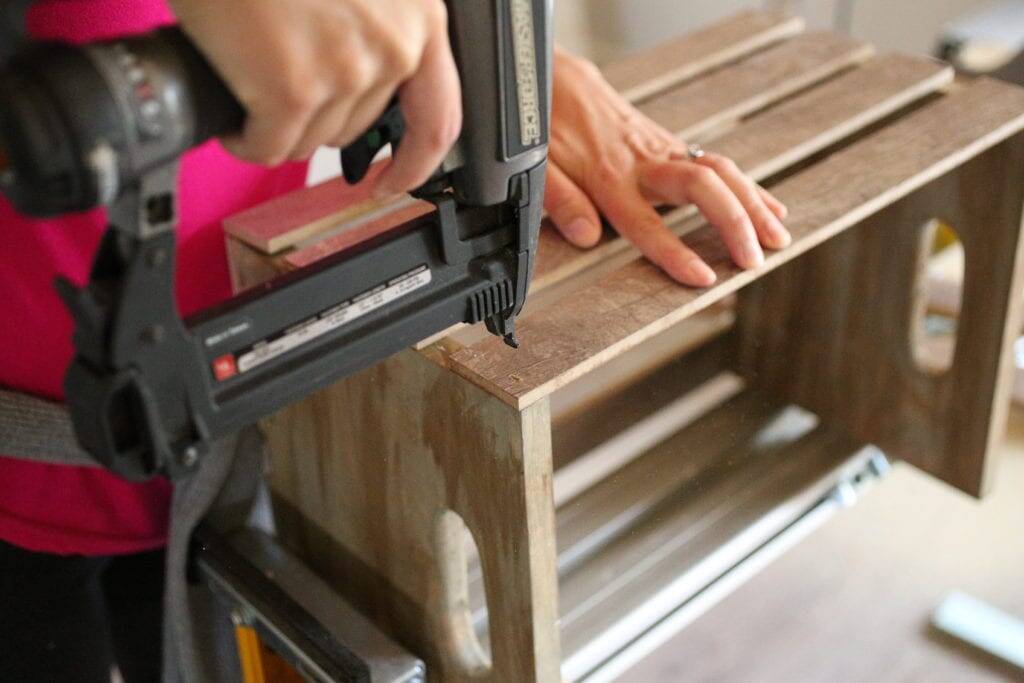
Assemble your crate. Eyeball where you want your slats to go. I started about 1/8″ from the bottom of the crate for the first slat. The top slat I made even with the top. Shoot a couple of staples in for each slat on each side.
Also, the flooring I used had a foam backer on it. I scraped it off for all of the slats except for the bottom ones. I liked the idea of leaving it on there so the crates could be moved around on the shelves without scratching them.

Thank you for stopping by! I hope this encourages you to make crates from scrap flooring!
Next time I have another project to use up scrap flooring!
Pin for Later!
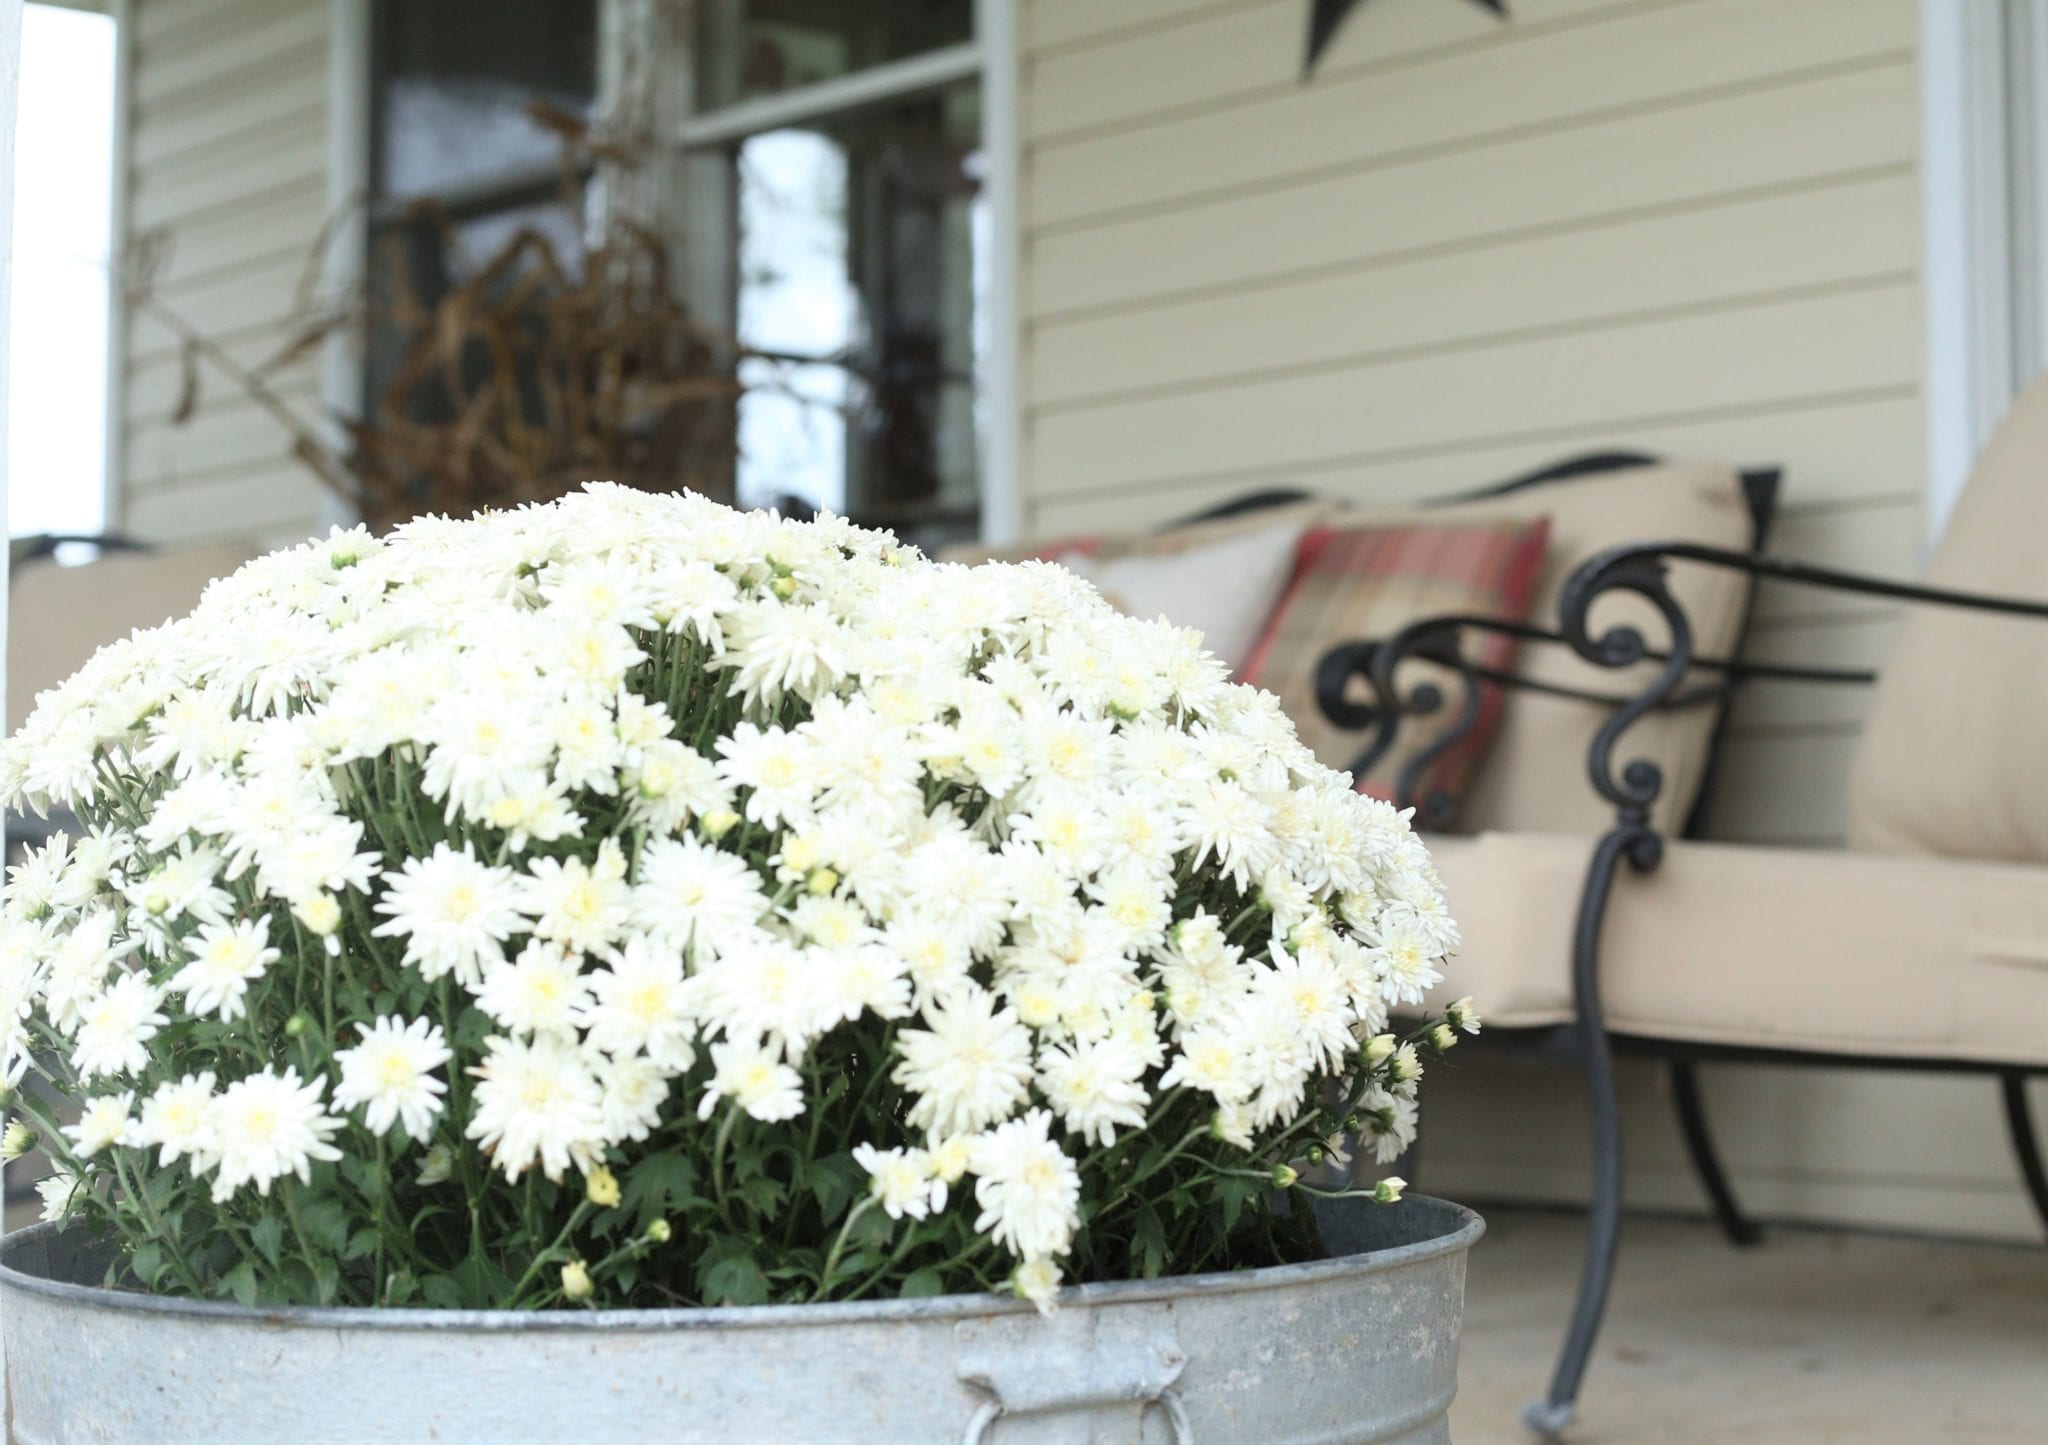
Check Out These Other Blogs for More Fall Inspiration!
Julie at This Beautiful Farm Life shares her inviting fall porch

Elise at Le Petit Saint Crochet shares the cutest crochet pumpkin and other handmade fall inspiration


Oh my goodness! I love these!!! I can imagine using them for soooo many different projects!
Wow, what a detailed awesome post! I know how much work must have went in it. Thank you so much for sharing!! Love them!!
Thanks Jersey! They are really pretty simple, but there are lots of steps. I appreciate your kind words!
Very nice video, you and Ben make it look so easy! I saw these this morning and they are beautiful!
Thanks Mama! I was hoping all the steps didn’t make it look too hard!
Great post! I love repurposed items and the video is so good:)
So cute! I love repurposing material you already have around the home. It’s the best! Great job.
Thank you Emily! I appreciate you taking the time to stop by and comment!
These are so cute! And useful. My favorite combo! I love crates around our house and would love more, but they aren’t cheap to buy – making them would be perfect! Thanks for sharing.
Thanks for stopping by Marisa! I hope you make some!
Your crates turned out so cute!!!
Thank you Angela!
Oh I REALLY love this idea! I think I could talk my hubby into doing some of these for me for kindling and blankets and MANY OTHER THINGS 😉
I know, we made 8 and I could use more!
The crates came out looking amazing!
Thank you Alice!
I love this idea! I will be absolutely doing this. Thank you!
Good! I am so glad it inspired you!
You had me at DIY crates! Visiting from the Handmade & Otherwise party and had to pop over to see how you made them. What’s not to love about making your own from scraps for free! Thank you for the tutorial. Pinned 🙂
Thank you Marie!
Great tutorial! Thanks for sharing at Vintage Charm!
Thank you Cecilia!
Thanks for your valuable resources keep share the information like this…
Thank you! Glad it was helpful!
So refreshing!! Love your site and I really feel inspired. Thank you❤️
Hey there! Thank you for taking the time to comment! I am so glad you visited and were inspired!
Beautiful reuse of leftover flooring—love the step-by-step! We’re an epoxy/finishes team and curious: did you seal the crates (poly/wax/oil) or leave them raw, and how has the finish held up with everyday/garden use?
Thank you! These were prefinished scraps so no need to seal.