How to Make Lard Candles | Crafting Lard and Beeswax Candles
When it comes to creating candles, there’s a world of possibilities beyond traditional wax options. Lard, a versatile and readily available fat, can be combined with beeswax to produce beautiful candles that emit a warm and comforting glow. You’ll enjoy this step-by-step guide for making and pouring lard candles with beeswax, infusing them with your favorite scents for an extra touch of cozy.
This post contains affiliate links.

Why Make Candles with Lard?
We raise pigs and the last two batches were considered lard pigs. This means that when we have them butchered, we get lots of lard. Using this lard for cooking and soapmaking is a no-brainer, but I was looking for more ways to use the lard. I don’t like waste and I certainly don’t want to waste any part of an animal that we have worked so hard to raise!
I had heard of making candles from tallow, but I wasn’t sure how well lard would work. Lard is softer at room temperature than tallow so I knew I would need to add something to the lard to help it firm up when it cooled. I have made beeswax candles so I knew that beeswax would be a perfect addition to the lard.
I am pleased to report that it worked perfectly. These candles have a nice long burn and they are so inexpensive to make! Even if you don’t raise pigs, lard is readily available from a butcher or even at Walmart.
You can also make candles with Soy Wax or just Beeswax.
What You Need:
- 4 cups of lard
- 1 cup of beeswax
- 2 oz Essential oils or fragrance oils (optional). The rule of thumb is about .5 oz of fragrance or essential oils per pound of wax. Since this was 2lbs of lard, I went with 2 oz of oil. The fragrance is nice but not overpowering. I used eucalyptus oil but feel free to use any oil that you love.
- Wicks and wick holders, or a skewer or pencil. This little kit is nice and affordable
Step 1: Prepare Your Workspace
Start by clearing a clean and spacious area to work in. Gather all the necessary materials, including a double boiler or heat-safe container (I use an old olive jar as beeswax is difficult to remove from a container), a thermometer, candle wicks, and suitable containers for pouring the wax. I used an empty piece of pottery and some little half-pint canning jars.
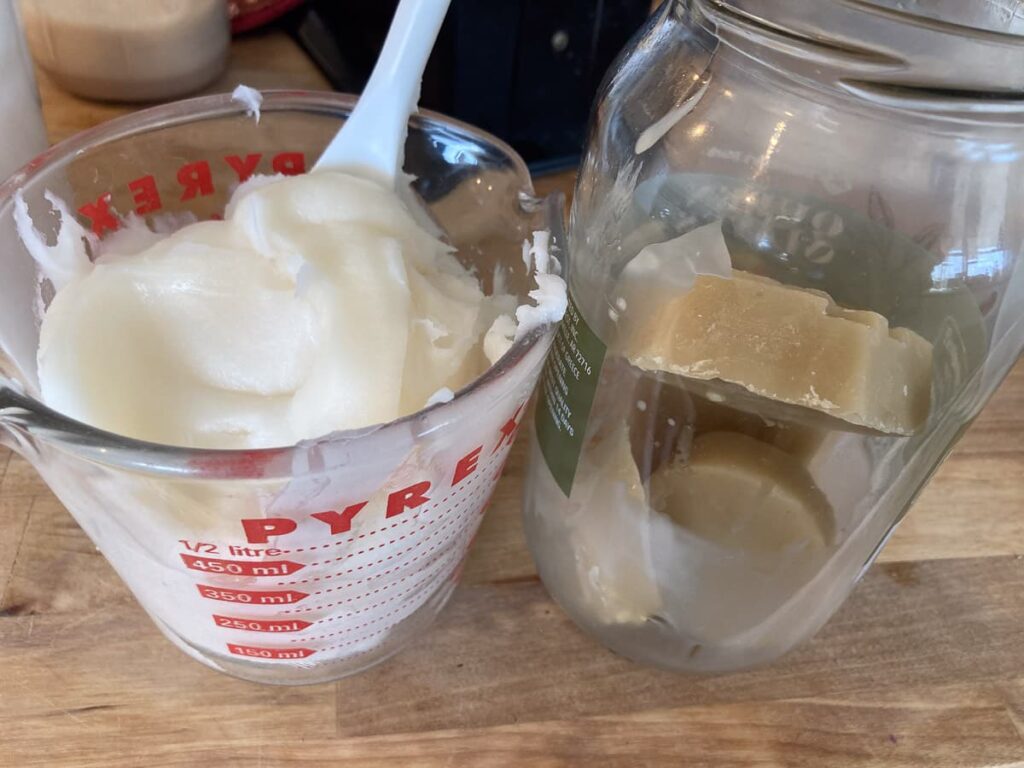
You can lay out some newspaper or parchment paper to protect your counters. My island where I work is butcher block. Any spills were just rubbed into the wood. I will say this cleans up very easily too!
Step 2: Melt the Lard and Beeswax
Combine the lard and beeswax in the double boiler or heat-safe container. I use an old olive jar, but you could use a can or any vessel that can hold up to heat. You would likely want to set this container aside for only candle making. Beeswax is difficult to remove.


Heat the mixture over medium-low heat, stirring occasionally, until both ingredients are completely melted. Beeswax fully melts at 180 degrees Fahrenheit, so monitor the temperature closely with the thermometer to avoid overheating.
Step 3: Add Fragrance (Optional)
If you wish to add fragrance to your candles, wait until the wax reaches a temperature of around 160-165 degrees Fahrenheit before incorporating essential oils or fragrance oils. This ensures that the scent blends evenly with the wax without being exposed to excessive heat.
Do Lard Candles Smell Like Meat?
Please note that properly rendered lard will not have a meaty fragrance. You do not need to worry about that smell with these candles.
Step 4: Prepare the Wick and Containers
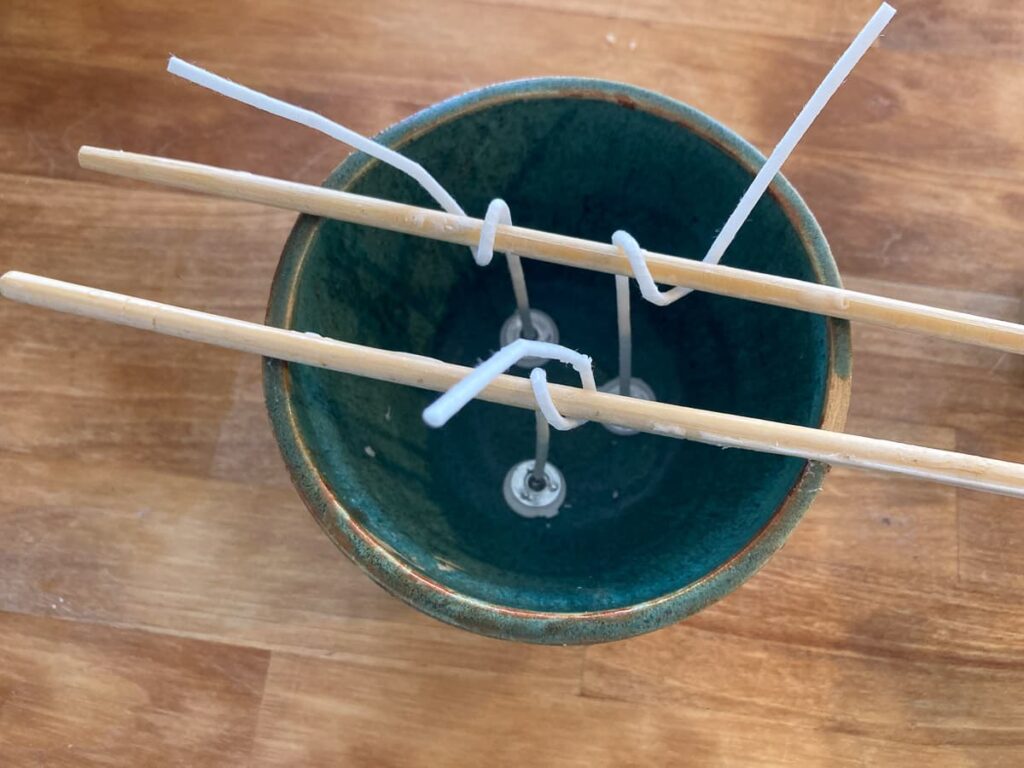
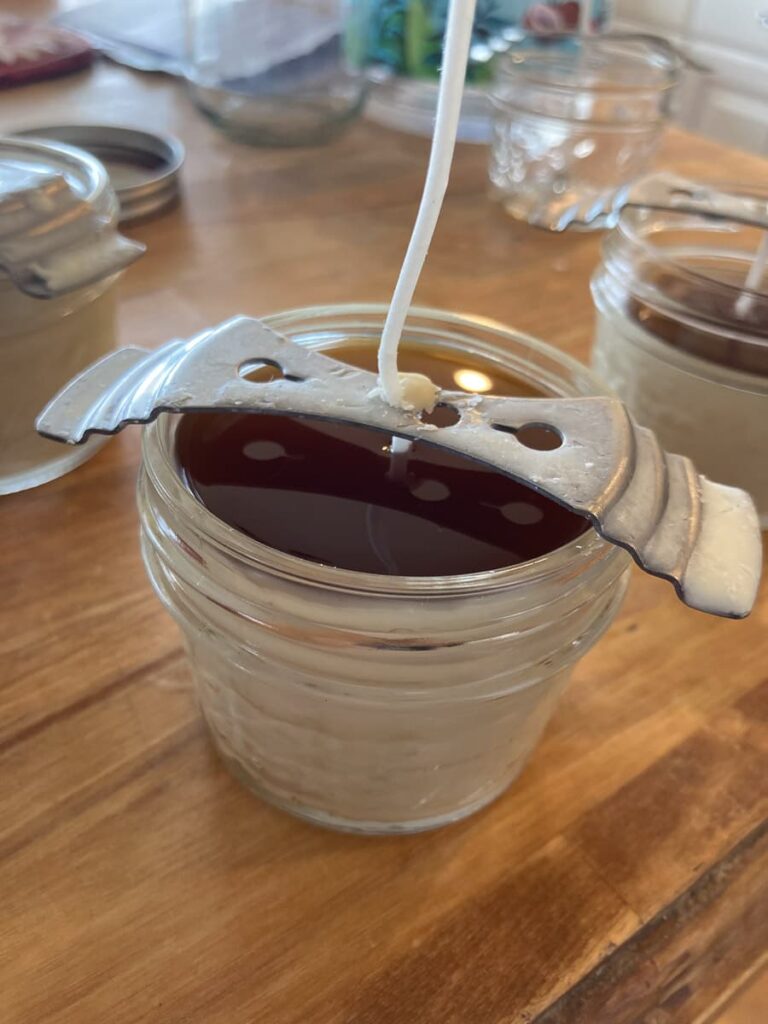
While the wax is melting, prepare your candle wicks and containers. Secure the wicks in the center of each container using wick stickers, a dab of melted wax, or hot glue. Ensure that the wicks are straight and upright to promote an even burn. You can do this by wrapping the wicks around skewers or a pencil or you can use candle wick holders that often come in kits.
Pay attention to the size of your container. Often if you use the thinner cheaper wicks you will need more than one. If the container is larger than 3″ in diameter I always add two wicks. This allows more surface area to melt and then you don’t get the annoying tunneling.
Step 5: Pour the Wax
Once it has reached the optimal pouring temperature (155-160 degrees Fahrenheit), carefully pour it into the prepared containers. Fill each container to the desired level, leaving some space at the top. Work quickly but cautiously to prevent spills and ensure a smooth pour.

Step 6: Let the Candles Cool and Set
Allow the candles to cool and set completely before trimming the wicks. Wicks should be trimmed to 1/4″ every time you burn them. It may take a few hours for the candles to cool completely. Once cooled, your lard candles are ready to use!

Please note that lard candles even when the beeswax is added are not super hard. This is beneficial in some ways. I once had a container that I didn’t add enough wicks to, I was able to stick a skewer down into the wax and add a wick even after the candle had cooled!
Hand-crafting lard candles with beeswax opens up a world of possibilities for creating unique and personalized candles that add warmth and ambiance to any environment. Whether you choose to infuse them with your favorite scents or keep them pure and simple, these homemade candles are sure to delight. Make them for gifts or for use in your own home! Happy crafting!




Lard will go rancid, so how long do they keep? Does the beeswax help preserve the lard? Do you store them in the fridge to preserve them?
Hi there, Lard is actually shelf stable for at least 6 months. We keep ours in our pantry with no issues. Also, yes, beeswax does act as a natural preservative.