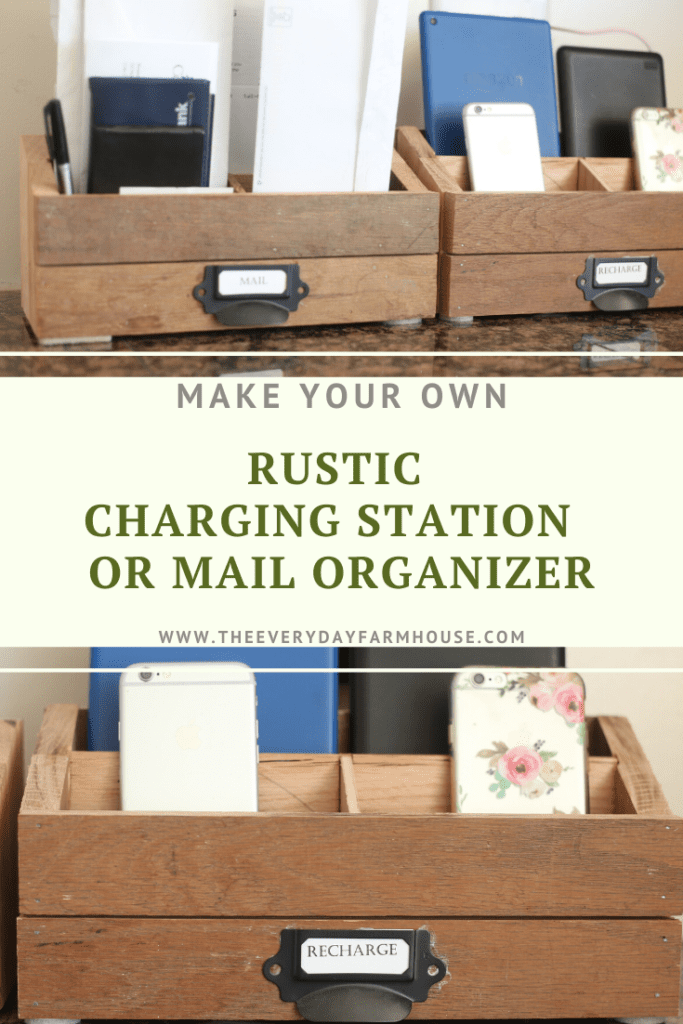
How to Make a Custom Charging Station or Mail Organizer, from Scrap Flooring or Lumber
In this post, I show you another how-to for using up some scrap lumber or hardwood flooring. This can be a charging station, or a little mail organizer. We have one for each. I hope you enjoy this post on how to make a charging station. This post may contain affiliate links.
The Itch to Organize
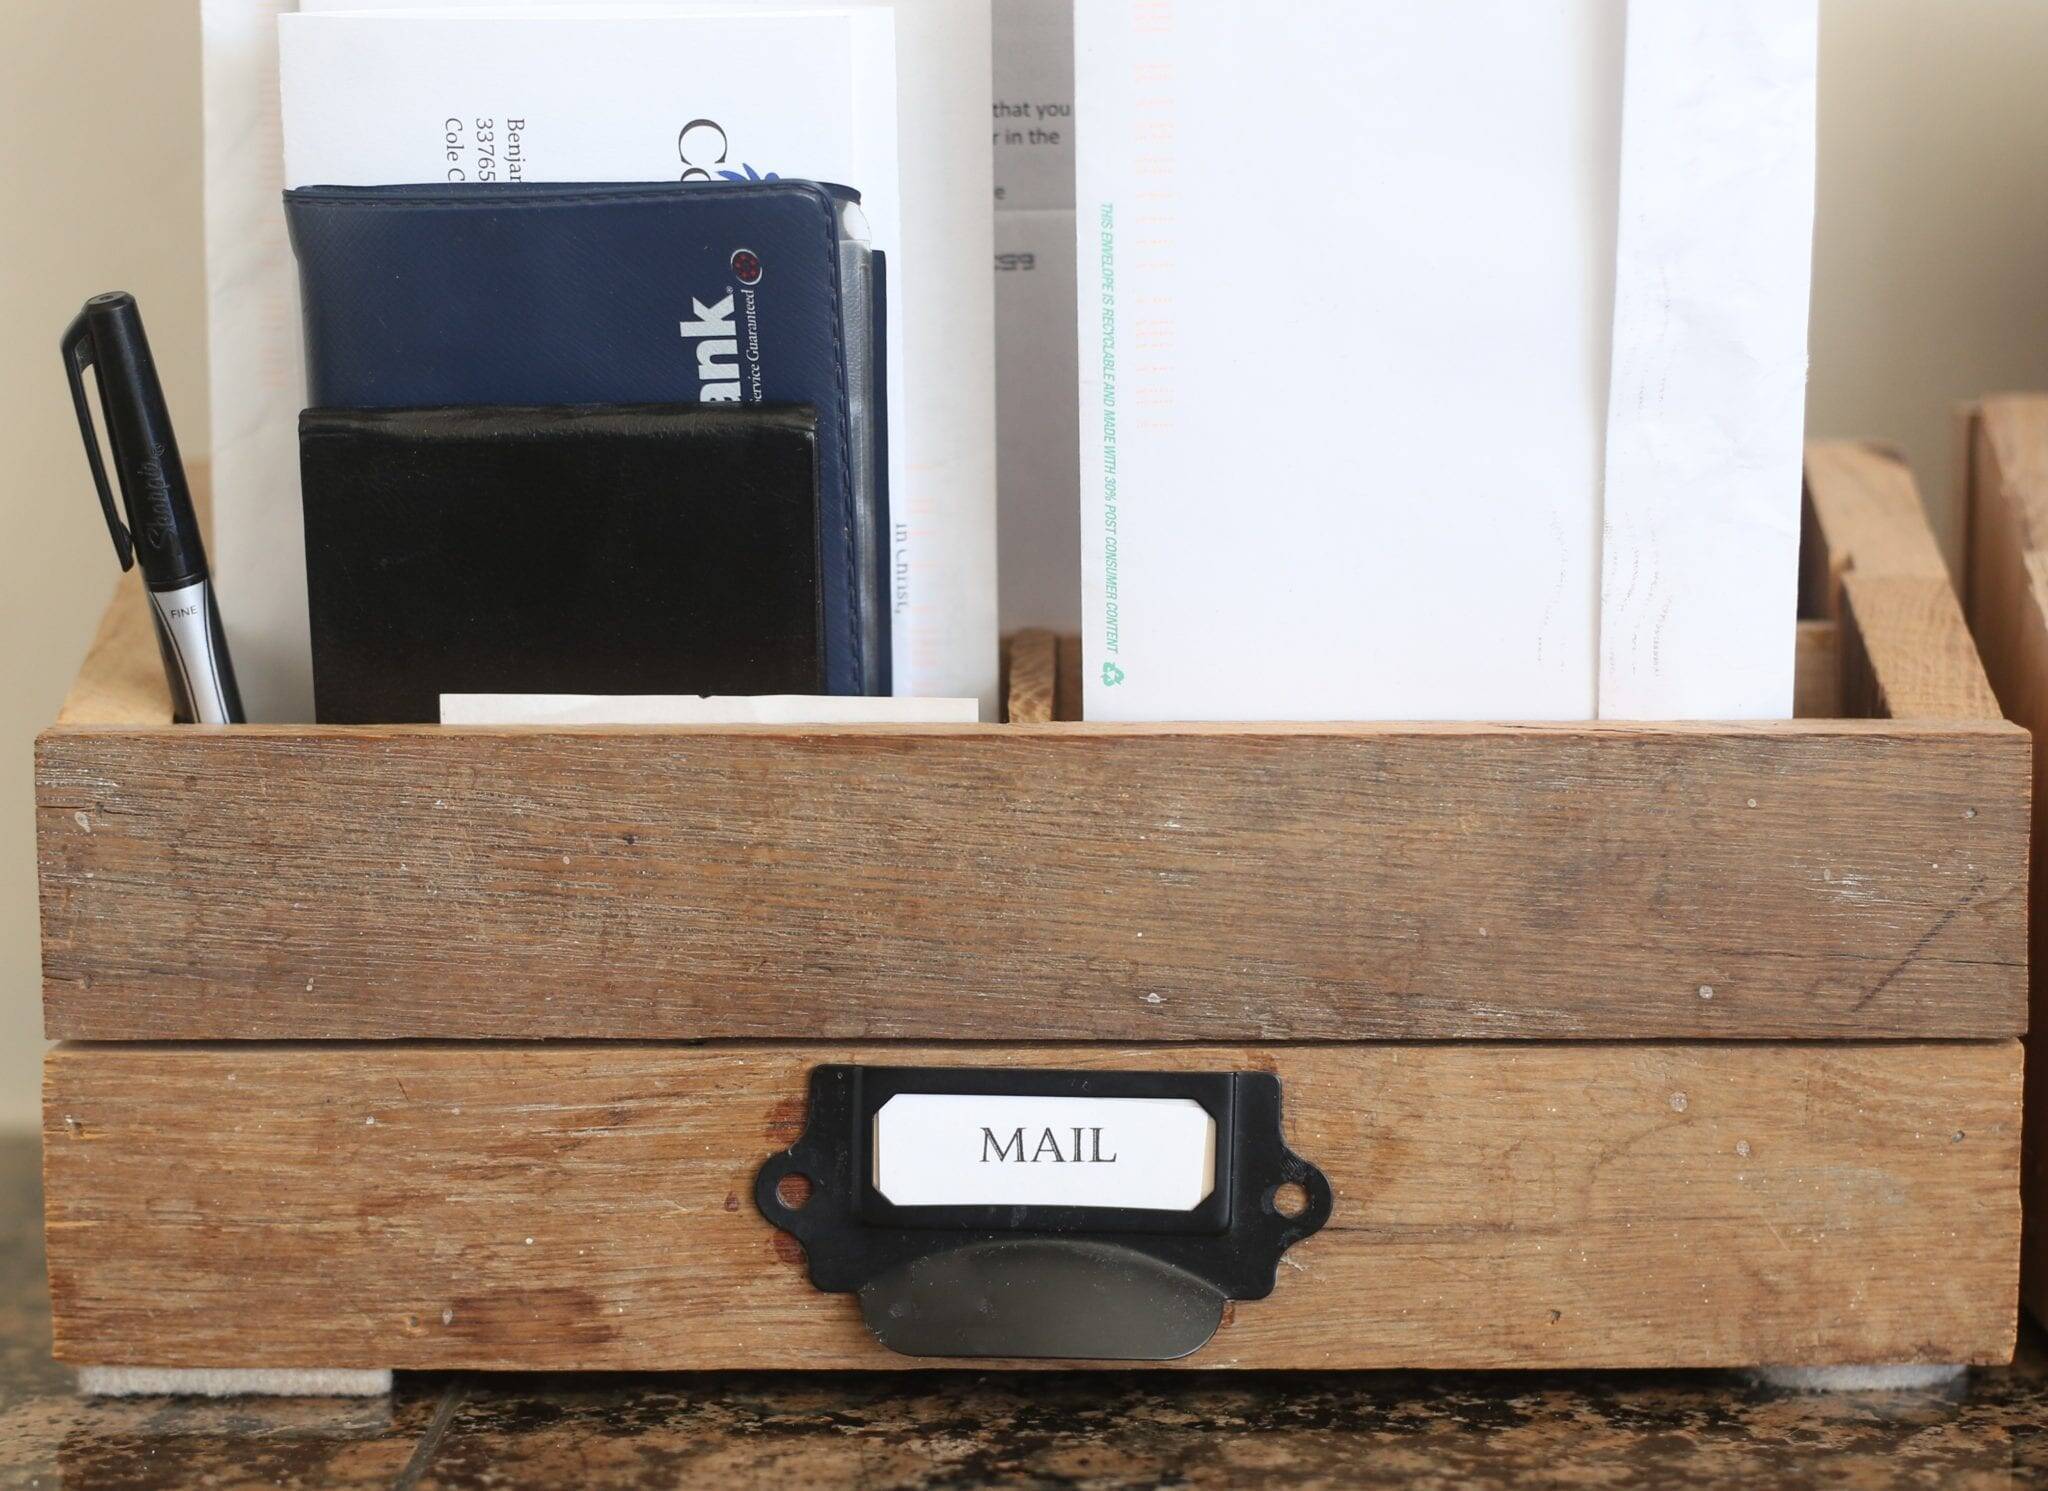
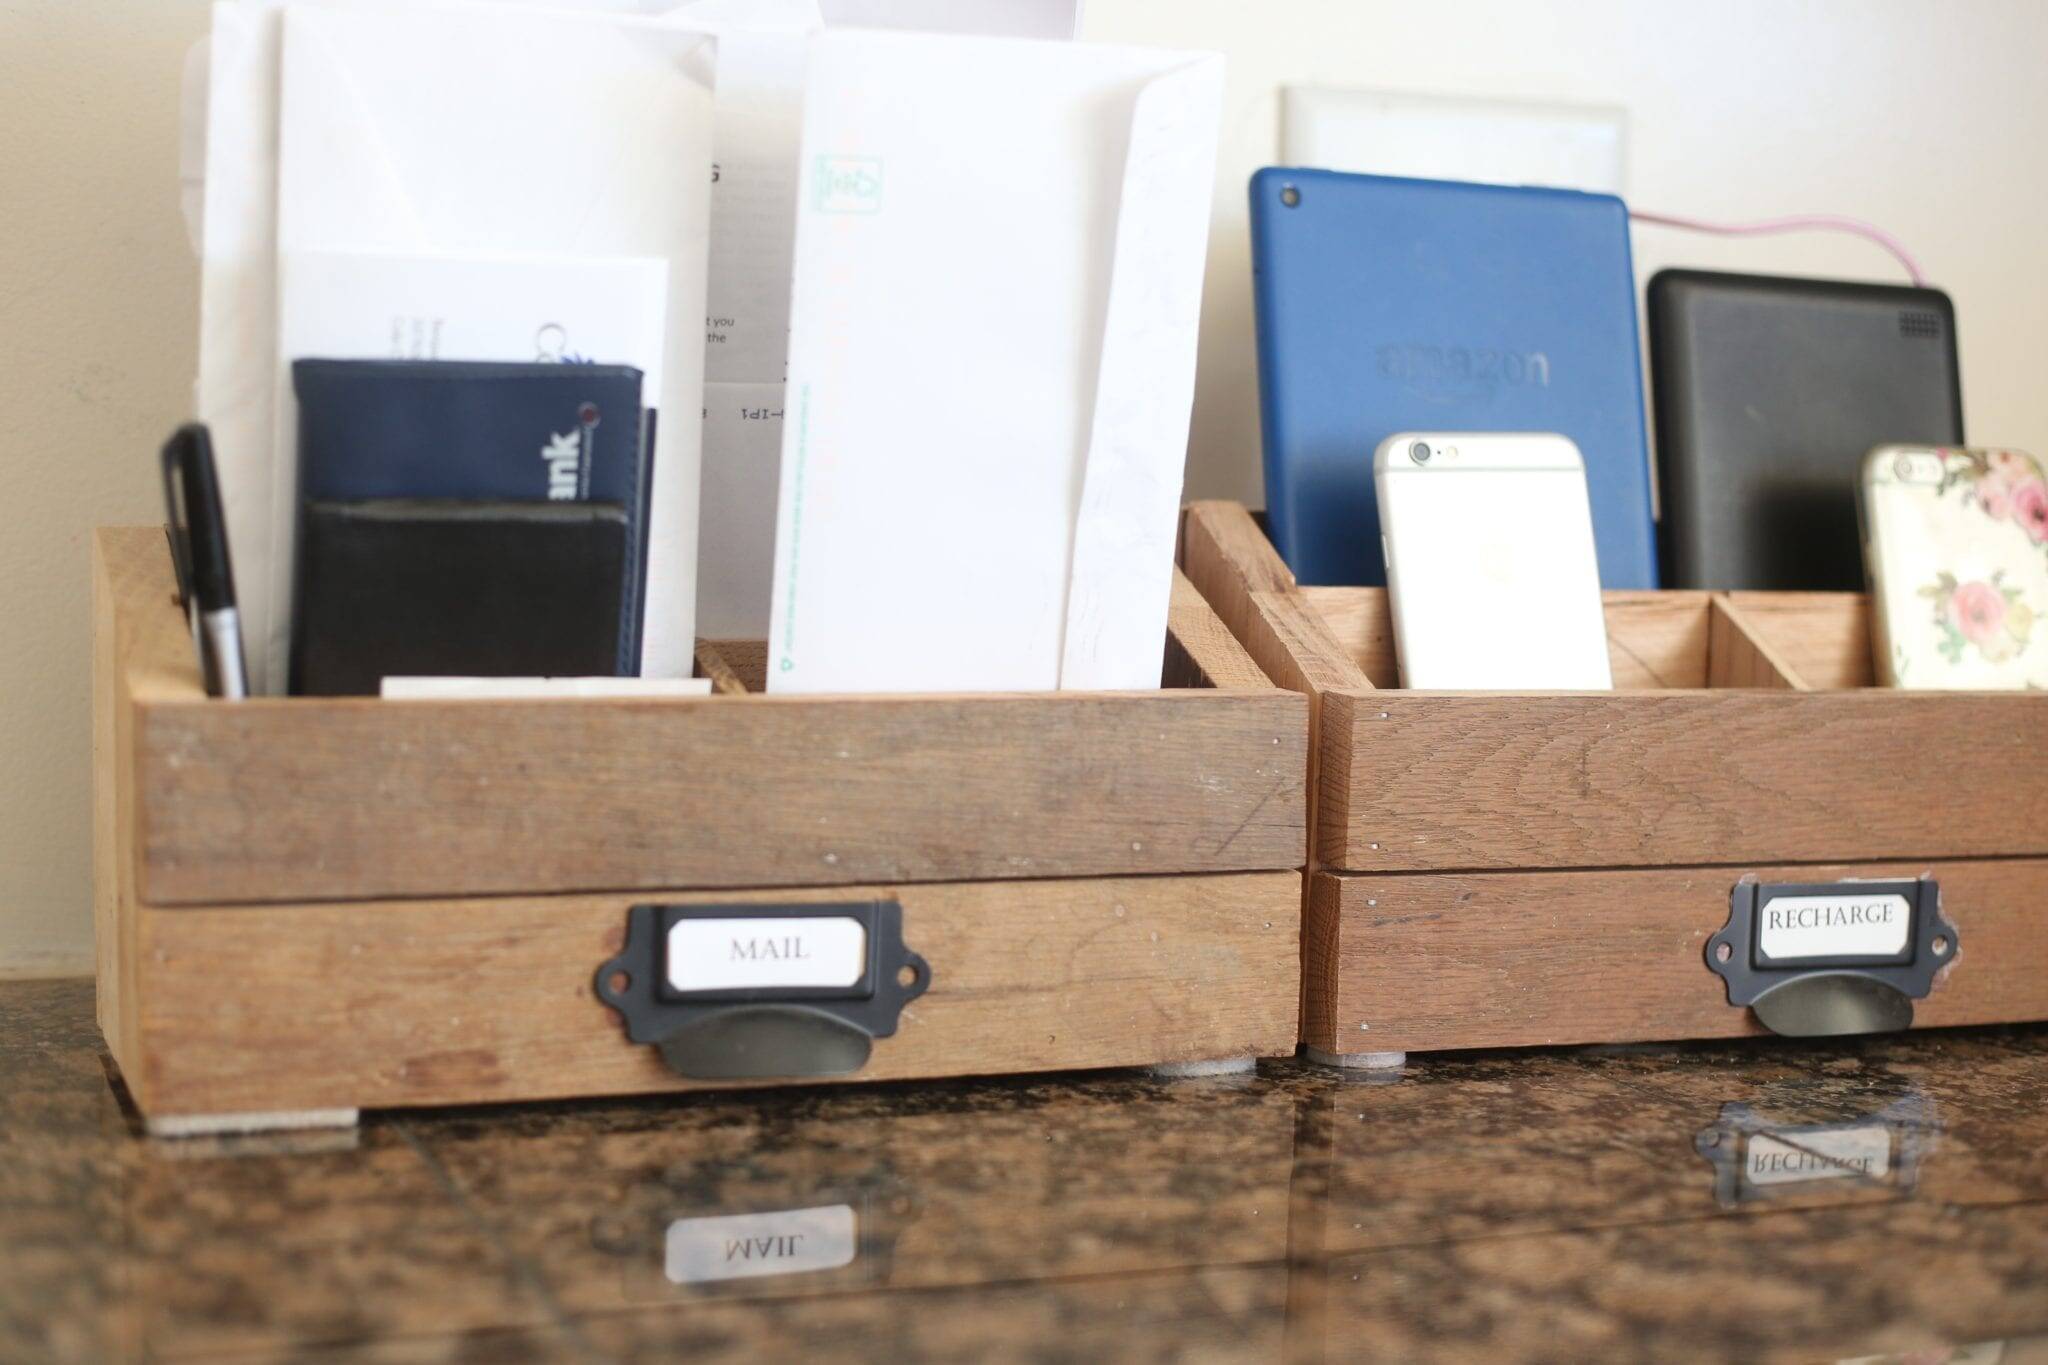
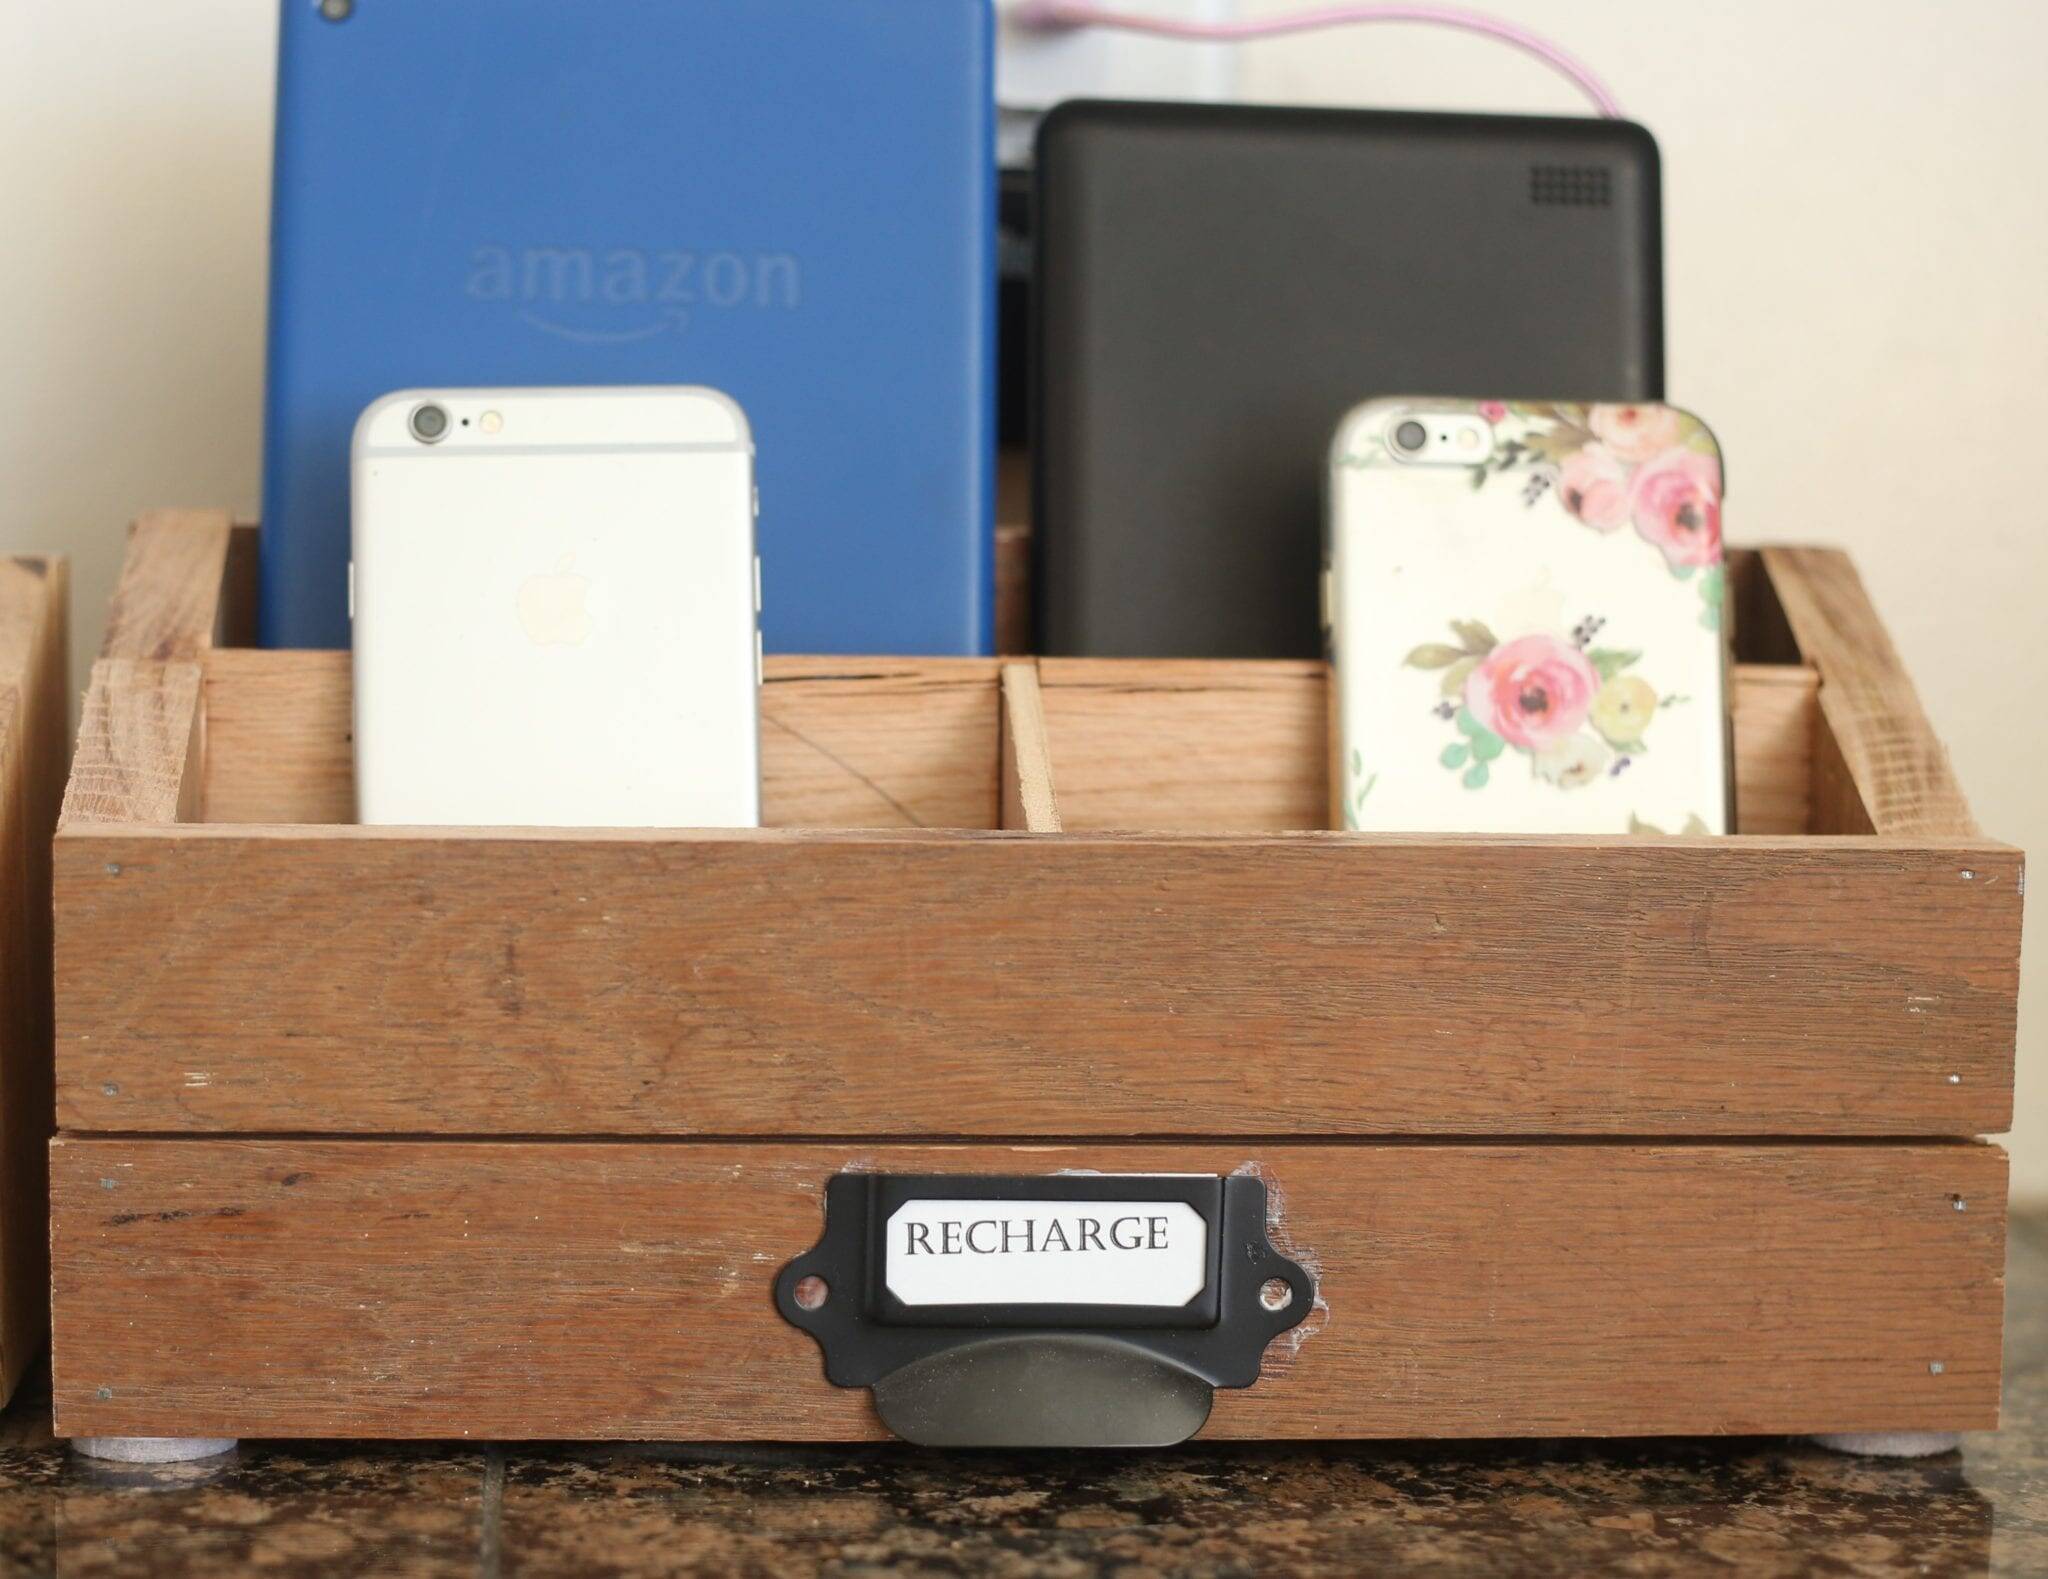
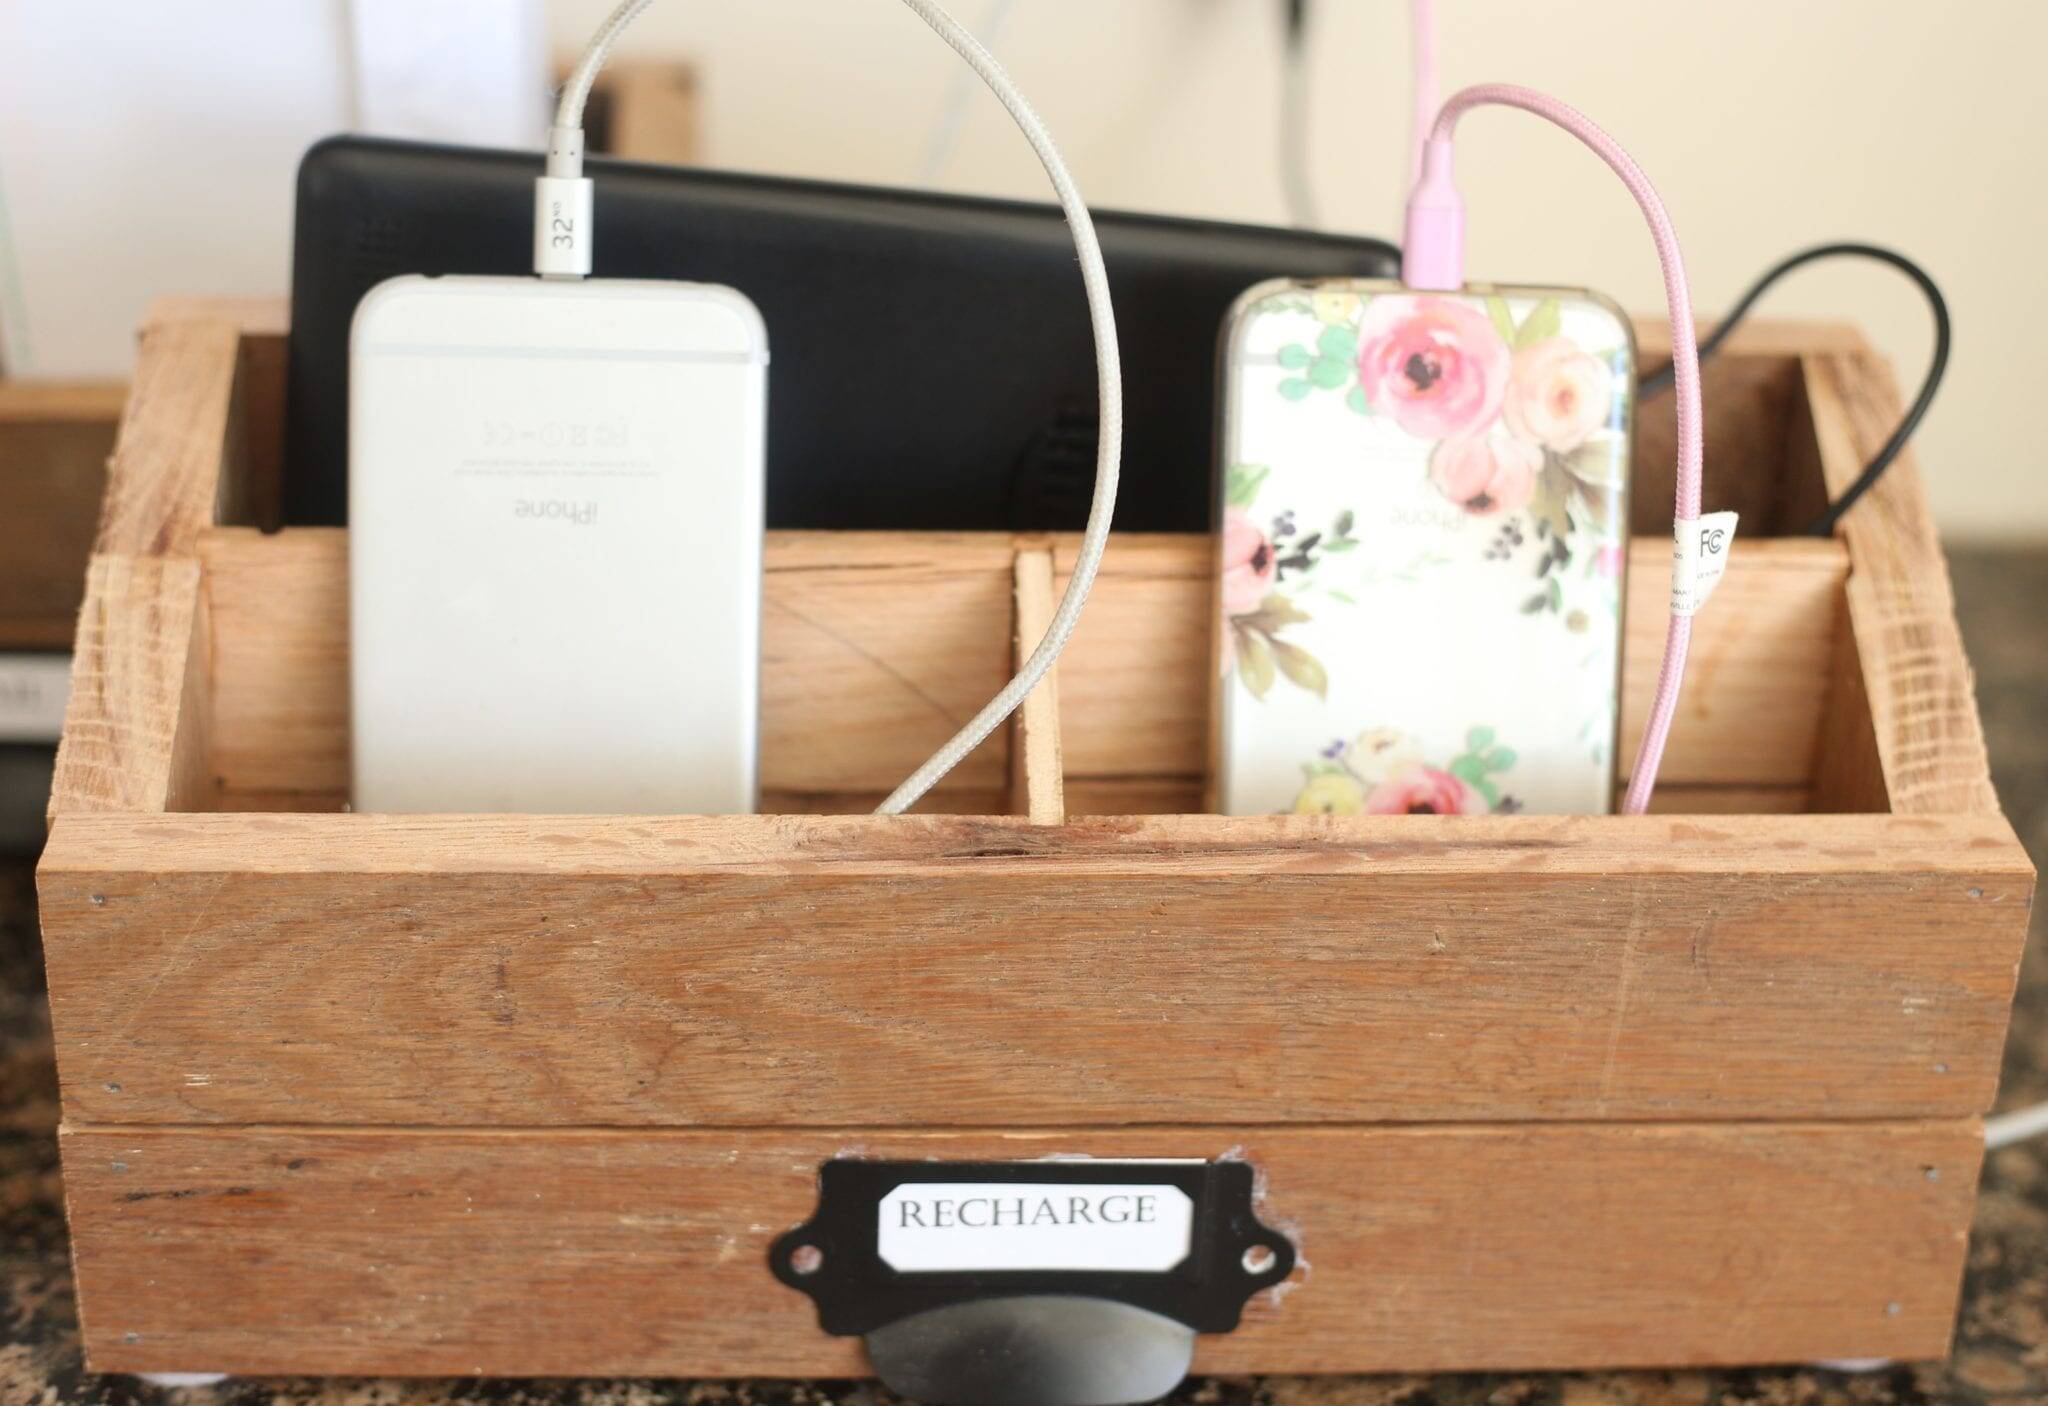
Don’t we all get that itch to get organized in the New Year? We get the Christmas stuff put away, and realize that maybe that wasn’t the MAIN problem. Then we can clearly see the areas that need a little extra love! There is a surface in our kitchen that drives me CRAZY!! It’s the drop zone. Everyone drops their keys, phones, mail, papers….you get the idea. This charging station has helped us with the phones, tablets and the mail!
Select your Materials
For this charging station, we used reclaimed hardwood flooring. I enjoy a rustic look, so we left the boards the way they were. For a more finished look, you can sand and paint, or sand and stain the wood. This project starts much like the other two scrap wood projects I posted. The wood crates and the picture frames. Figure out what material you are going to use. If you are using hardwood flooring, go on to step one. If you are using new lumber, just start with the cut list.
Tools to Make it Easier
We used a Table Saw and a Mitre Saw
A Drill
A Nailer or Brad Nailer
Wood Glue
Clamps
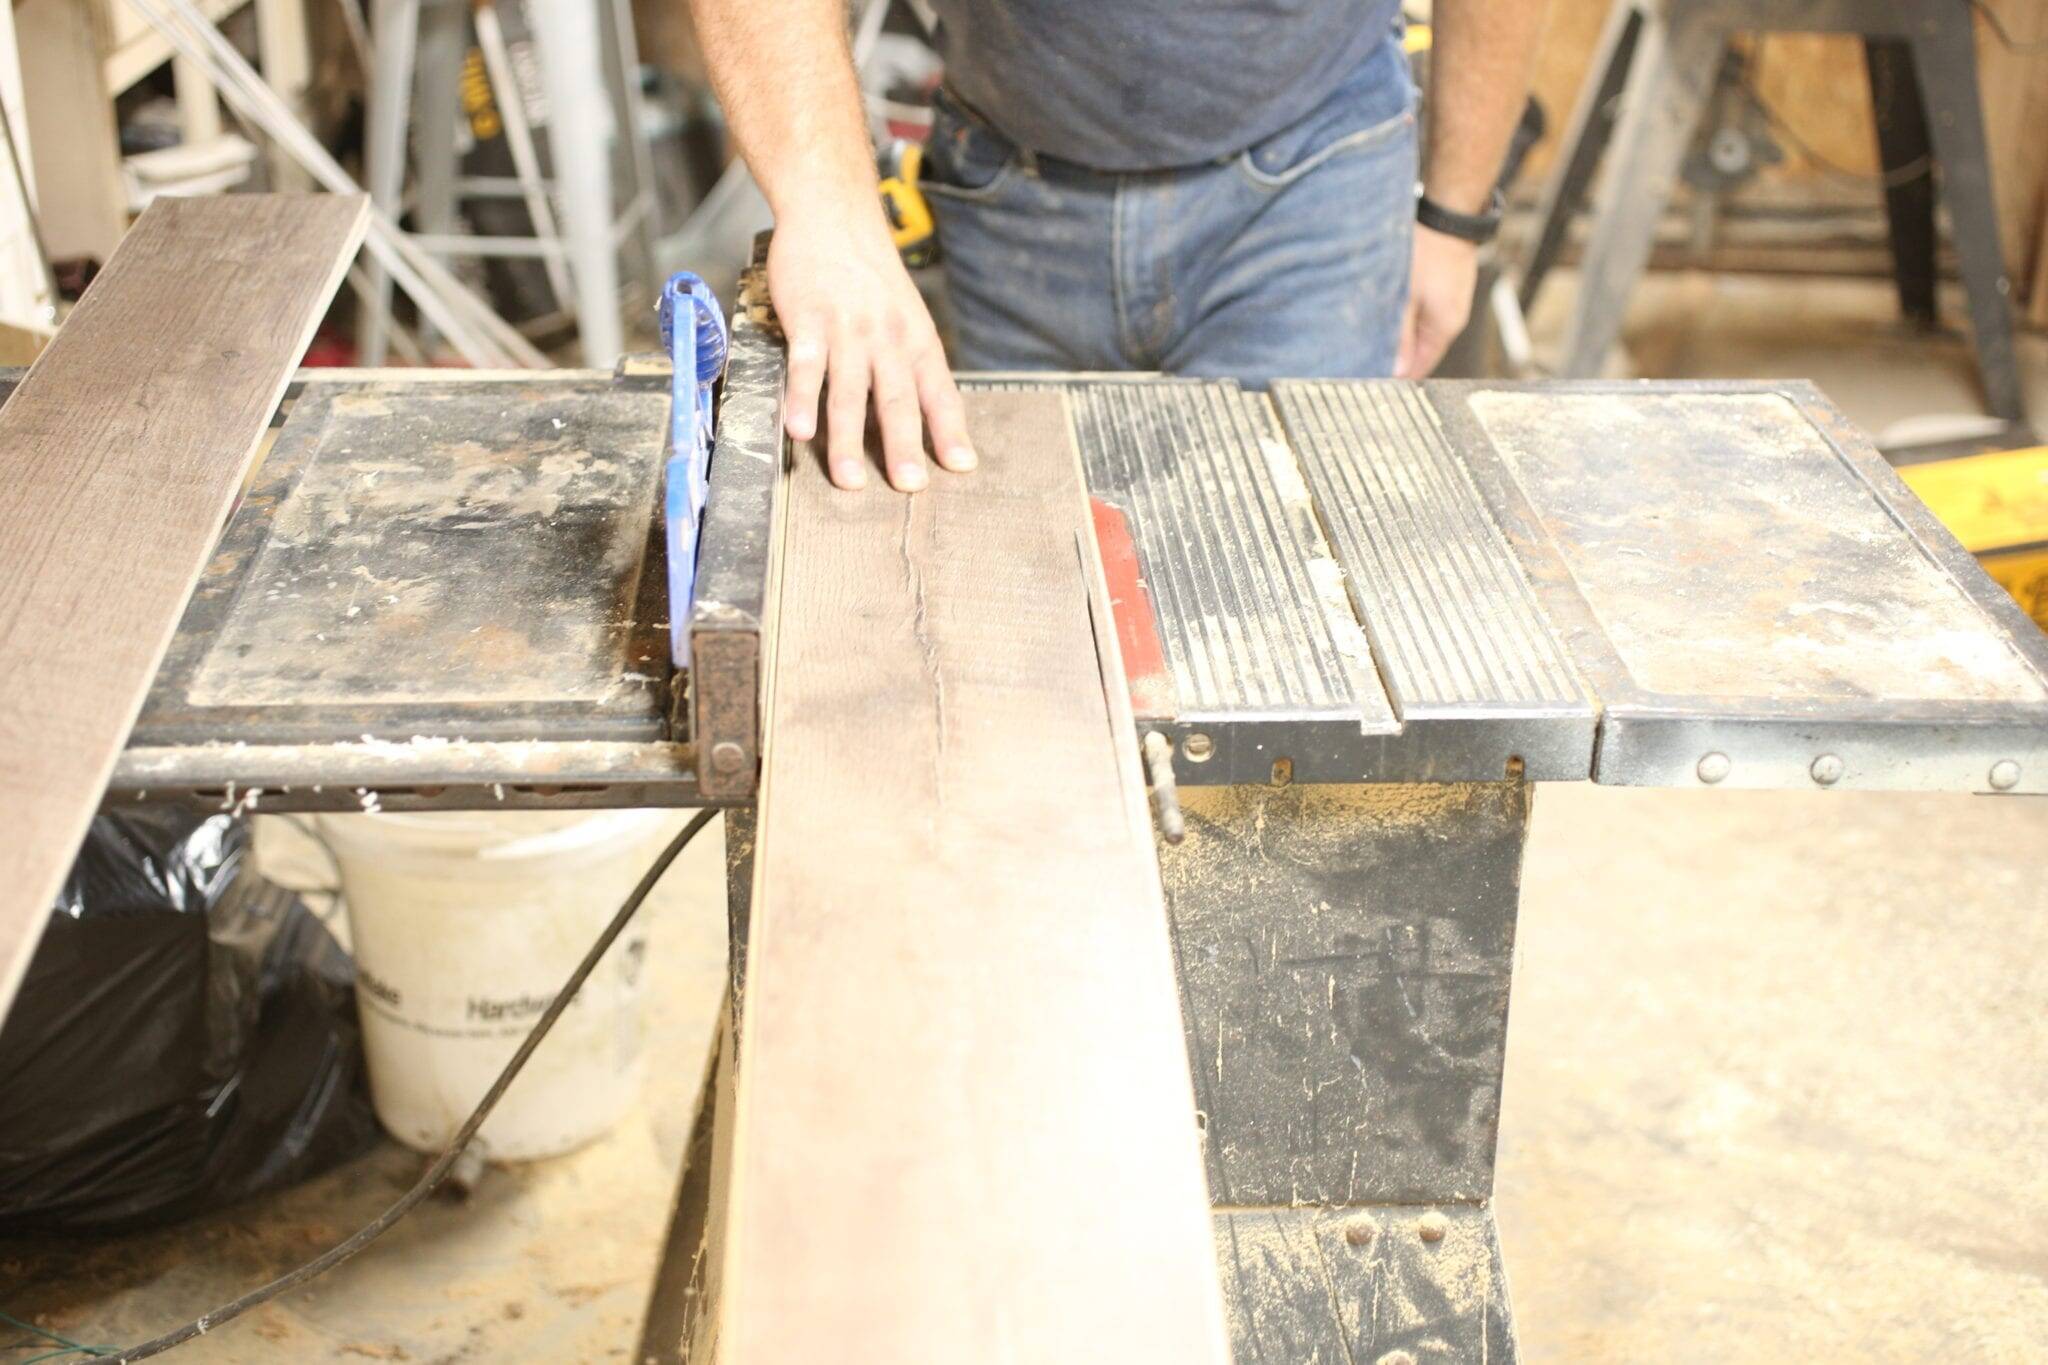
Step One–Rip off the Tongue and Groove
Using a table saw, you will need to rip the tongue and the groove off of your hardwood flooring.
Step 2 Cut List for Charging Station
As I mentioned above, we used hardwood flooring, so our pieces are 1×2’s. If you are making this with new wood like inexpensive pine, pay attention to the overall dimensions that I give. Also, this is totally customizable, make it whatever size works for you. I am just sharing my dimensions here.
Front- 2-11 1/2″ 1×2’s Total measurement is 3 1/2″ high by 11 1/2″ wide

Back- 3–11 1/2″ 1×2’s — Total measurement is 5 1/2″ high by 11 1/2″ wide
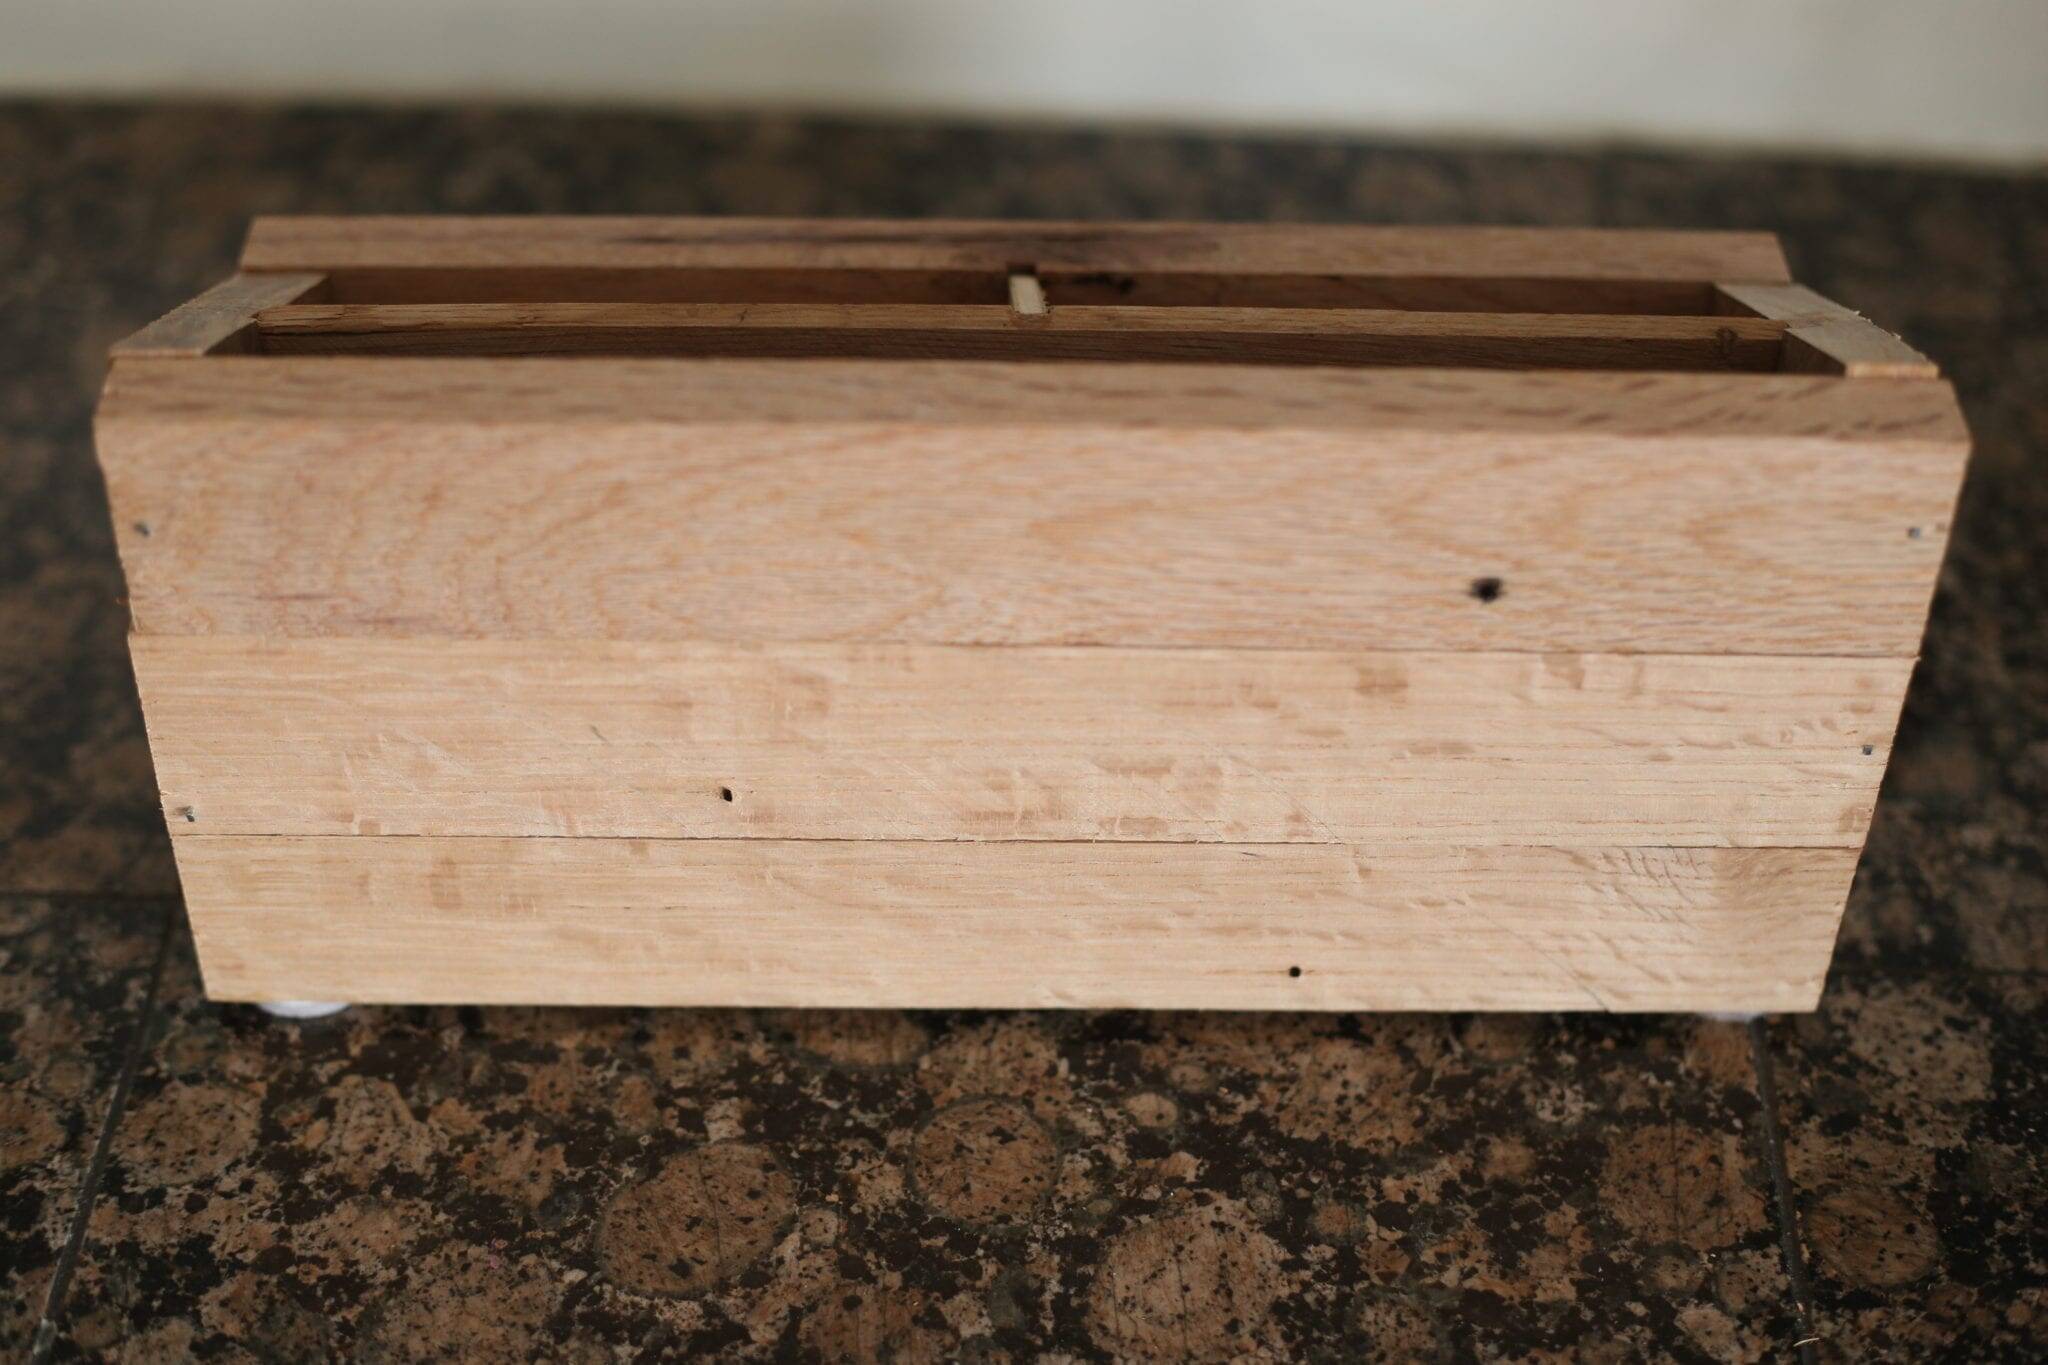
Sides–4 1×2’s 5 1/2″ high in back, angling down to 3 1/2″ in front–Total measurement is 3 1/2″ wide 5 1/2″ at back angling down to 3 1/2″ in front
Bottom- 2-1×2’s 10″ long–Total Measurement- 10″ x 3 1/2″
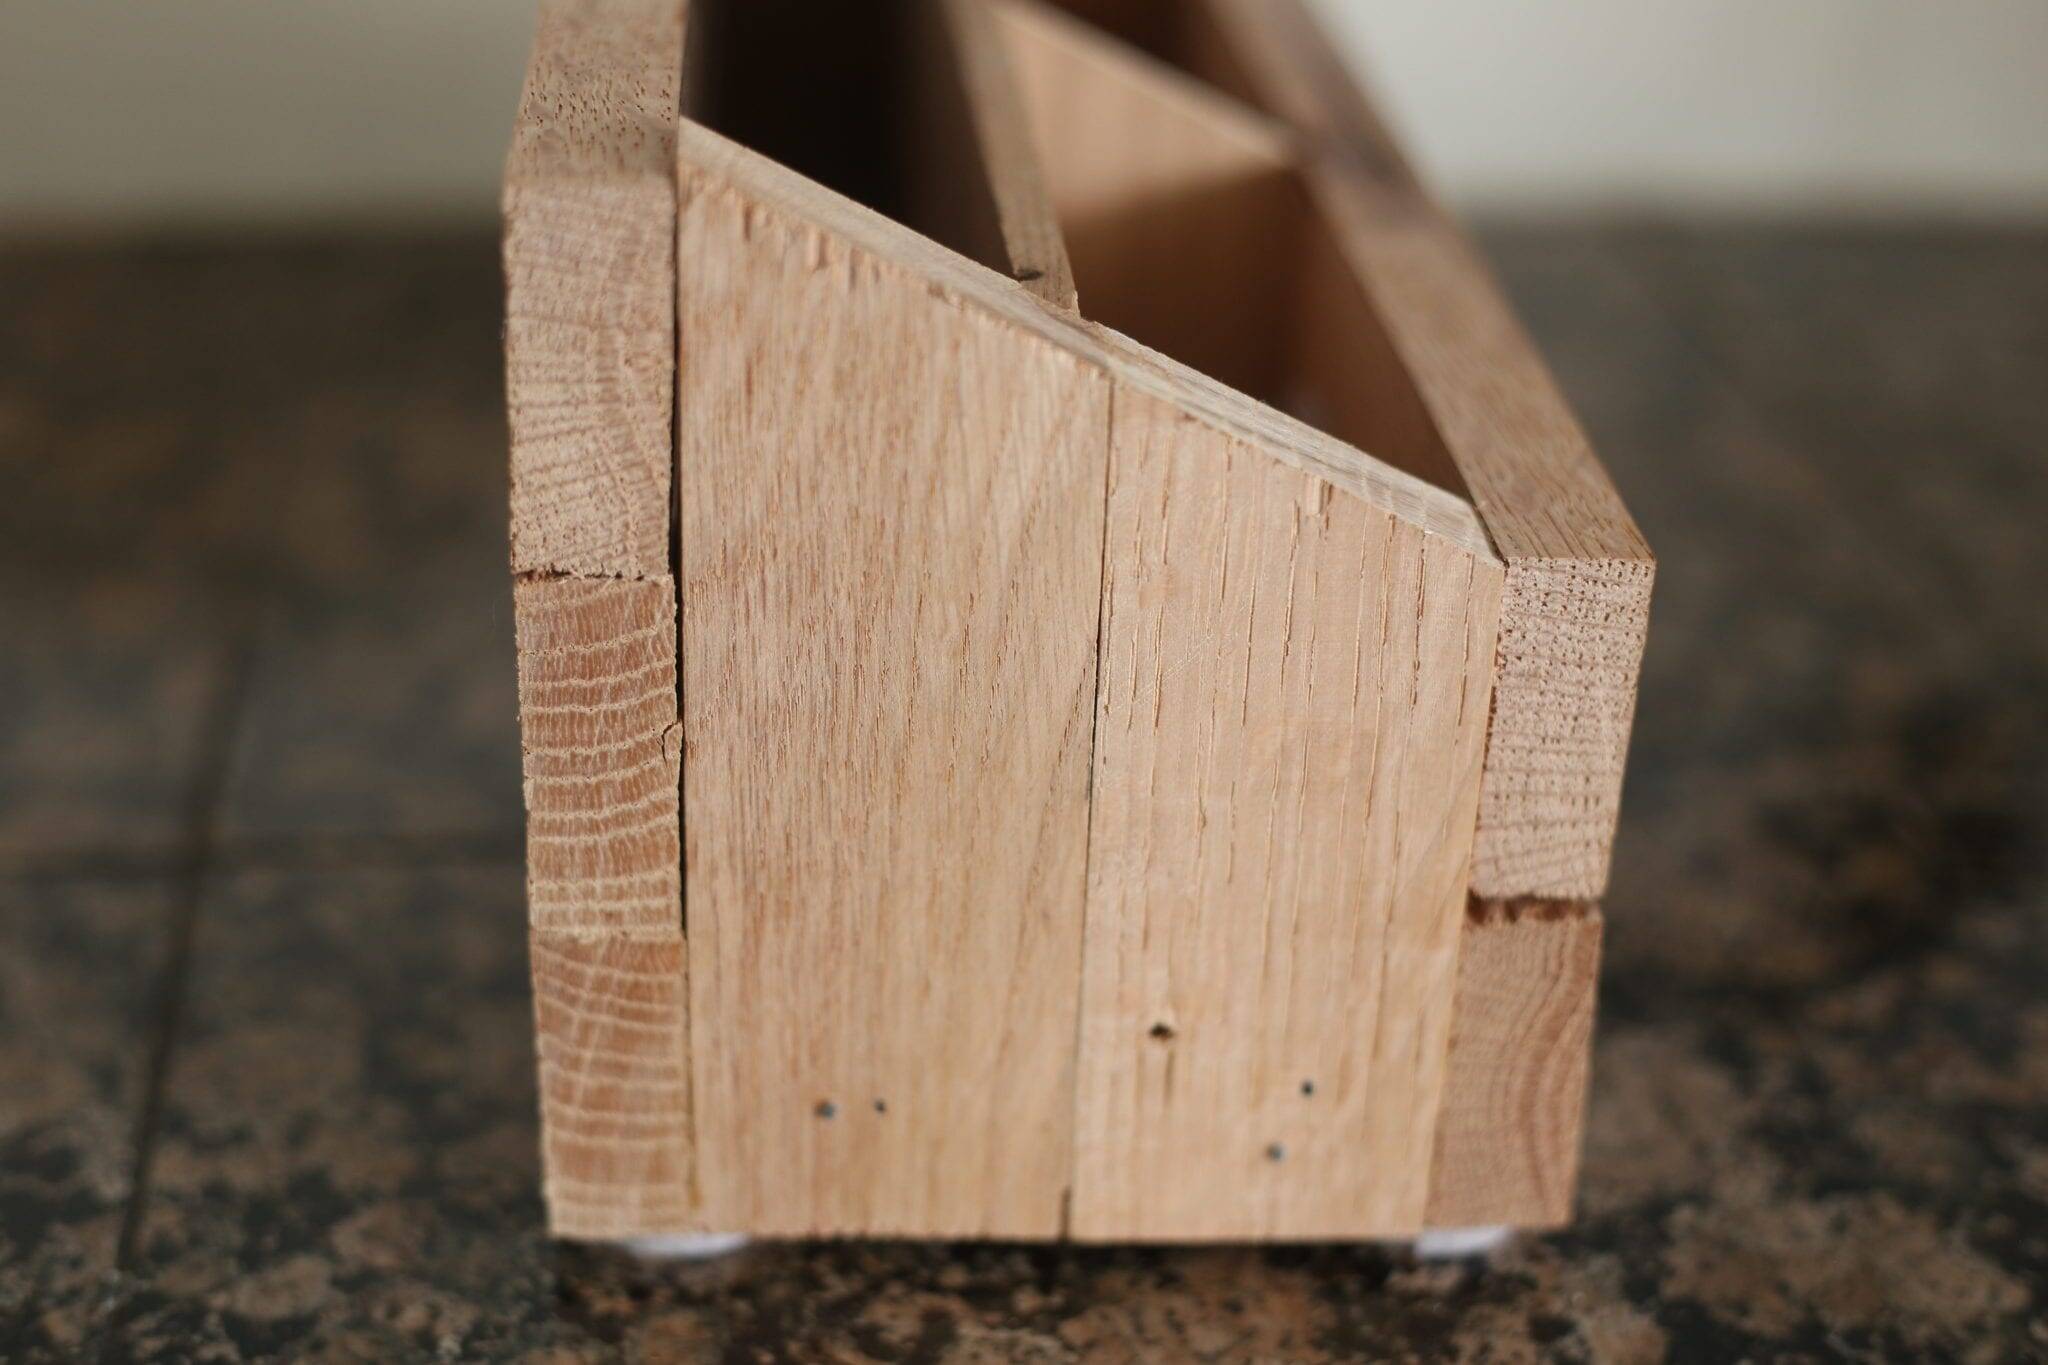
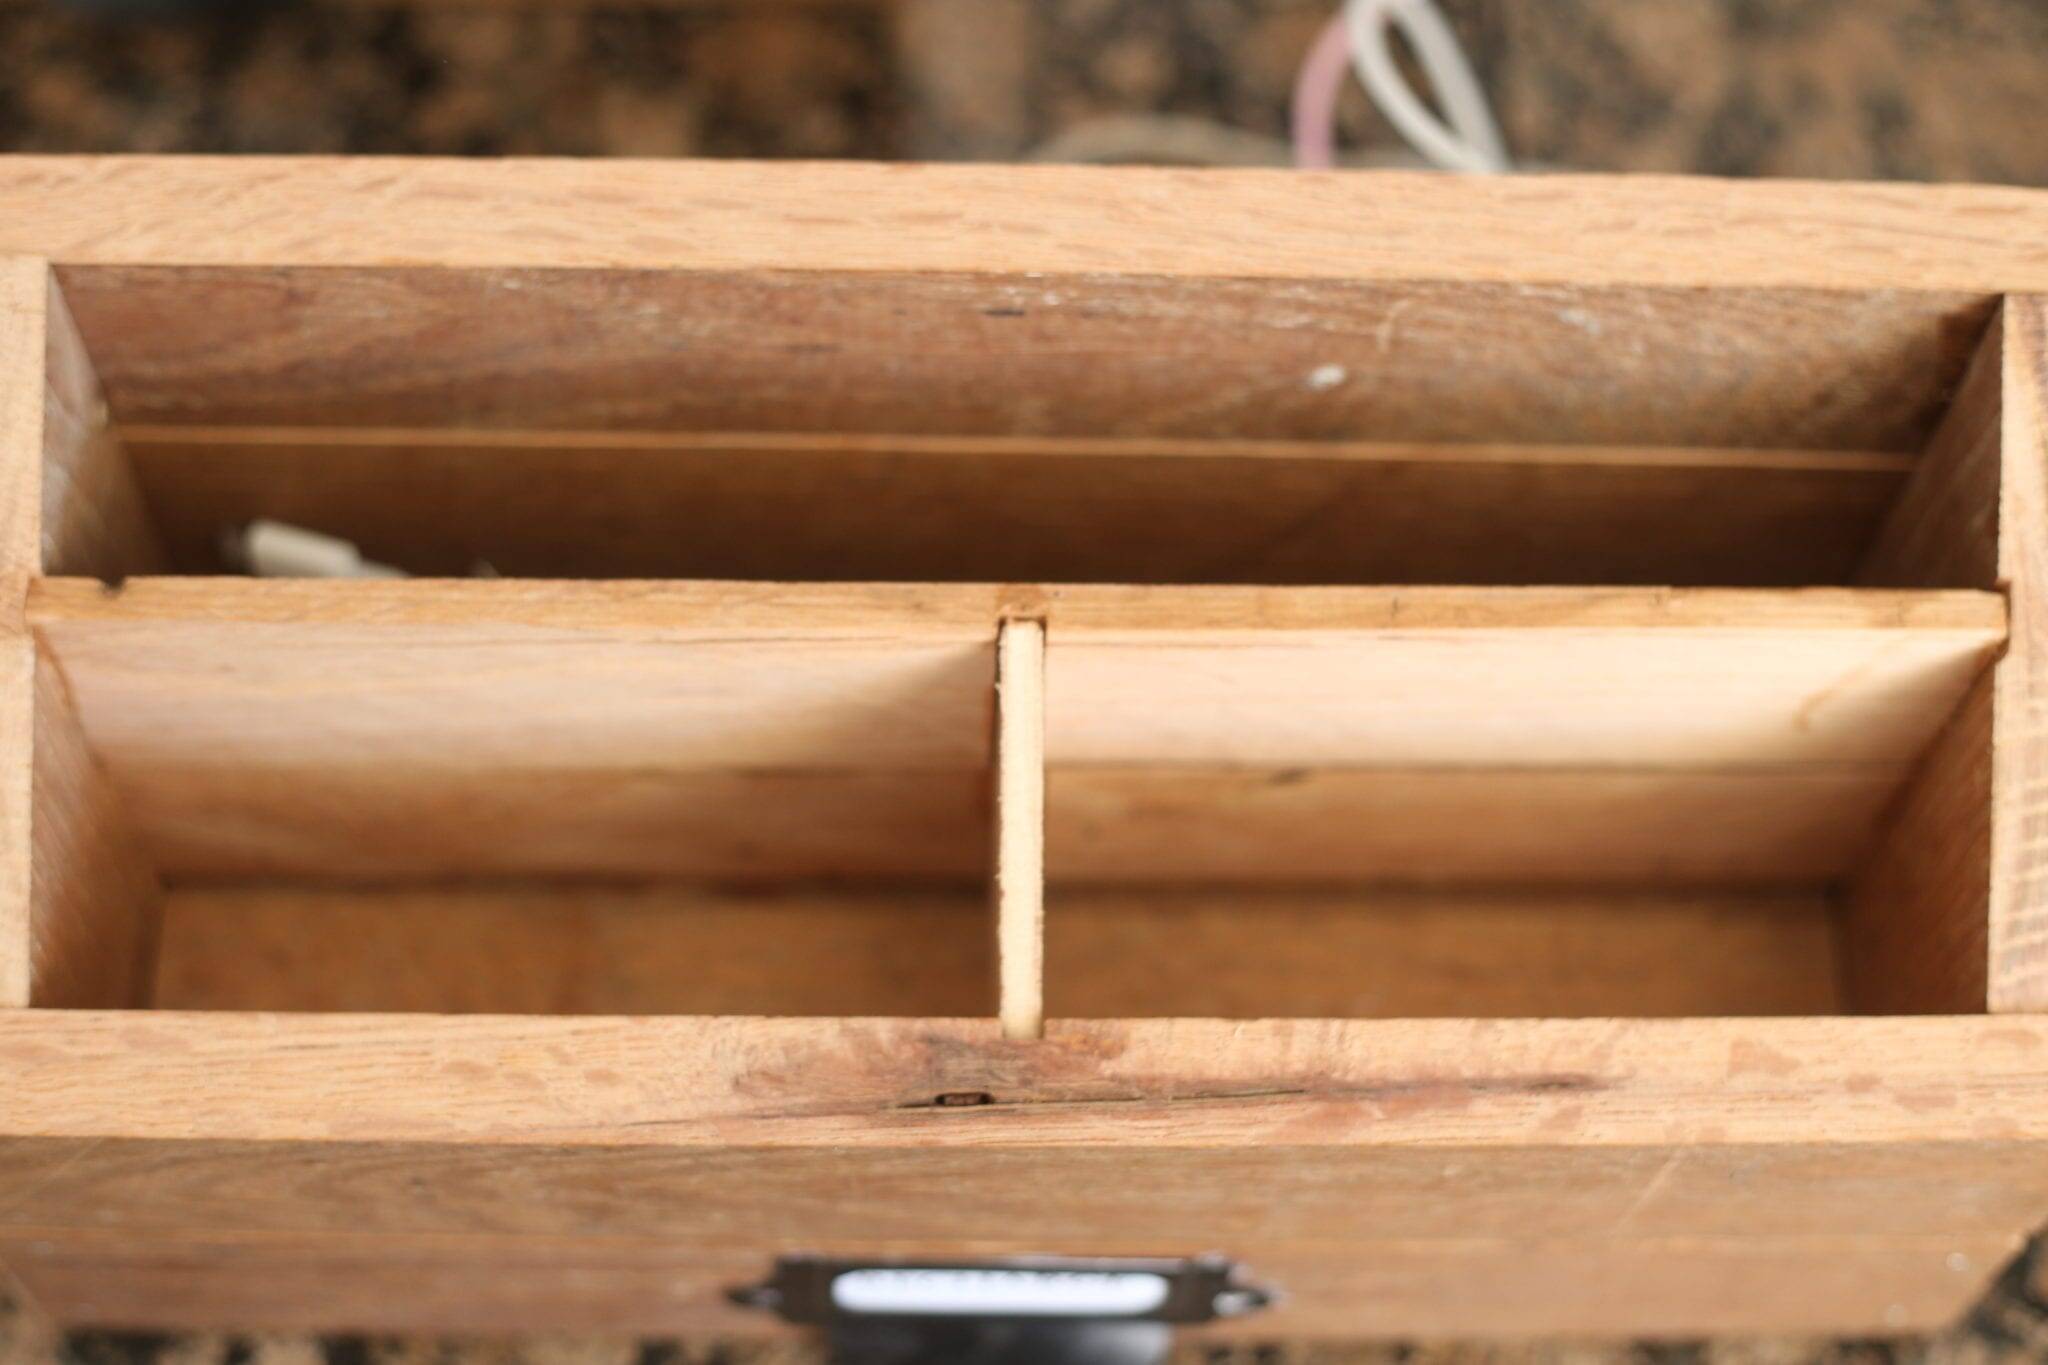
Inside Divider Pieces
For these, my husband used a table saw and just ripped some boards to a 1/4″ thickness. There are two 10″ long 1/4″ thick boards glued together to make the side to side divider. For the middle divider on the front compartment it is a 1/4″ thick piece 2″ wide. At the tallest point, it is 3 1/2″ and it angles down to 3″.
To make the slots for the divider on the charging station-
My husband raised the blade on the table saw just enough to make a groove for the pieces to slide into. It was two passes wide with the blade.
Assembly
To assemble your charging station or mail organizer, you will need wood glue and a brad nailer. It makes it easier to keep it square if you clamp the pieces as you go, or if you have another person holding it for you as you glue and nail.
Step 1 Assembly
Start by gluing and clamping your back, side and bottom pieces together if you are using 1×2’s. Leave until fully dried, which may take overnight. We left the front pieces separate because we liked the rustic look of a little gap.
Step 2
Using a Mitre Saw to cut the angles for your side pieces.
Step 3
Once your pieces are dry and your angles are cut, start by gluing your sides to the back. Finish this with a nailer or a brad nailer. Two or three nails for each side.
Step 4
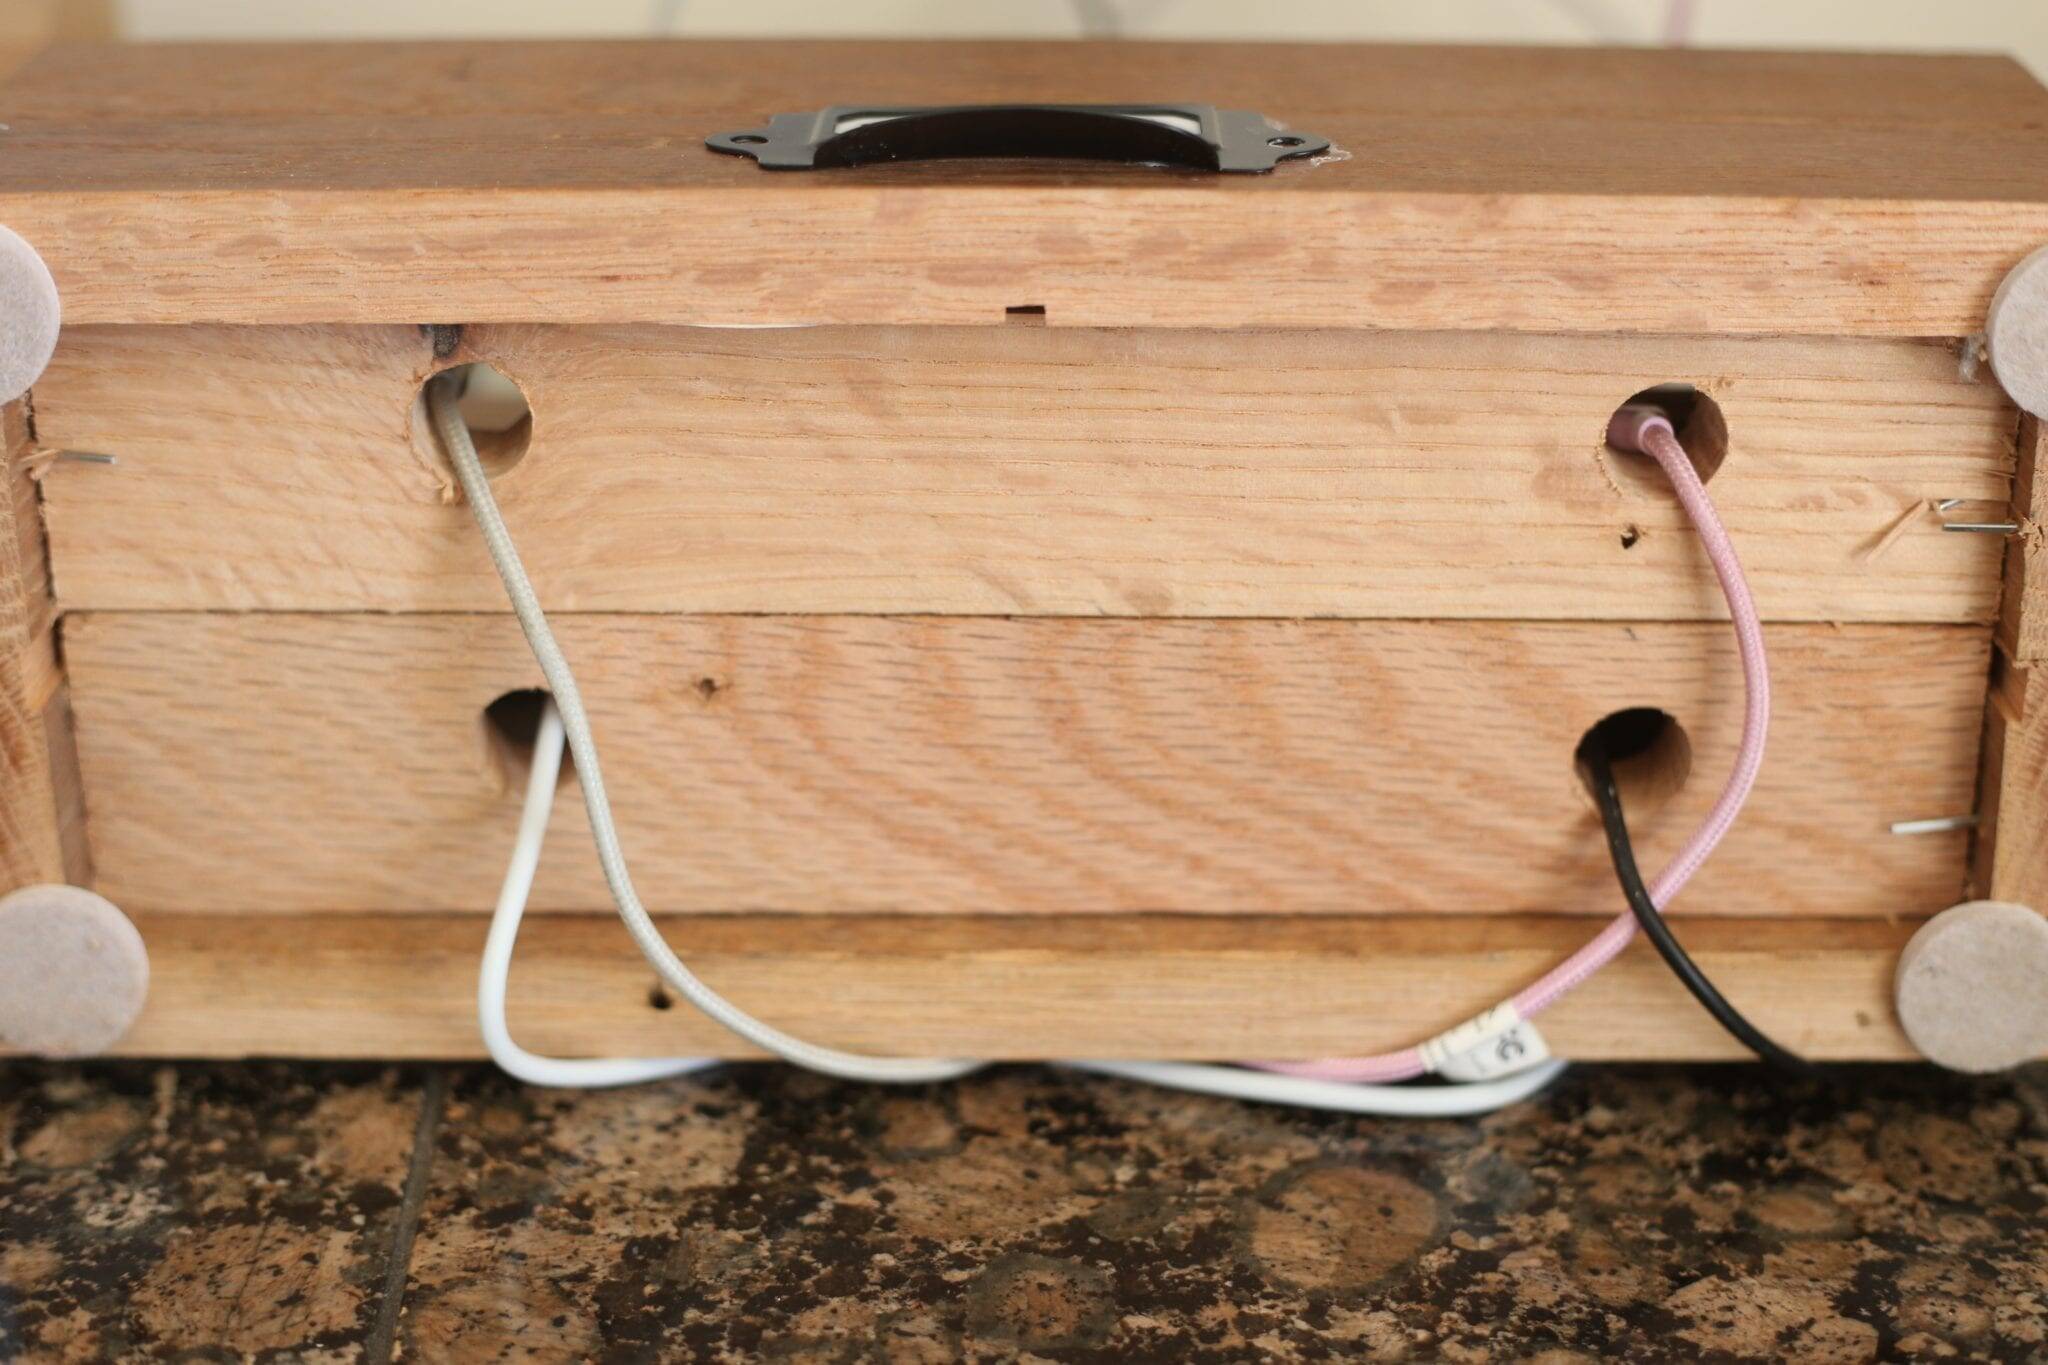
Leave a gap at the bottom for the cords, then glue and nail your bottom in place. Again, clamps or an extra set of hands really helps here.
Special Notes for the Bottom
We made two of these–one we made years ago, and one recently. On the newer one we made, we made a change that we felt was necessary was for the bottom to be raised. This gave us more room for the cords underneath. This is where either a shim or an extra set of hands is helpful for nailing the bottom in place.
Step 5
Put the front on last, using glue and a nailer. Again, we left these pieces separate because we liked the rustic look.
Step 6
Using a 5/8″ drill bit, drill the holes in the bottom for cords.
Step 7
Place some felt pads on the bottom for a little extra lift and for ease of moving on the counter.
Step 8
Add a cute little label holder for the front. I cannot remember where I got mine, but these are very similar, and these look nice too.
Here’s a video of the assembly
This video was actually filmed for a different platform which required vertical video. The video was never used. I didn’t want to waste the effort that was put into it, so I did a voice over and sped it up just to show the assembly. I hope it is helpful in some way.
Enjoy your Newly Organized Counter Space!
Cords can be hidden, but honestly, for ease of use–ours usually look like this! It’s fine with me, it is still far better than phones and cords all over the counter!
Too Much Work?
I get it! There are a lot of steps. How about keeping your eyes peeled for an already made mail organizer? Then you could just drill holes in the bottom and use some felt pads to lift it up a bit! Here and Here are ones that are similar. This one is too!
Pin for Later!


These are very pretty and handy, Jenn! I would love to have you share this on Farm Fresh Tuesdays!
Thank you Lisa! I linked up!
So cute! I could use a dozen. I’ll share on my FB. Thank you.
Thank you Jersey! Yes, they get filled up quickly!
Love this charger! Going on my “project list”!
Pamela, thank you for stopping by! I hope you give it a try!
Great idea for a charging station.
Happy New Year,
Kippi
Happy New Year! Thank you for stopping by!
So cute and I love that you used reclaimed flooring!!!
Thank you for visiting Emily!
These are so pretty and practical! Goodness knows I could use at least one!
Thank you Katie! Yes, they can fill up quickly!
I need this in my life! This would be perfect in my kitchen! Thank you for this great tutorial!
You are welcome! I hope you all make one!
You guys should sell these! #littlecottagelinkparty
I am always thinking of things to sell, thanks for the encouragement!
What a great idea! Thanks for sharing at Vintage Charm!
You are welcome, thank you for having me!
Hey Jenn!
These charging stations/organizers are super cute, and I love how you used the scrap lumber. That’s how I like to operate; by using materials I have to make something new.
Thank you for sharing this post with us on the Homestead Blog Hop, and I featured this post for this week 🙂
Have a wonderful week and stay warm!
-Cherelle