Woven Wreath–Dressed for Spring
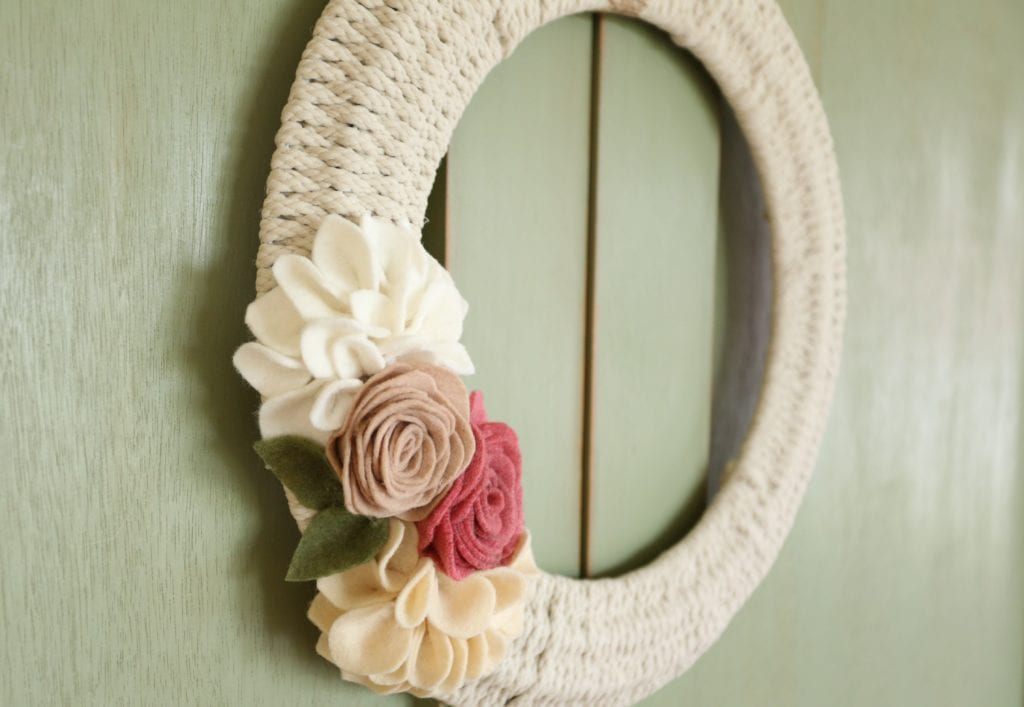
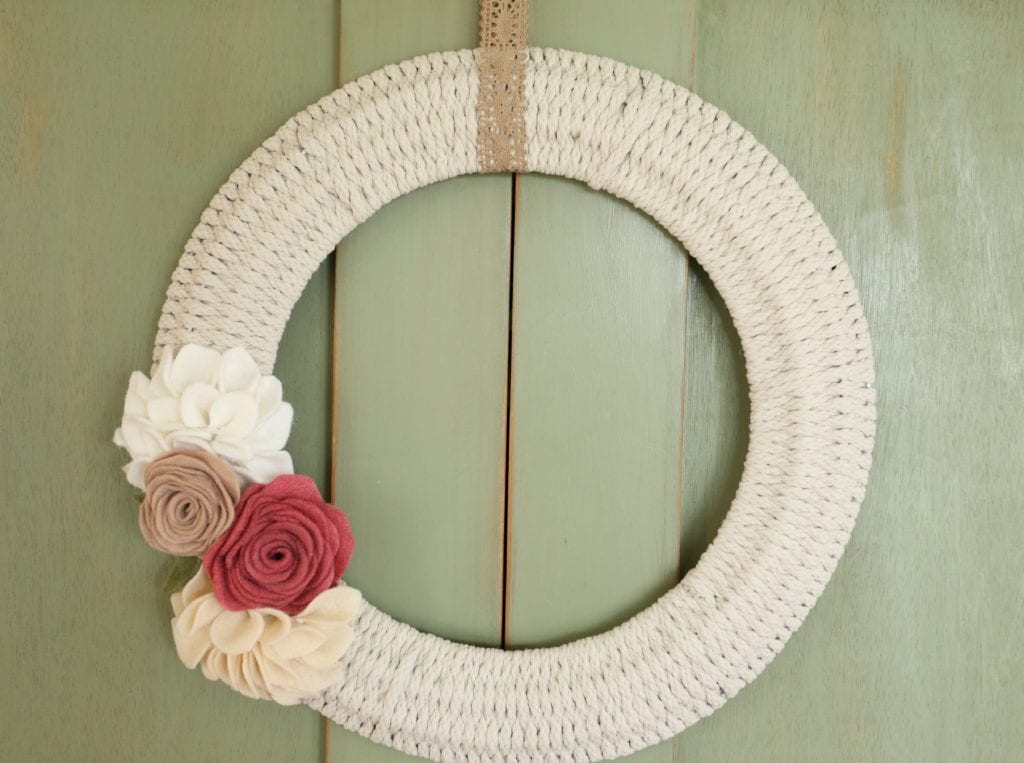
In this post, I share a technique for making a woven wreath. I dress mine up for spring, however, you could use this for any season. I hope you enjoy making this woven wreath! Be sure to scroll to the bottom for more spring wreath inspiration. I have joined up with several blogging friends to bring you lots of different takes on a spring wreath!
Ever Have an Idea?
Do you ever get an idea for something, and you don’t really know where it came from, but you have to do it? That’s how it was with this wreath. I wanted to make a wreath, with a woven look. It needed to be natural looking with some sort of neutral cord. The idea came to me in January when I was making the Valentine Wreath. I had never worked with these wire frames before, and they just looked like something should be woven through them. That’s where this woven wreath came from.
I tried jute twine, but it just shed all over and wasn’t pleasant to work with. I had a roll of this type of cording, but it was 100% cotton. I loved the look of it, but I needed more than I had. That is when I came across this Bonnie cord at Hobby Lobby. It is not cotton, but a poly blend which is nice for fusing. It is also on Amazon, and comes in lambs wool and cotton. 100 yards is plenty for two wreaths.
Be sure to watch the video it really gives you a good visual for how this is done!
Gather Your Materials
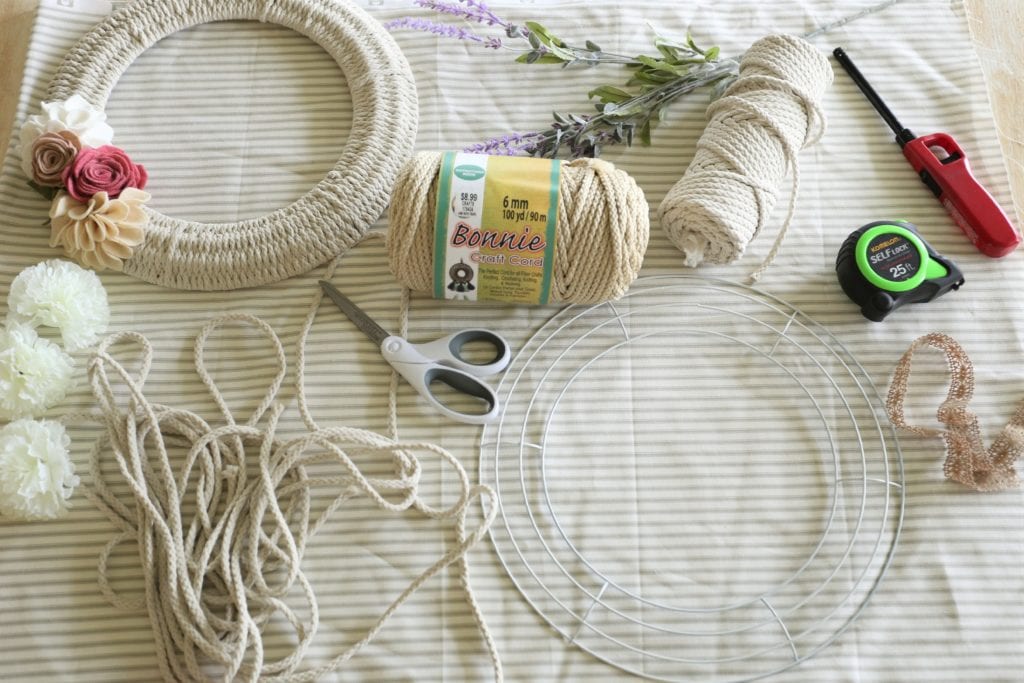
You will need:
- A wire frame–they have these small ones at the Dollar Tree
- Spray paint if you want to
- Cord or yarn or whatever you want to weave
- A tape measure
- Scissors
- A lighter to fuse the ends
- Embellishments and Ribbon for hanging
Start Weaving
If you want to spray paint your frame to more closely match the color of your cording you sure can. It may not be totally necessary, but there are few little spots on my wreath where the frame shows through, so I think it’s worth the extra step.
Next, begin weaving your cording around the frame. I looped mine around the first time and then fused it to itself so that it stayed put. You are going over the first wire, then under the next, over the next, under and around the top. There is a video at the end to help you to see how to do it, but it really isn’t complicated.
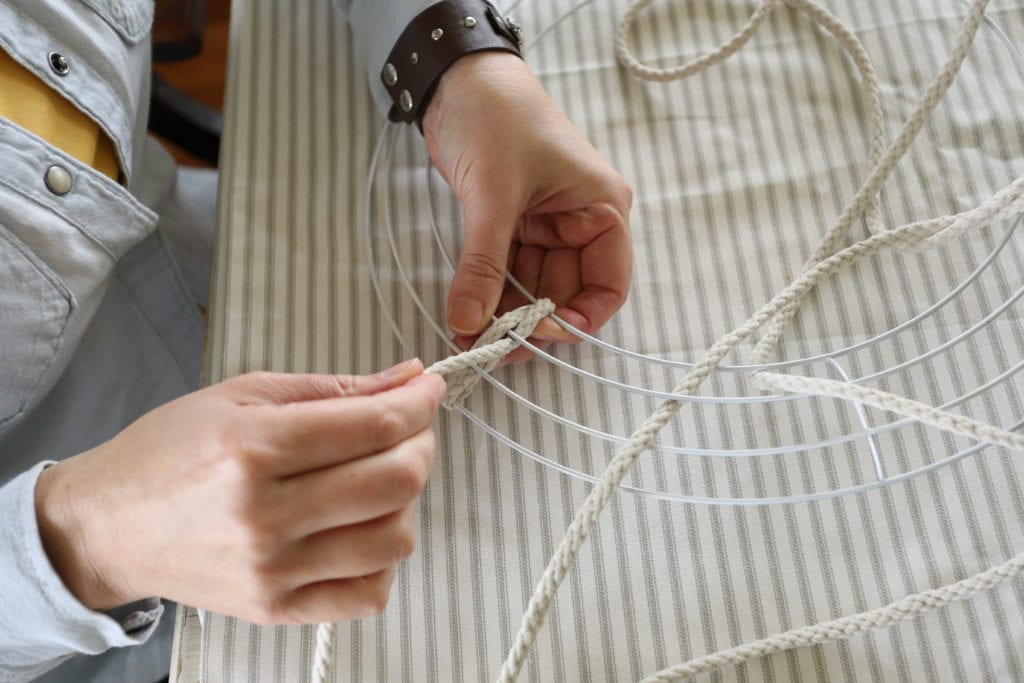
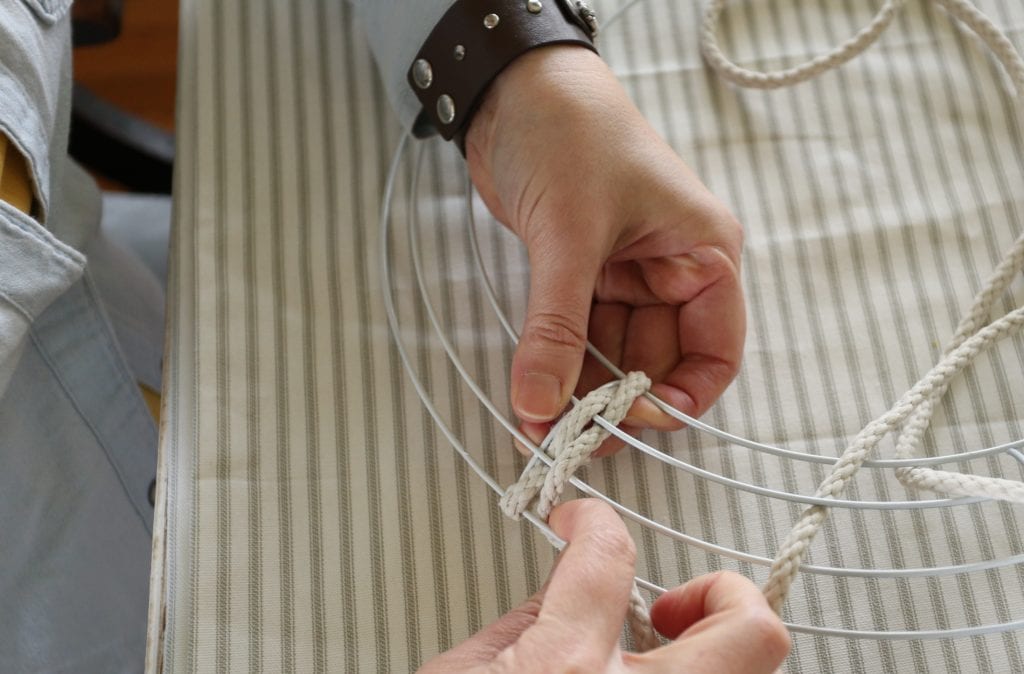
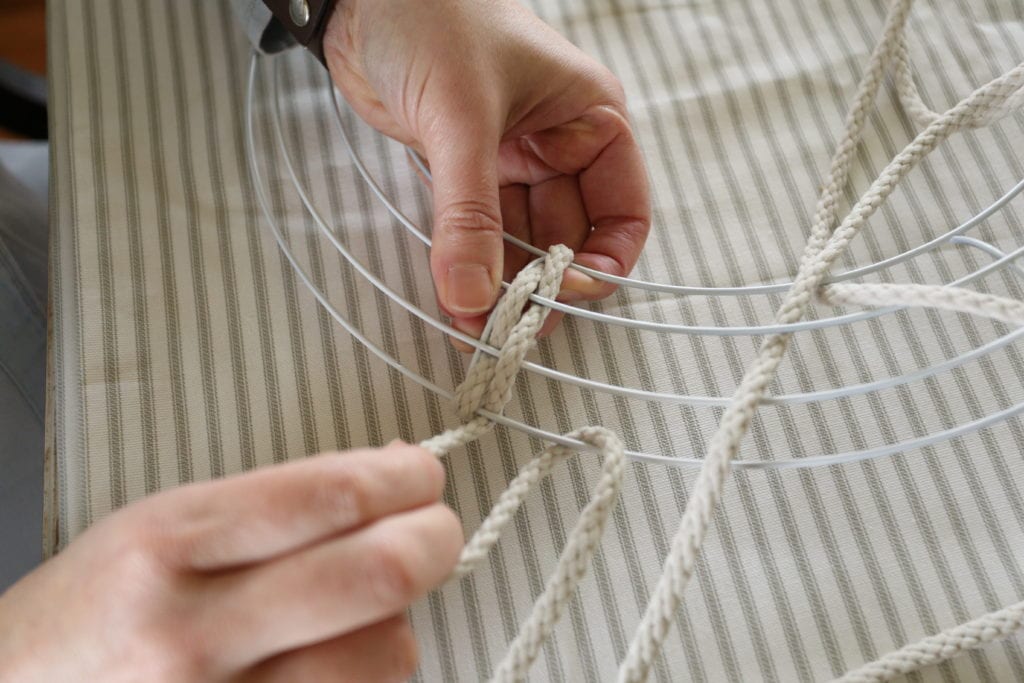
Continue to weave pulling the cording tight and then pushing your rows together.
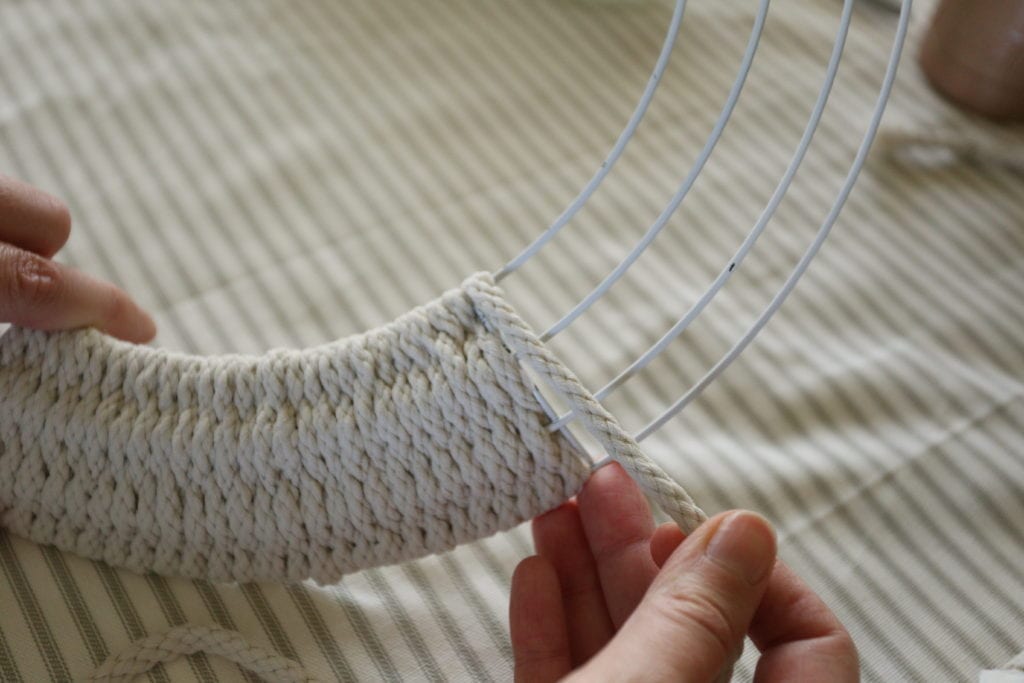
When you get to one of the vertical wires, simply pull the cord over the entire wreath frame to cover the wire, and continue on the other side weaving over and under. It is the best way I could figure to deal with those bars. I tried wrapping around them, but it just looked messy.
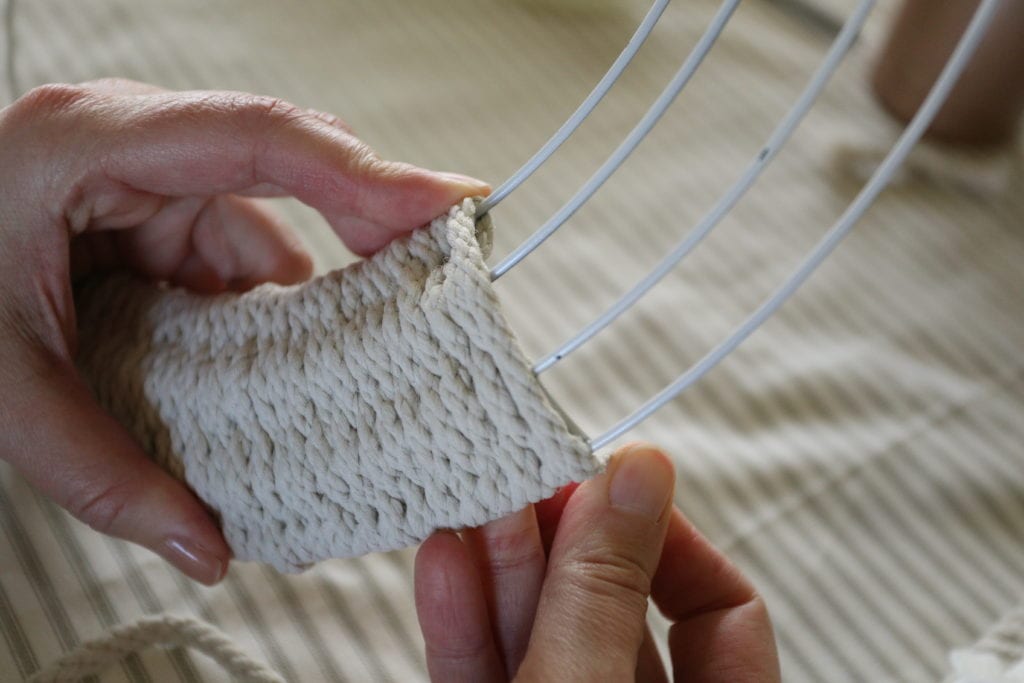
When you run out of cord, you can just tie on some new cord, or if you have the Bonnie cord, you can heat it with a lighter and fuse a new piece on to the old one. Just be careful, I did burn myself once!
Keep going all the way around the frame. Tie it off or fuse the end on the back.
Embellish Your Woven Wreath
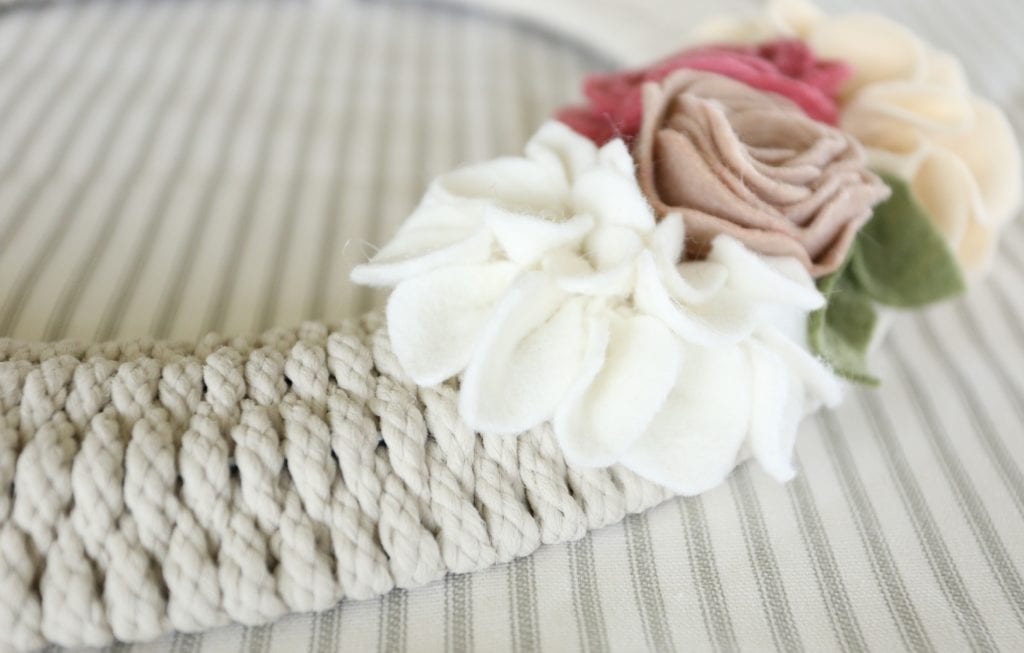
Now the fun part, dress up your wreath. You can use anything with these. I could see going in a nautical direction with this. Perhaps some lavender or some other pretty fake flowers. Whatever your heart desires! You can just hot glue them on, or use a wire if you want to change it out for the seasons.
I pictured mine with felt flowers. I found two excellent tutorials for making the flowers that I chose. However, there are tons of different tutorials out there for just about any flower you could want. I chose roses, and I followed this tutorial . She even has a free printable template.
The other flowers look like dahlias to me. This is the tutorial that I followed for those. She has a great video to go with it. Warning, these are quite a bit of work. My tip is to only make half of one and tuck it in with the other flowers. At least that is the lazy way that I did it. Also, her flowers look way better than my version, but I’m okay with that!
Video Tutorial
Need Help With Home Organization and Cleaning? Check out My Helpful Planners!


How About Some More Spring Wreath Inspiration?
Pin and Share!




This is amazing friend! What a fun idea!
You got this friend!
happy day!
karianne
Thanks KariAnne! You are so kind!
This is so fresh and pretty for Spring!🌸
Thank you barbijo!
That’s beautiful Jenn! Hmm, maybe I could do a mirror behind it? What a great job!!!❤️
Jersey, that would be so cool!!
So simple yet elegant, Jenn. Lovely!!
Thank you Jenny!
I love this idea, Jenn! So pretty!
Thank you Jen! I appreciate your comment!
This is such a sweet project! I love those gorgeous felt flowers too! Wow! Thanks so much for the tutorial!
Thank you Elise! You are always an encouragement!
How beautiful! What a great and simple idea 🙂 Thanks for sharing friend!
Thank you Alexa! I appreciate you stopping by!
Very pretty! I love the nautical idea and also, swithing things out for the season. Green cord would be very Christmas-y, too!
Yes, make it all your own!!
I love this idea! This is such a beautiful and simple wreath. How creative!
It is very simple! Thank you for visiting!
Love, love, love your woven wreath! Thanks for adding the links showing how to make the flowers.
Thank you! Yes, they are great tutorials!
Jennifer, I love your woven wreath! Thanks for sharing at Vintage Charm–pinned!
Thank you Cecilia!
What a wonderful idea for a Spring wreath! I would imagine the weaving process is very relaxing. Wow, even the flowers are handmade. Love it! Pinned it!
Thank you Marie! Yes I enjoyed the process! Thanks for pinning!
I absolutely love this beautiful wreath and can’t wait to try making it myself! Thanks for the awesome idea!
You’re welcome! Thank you for stopping by!
I love this. How much Bonnie macrame cord did it take? I have some, but I’m not sure it is enough.
Thank-you!
This is so elegant, and I’ll bet super relaxing to weave. I love it!
Sydney, thank you for stopping by! I found it relaxing!
What a great idea to make a woven wreath! This is definitely something I’ll be trying in the future. Love the pretty flowers too – thanks for the tutorial, Jenn!
What a great project! I will need to give this one a try. I love the idea and love of weaving the cording around the wire wreath form.
Hi Tammy! Thank you!
This is beautiful! It looked so complicated, until I read your directions, and its not that hard! What a great idea! Now I’m thinking of what other things could be weaved?!
Danielle, Yes, I am the same way, I am thinking of all sorts of ideas!
Love this idea! The weaving looks beautiful. Happy to be part of the DIY Spring Wreath Challenge with you!
Hi Marie!
Me too thank you!
This is beautiful! I’ve always wanted to learn this technique! Thank you for sharing!
Oh good! I am glad you like it!
This is such a great idea! I love the texture of the wreath! I could even make one fir my lake Kottage because it kind of has a nautical or beachy look too! Fun to be a part of the wreath challenge!
Karin
I have to try this out! The wreath is beautiful so thank you for sharing it on the blog hop. I am definitely inspired to try this out soon. Pinned.
I am so glad you are inspired! Thank you!
What shade of cord did you use? Also, did you use a macrame cord? I need to order online as the store where I live don’t stock it.
Thanks.
Hi there,
There is a link in the post to the cord that I used. It’s on Amazon. Hope that helps!
Thanks. Did you use the Fresh Cream color? Like you I’m looking for a neutral. Your wreath is beautiful.
I don’t see the exact one I bought on Amazon anymore. I think it was called Lambswool, there is a shadow gray that looks similar.
Have a question about when you pull the cord over the frame to cover the wire bar. I end up wrapping the cord opposite on the bottom ring. Hopefully I can word this so it makes sense. When you started wrapping your cord it was wrapping from behind, around the bottom to the top side. After covering the bar it’s wrapping from top side to the back. (Started wrapping from behind to front, after covering bar wrapping from front to back on bottom row.) When I get to the next bar I’m not able to cover the entire bar. I hope this makes sense. Thanks for your help.
Thank you very much. It looks great
Thank you for visiting!