Making Homemade Raw Milk Mozzarella Cheese from Scratch: A Step-by-Step Guide
Making homemade mozzarella cheese is a gratifying and delicious endeavor. This step-by-step guide will walk you through the process, from selecting the freshest ingredients to enjoying your homemade mozzarella.
Jump to Recipe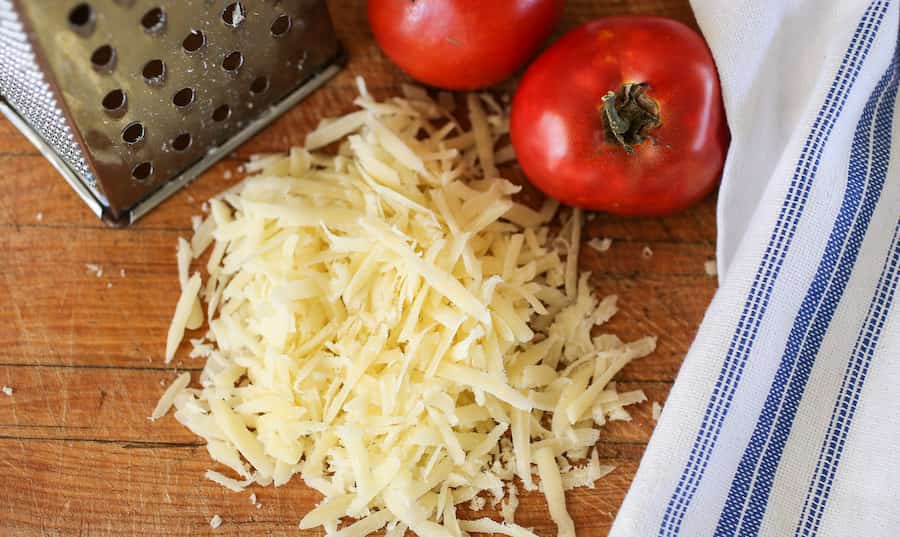
There’s something truly special about creating your very own mozzarella cheese from scratch. The silky texture, milky flavor, and the satisfaction of crafting this beloved Italian cheese are all worth the effort.
This post contains affiliate links
As with all of my cheesmaking efforts, mozzarella was a bit of a challenge for me. My first batch was definitely edible but it wasn’t shiny and stretchy like I was hoping for. I would watch videos from @turkuazkitchen where she would stretch the mozzarella and it just looked so beautiful. I’m still unsure how she does it without gloves! I finally realized I wasn’t heating mine enough and that I needed a bit more acid. I can finally make beautiful stretchy mozzarella…but I wear gloves!
Mozzarella Cheese: A Brief Introduction
Before we dive into the details of making mozzarella cheese from scratch, let’s take a moment to understand what mozzarella is and why it’s so beloved worldwide.
Mozzarella is a fresh, soft cheese that originated in Southern Italy. It’s often considered the “queen of cheeses” due to its versatility and use in a wide range of dishes, from pizzas and pasta to salads and appetizers. Mozzarella is made primarily from cow’s milk, but it can also be prepared with buffalo or goat milk, each offering a unique flavor profile.
The cheese is known for its smooth, slightly elastic texture and mild, milky flavor. Fresh mozzarella is pure white and has a high moisture content, making it a delightful addition to a variety of dishes.
Ingredients and Equipment
Before you start making mozzarella cheese, ensure you have the following ingredients and equipment on hand:
Ingredients:
- 1 gallon of fresh milk (I use raw milk but pasteurized will work, just not ultra-pasteurized)
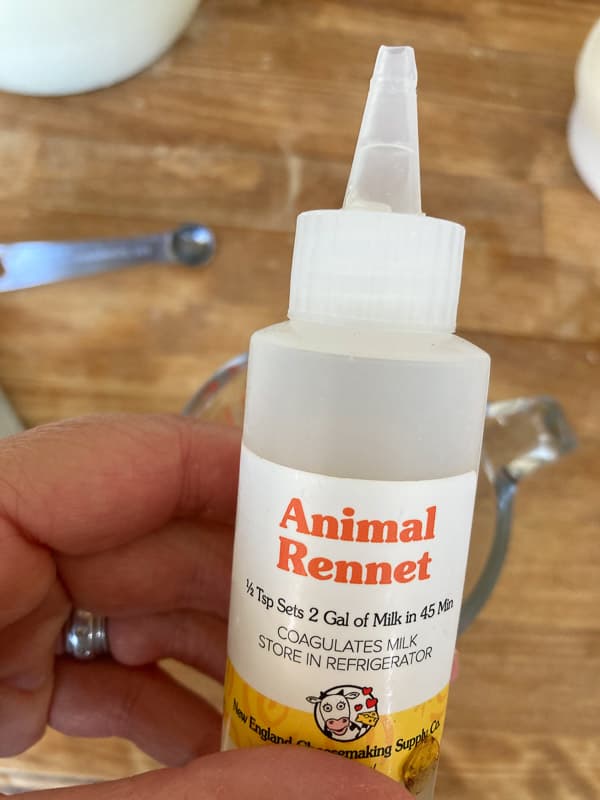
- 1/4 tablet of rennet or 1/4 teaspoon liquid rennet (I prefer the liquid rennet)
- 1 1/2 teaspoons of citric acid
- 1/2 cup of cool, chlorine-free water split in two containers
- 1/4-1/2 tsp of salt or more to your taste preference (I use Himalayan pink salt or sea salt)
Essential Cheesemaking Equipment:
- A large stainless steel pot
- A thermometer
- A long knife for cutting curds
- A slotted spoon (I got mine from Ikea but the one linked is similar)
- Rubber gloves heat resistant are best, regular dishwashing gloves won’t do
- A large colander
- Cheese cloth or you can buy this set that comes with cheesecloth
- A large bowl for whey collection
With everything ready, let’s begin the mozzarella-making process! One gallon of milk will yield approximately 10 oz of mozzarella cheese.
Step 1: Preparing the Milk and Adding Citric Acid
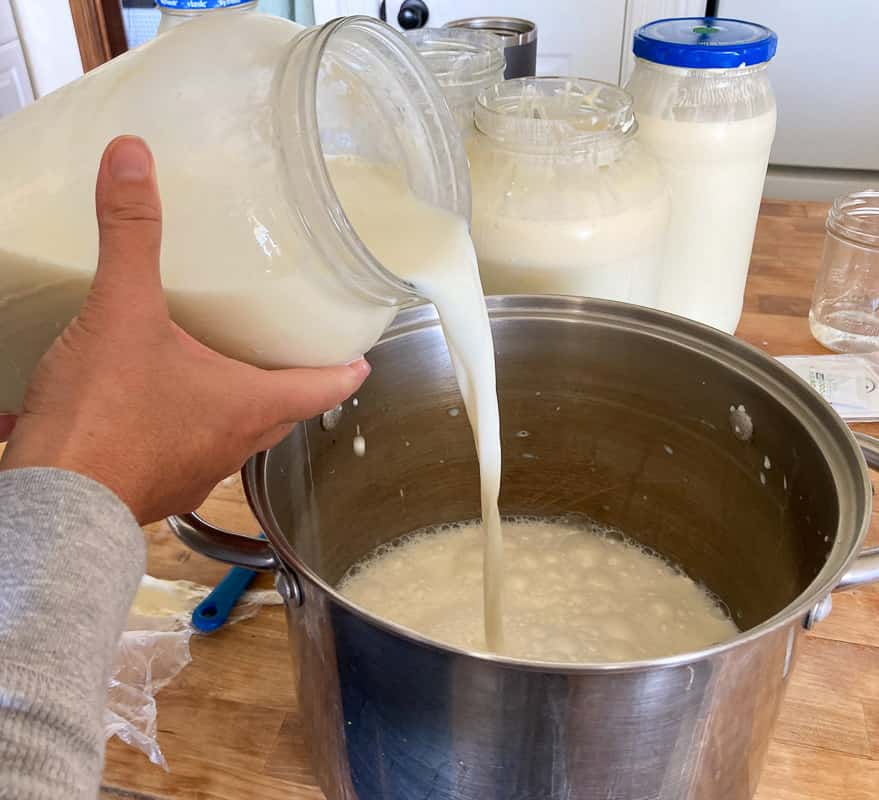
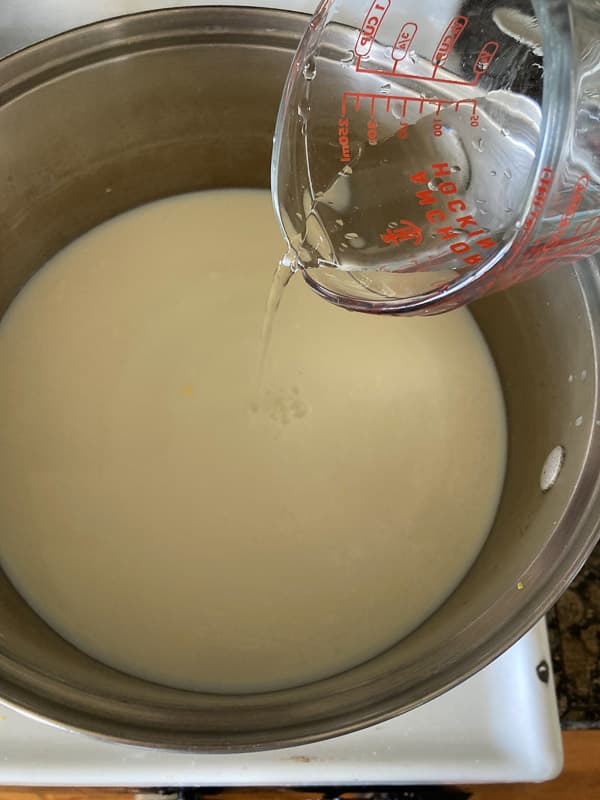
Start by pouring the fresh milk into a large stainless steel pot. Slowly heat the milk over medium-low heat, stirring frequently to prevent scorching. Use a thermometer to monitor the temperature, and heat the milk until it reaches around 90 degrees F. If you milk a cow, bringing the milk in fresh from the cow and straining it makes the temperature just right. You can add the citric acid before or after heating the milk.
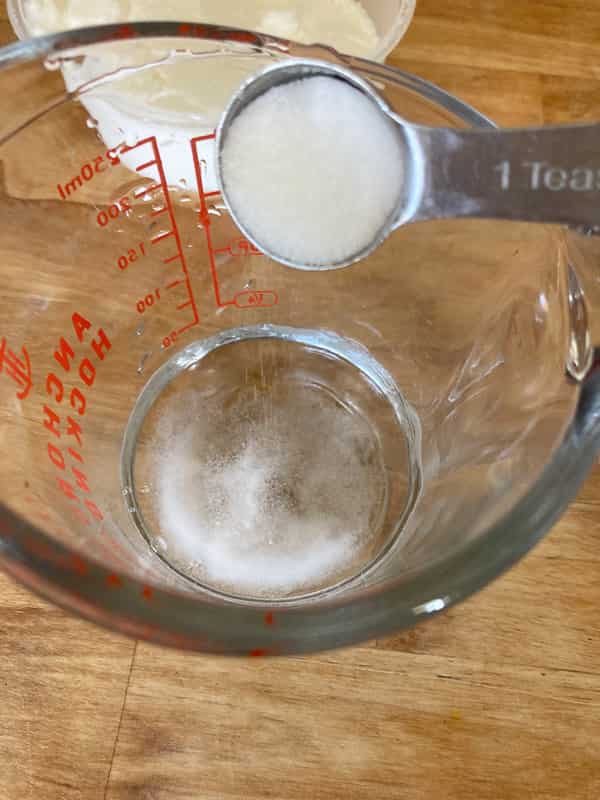
Once the milk reaches the desired temperature, dissolve 1 1/2 teaspoons of citric acid in 1/4 cup of cool, chlorine-free water. Add this solution to the heated milk and stir gently.

Step 2: Using Rennett in Mozzarella Cheese
In a separate container, dissolve 1/4 tablet of rennet (or 1/4 teaspoon of liquid rennet) in 1/4 cup of cool, chlorine-free water. Add this rennet solution to the milk, make sure it is still around 100 degrees and stir gently for about 30 seconds. Then, remove the pot from the heat and let it sit, covered, and undisturbed for 10 minutes.
Rennett is an essential enzyme in cheesemaking.

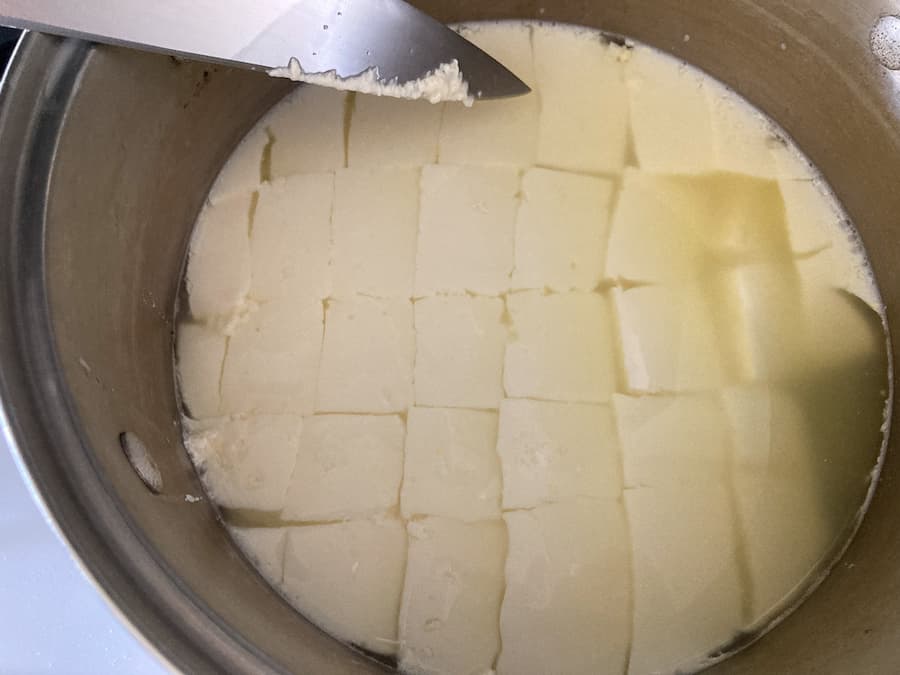
Step 3: Curd Formation in Mozzarella Cheese
After 10 minutes, you should see the milk forming into curds. They’ll look like a solid mass. Use a long knife to cut the curd into 1/2-inch cubes. Be sure to make clean, straight cuts and go all the way to the bottom of the pot.
Step 4: Heating The Curds
Place the pot back on the stove and heat the curds gently to 108 degrees F, stirring occasionally to prevent them from sticking. This will cause them to separate from the whey more and to shrink a bit.

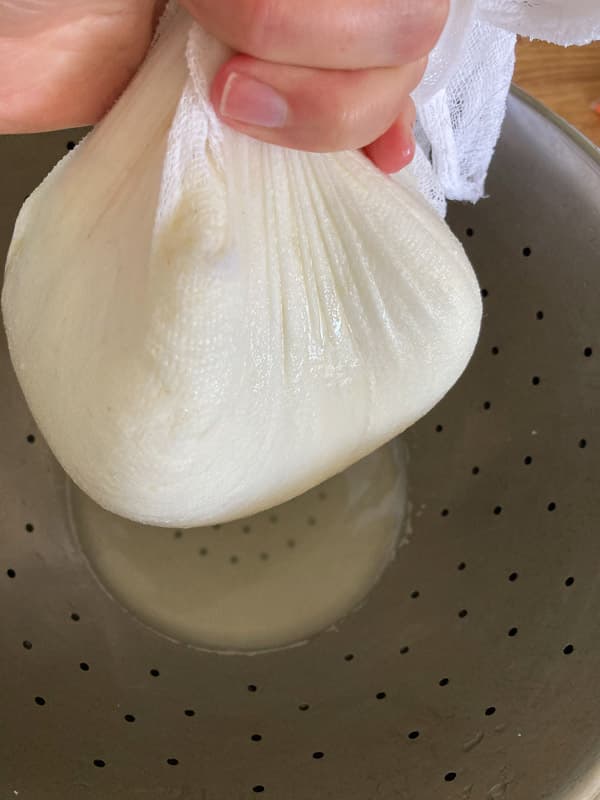
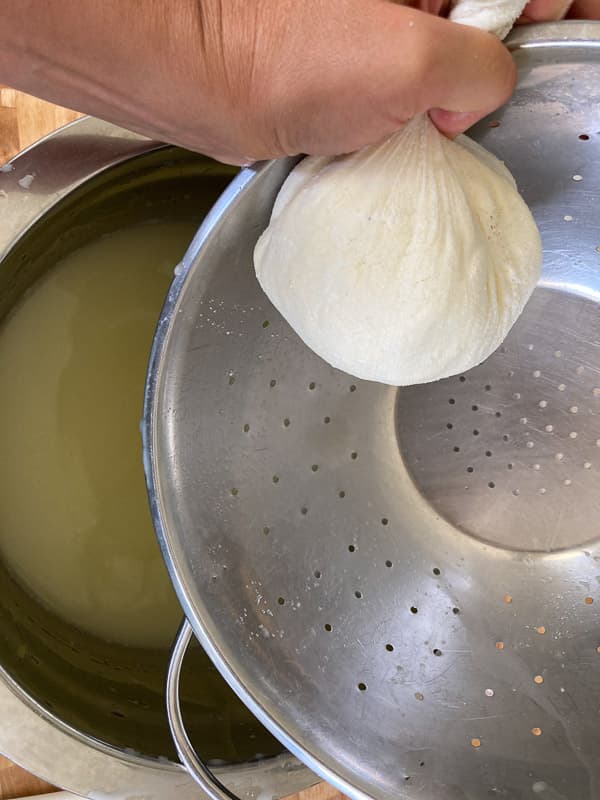
Step 5: Draining and Stretching the Mozzarella Curds
Carefully pour off any excess whey from the curds. I line the collander with cheesecloth. Then I gather it up into a bundle to squeeze out the excess whey after it has drained for about 10 minutes or so.

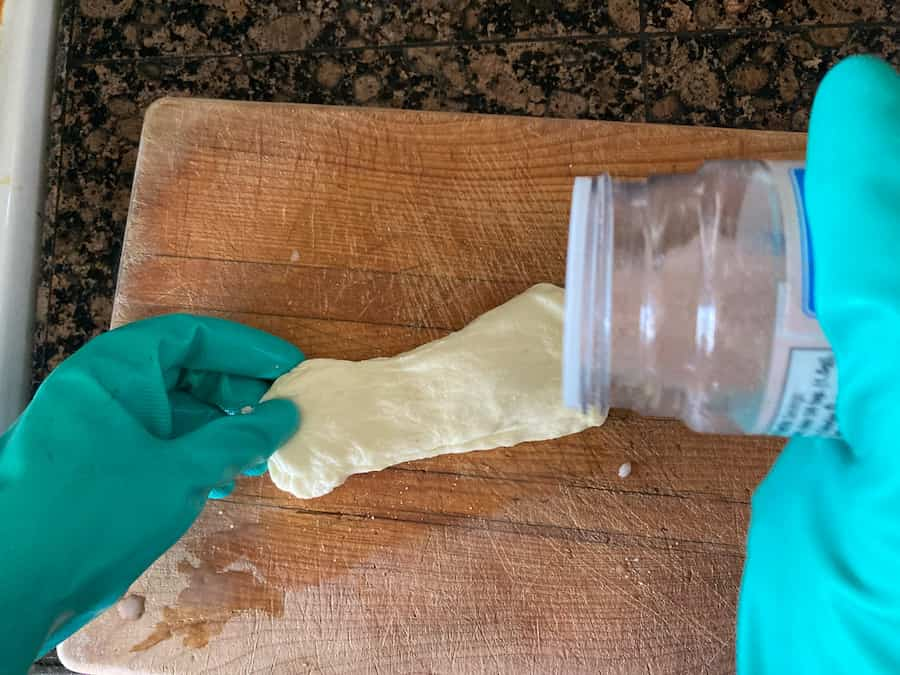
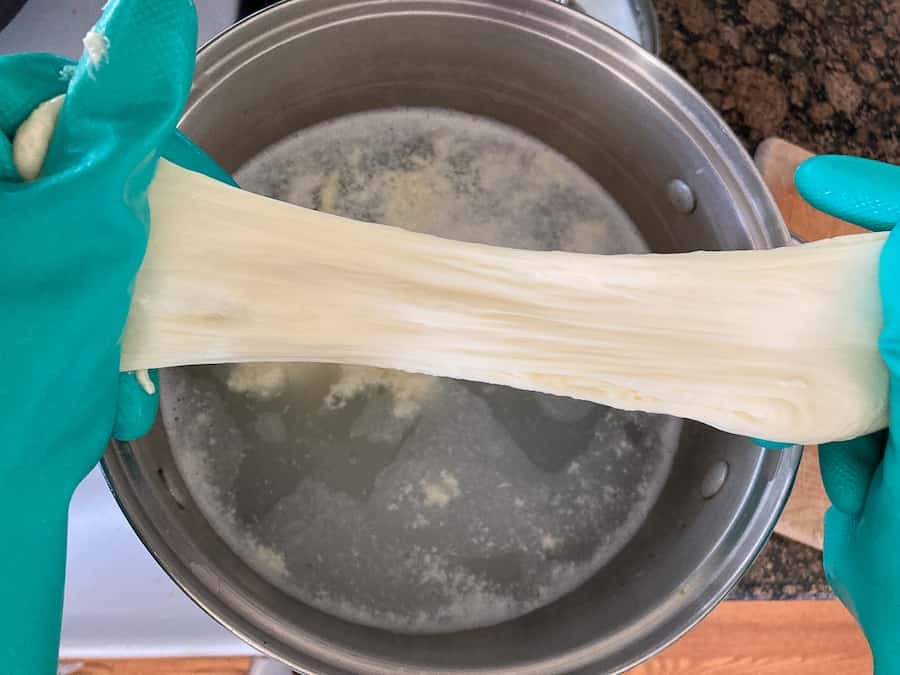
Gather the curds into a few balls. Place them in the pot of hot water. Use a slotted spoon or cheese skimmer to pull a ball of cheese from the water. Using rubber gloves to protect your hands from the hot curds, stretch and fold the curds repeatedly. Dip the cheese back in the hot water to heat them up for stretching. Do this until the cheese looks shiny and firm.


Step 6: Salting
Sprinkle salt over the cheese as you stretch it out. Work the salt into the cheese.
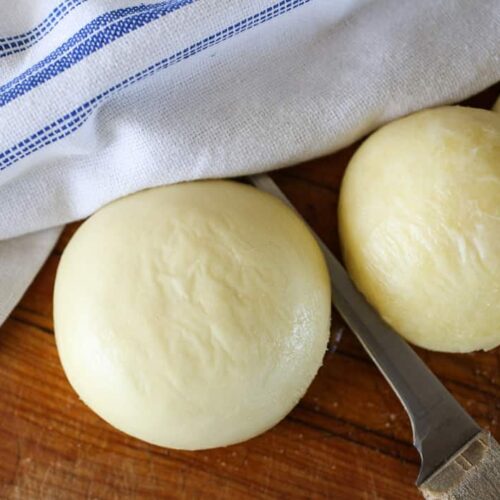
Step 7: Shaping the Cheese
Now comes the fun part! You can shape your mozzarella cheese into balls, logs, or any other form you desire. This can be done by rolling, folding, or shaping the cheese with your hands. If you find that the cheese cools too quickly to shape after salting, you can dip it in the hot water again. It will not wash all of the salt out.
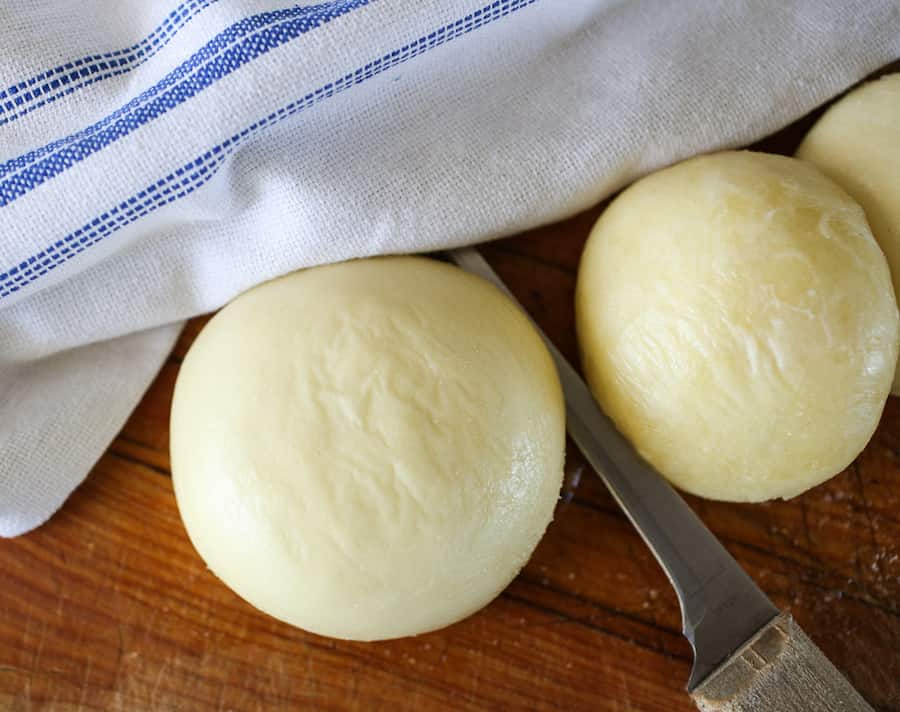
Step 8: Cooling and Storing Homemade Mozzarella Cheese
Place your freshly made mozzarella cheese in a bowl of ice water for about 15-20 minutes. This will cool the cheese quickly and help it retain its shape. Once it’s cooled, you can store it in the refrigerator in an airtight container, add a bit of the reserved whey for storing until you are ready to use it in your favorite recipes. I like to grate some of the cheese for pizzas.
Troubleshooting and Tips for the Perfect Mozzarella
- Use high-quality milk: The quality of your mozzarella starts with the milk. Fresh milk without any additives is your best bet.
- Maintain cleanliness: Ensure all your equipment is clean and sanitized to avoid contamination.
- You can microwave the curds rather than dipping in hot water. Put them in the microwave for 1 minute at a time. This will expel the whey and heat the curds for stretching. You will probably still want to wear gloves…it’s hot!
- Time and temperature are crucial: Pay close attention to the temperature at each stage of the process. Be patient and don’t rush the heating, cutting, or stretching steps.
- Fresh is best: Mozzarella is at its peak when consumed fresh, so enjoy it within a few days of making it.
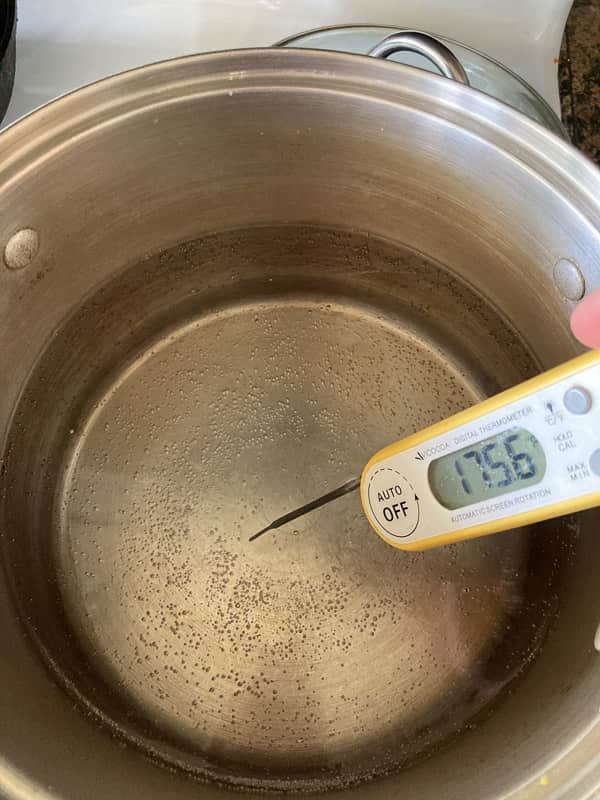
- Stretching can be tricky. If your mozzarella is wanting to break rather than stretch, make sure the water you are dipping it in is 175 degrees. Flatten the cheese out when you dip it in the water, this allows it to heat better than if you kept it in a ball to dip. Also, you can add a bit more acid the next go round. This will often help with cheese that doesn’t want to stretch.
Homemade Mozzarella from Scratch
Equipment
- 1 Large heavy bottom pot
- 1 Slotted Spoon or Skimmer Spoon
- 1 Set Heat Resistant Nitrile Gloves
- 1 Cheesecloth
- 1 Collander
- 1 Large Bowl
- 1 Large Sharp Knife
- 1 Thermometer
Ingredients
- 1 Gallon Fresh Milk
- 1 ½ tsp Citric Acid Dissolved in ¼ cup water
- ¼ tsp Liquid Rennet Dissolved in ¼ cup water
- ½ cup unchlorinated water Split between the acid and rennet
- ½ tsp Salt adjust to taste
Notes
You Just Learned About Making Mozzarella Cheese From Scratch!
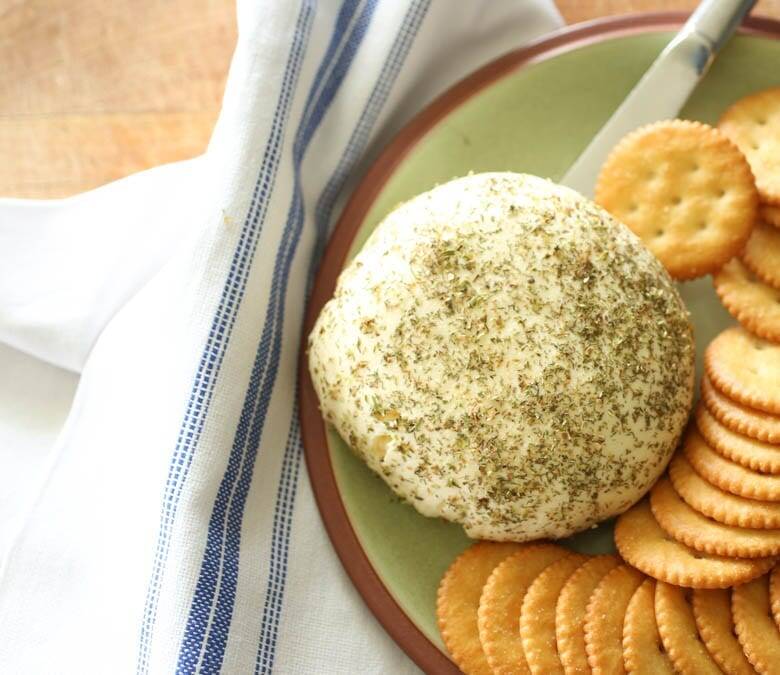
Congratulations! You now have the satisfaction of crafting your own homemade mozzarella cheese! You can use this on your eggs, in pizza, with crackers or a baguette!
Remember, practice makes perfect, so don’t be discouraged if your first attempt isn’t flawless. Each time you make mozzarella, you’ll gain a deeper understanding of the process and refine your cheese-making skills. So, gather your ingredients and equipment, follow the steps carefully, and enjoy the fruits of your labor as you savor the creamy perfection of homemade mozzarella cheese!
Maybe serve your mozzarella on a charcuterie board! Find my posts on making your own charcuterie here!