DIY Cross-Back Reversible Apron Pattern-Linen and Cotton
In this post, I share how you can not only make your own cross-back reversible linen and cotton apron but also how to make your own pattern. This post contains affiliate links.
These aprons are so handy! You can slip it over your head before you cook or as you head out to the garden or to do chores. No need to tie, slip it on! I think these aprons are timeless and beautiful. Stay with me, even if you don’t sew, I did a round-up of some of the most beautiful and affordable linen cross-back aprons that I could find.
This is going to look like a lot of steps, but trust me, this isn’t as difficult as it looks. This apron would make a wonderful gift as well! If you are into handmade gifts, scroll all the way to the bottom for more inspiration from some other bloggers!

Why Should you Wear an Apron?
I wear aprons sometimes, I really want to wear them more. Women from the past were so wise to wear them! I recently made a garden apron and am looking forward to using it. Keeping your tools and seeds at hand just seems logical.
I am not a neat or tidy cook. I have many grease-stained t-shirts to prove it, so I am purposing to wear aprons more. Plus, I just feel ultra-productive when I am wearing one! I love having a place to wipe my hands quickly.
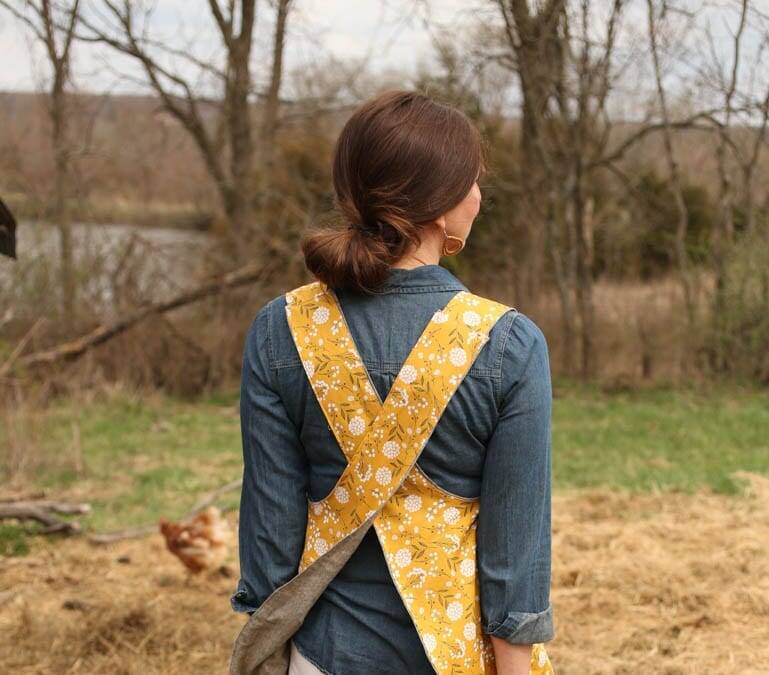
I really like this style because it is so easy to slip on, no need to tie it. Plus..pockets, I mean how handy are those? I think this style is also called a pinafore style. Let’s make and wear a reversible cross-back apron!
A Reversible Cross Back Apron


I have seen lots of tutorials on how to make various styles of linen cross back or japanese style cross back aprons. However, I didn’t see any that I loved for reversible ones! I am terrible at following patterns anyway, so I decided to make up my own.
This apron uses about a yard and a half of a solid cotton-linen blend and a patterned cotton fabric. I bought this linen-blend here, the color is olive, there is also indigo and red to choose from. The dandelion print came from Hobby Lobby and I absolutely love it!
You will need an old sheet of tablecloth for making the pattern. Then you will need a yard and a half of fabric for the front, and a yard an a half for the back. This fabric should be at least 42″ wide.
How to Make Your Own Cross-Back Apron Pattern
I will give you the measurements that I used, and you can go off of that, I am about 5’9″ and a size 6. I would say this would fit the average sized person. However, if you are much larger or much smaller, then you may want to adjust your measurements accordingly.
This is my rough pattern sketch, all measurements are approximate.

Choose fabric that is at least 42″ wide. The finished apron is approximately 41″.
From shoulder to front scoop is approximately 14″ this is the neckline
From shoulder to underarm is approximately 18″
Strap width is 3.5″ in on the front and 3″ on the back, so that you can tuck one inside the other to make it reversible.
The pocket is 15″x16″
This Video will Help You Make a Pattern
This video isn’t terribly long, around 5 minutes, but it will help you to see how I made the pattern.
Step 1: Choose an Old Sheet or Tablecloth for you Pattern.
I made two patterns just to practice. One out of an old sheet and one from a tablecloth. This looks like a lot of steps, but it is really simple and you are just making your own pattern for the apron.
Step 2: Fold the Fabric and Iron a Seam down the Center
Lay the fabric out and fold it lengthwise. Give it a quick press so that it is nice and smooth and easy to work with.
Step 3: Begin to trace the neckline

Using a tank top that fits you, begin to trace along the straps and neckline, go at least 1/2 inch larger than you want it to be, this allows for the seam. The width of the straps is 3.5″ and 3 “. Slide the shirt down as you go allowing approximately 18″ for the armholes. You can make the armholes as large as you like. The approximate width of the armholes is 10″. If you want it to be less fitted, go large like 25″ inches. Mine is fairly fitted and the armholes are approximately 18”. From the top of the strap to the neckline is approximately 14″, again if you want a bigger scoop, go for it.
Step 4: Draw the Straps
Following from the bottom of the arm hole, angle a line up to the top of the fabric. Measure over to match the width of the front strap minus approximately 1/2 inch. This will allow you to join the strap to the front and make it reversible.

Step 5: Draw the Body
After you have measured over the width of the strap begin drawing a line straight down along the edge of the fabric. Stop and then measure down the front of the seam for how long you want the apron to be. Now, going from the fold using a slightly rounded line draw a line from the front fold to the line for the strap until the two lines meet. My apron length is approximately 40″.

Step 5: Cut out the pattern
Cut the pattern out, and then pin it at the top and try it on to see if it suits you.
How to Make Your Own Cross-Back Reversible Apron
Now that you have made your own pattern, it is very simple to actually make the apron.
Prewash Your Fabric
First, I don’t like this step, it makes me feel irritable! However, if you are concerned with it shrinking after washing, you should probably be a good seamstress and wash and dry the fabric first. Please don’t ask me if I did or not!
Trace the Pattern
Using a washable marker or a disappearing sewing pen, or just a pencil like me, trace your pattern onto the linen fabric and also on the cotton.
Cut Out the Apron
Cut out both of the aprons.
Press a 1/2″ hem
Press a hem all around both aprons. 1/2″ works well. Press a hem on the tops of the straps as well.
Make the Pockets for the cross-back reversible apron
For the pockets, I cut two pieces of fabric, 15″ x 6″ from the linen and two from the yellow pattern. I sewed these together right sides facing and then left about a 3″ hole to turn it right-side-out. I wanted the inside of the pocket to be the opposite pattern of the outside. Give the pocket a press with the iron.
Pin the pocket in place, Mine is 9″ up from the bottom and centered on the apron. Stitch around the outside edges making sure the place where you left it open is on the bottom so that it gets stitched closed.
Next, stitch a line straight down the center so that you have two pocket openings if you want.


Stitch the Two Aprons Together


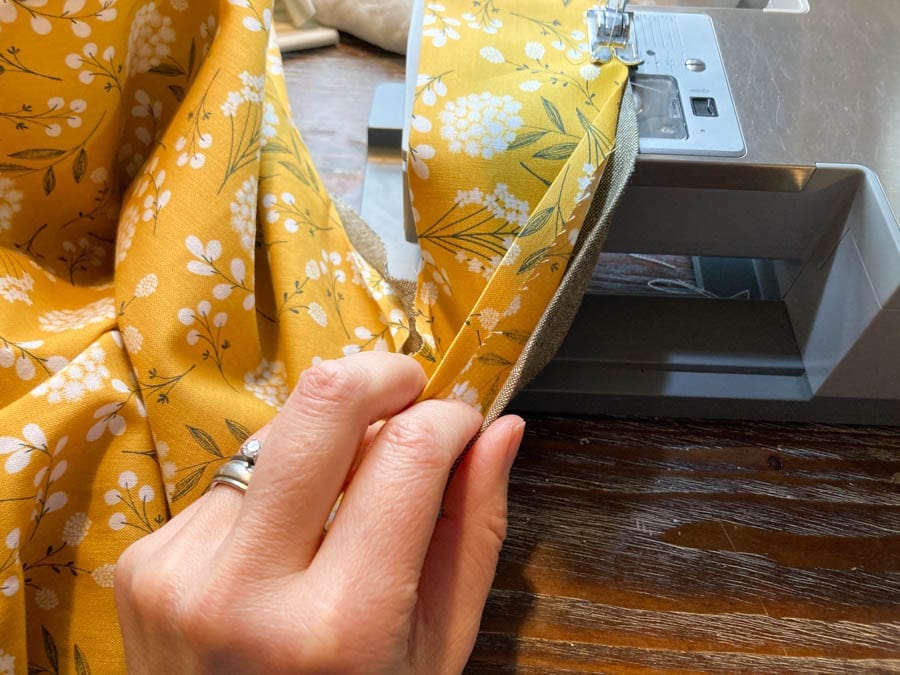
Now that the pockets are on the aprons, and the hems are pressed. You simple place both aprons together right sides facing out . Stitch all along the outside hem. Leave the tops of the straps open.
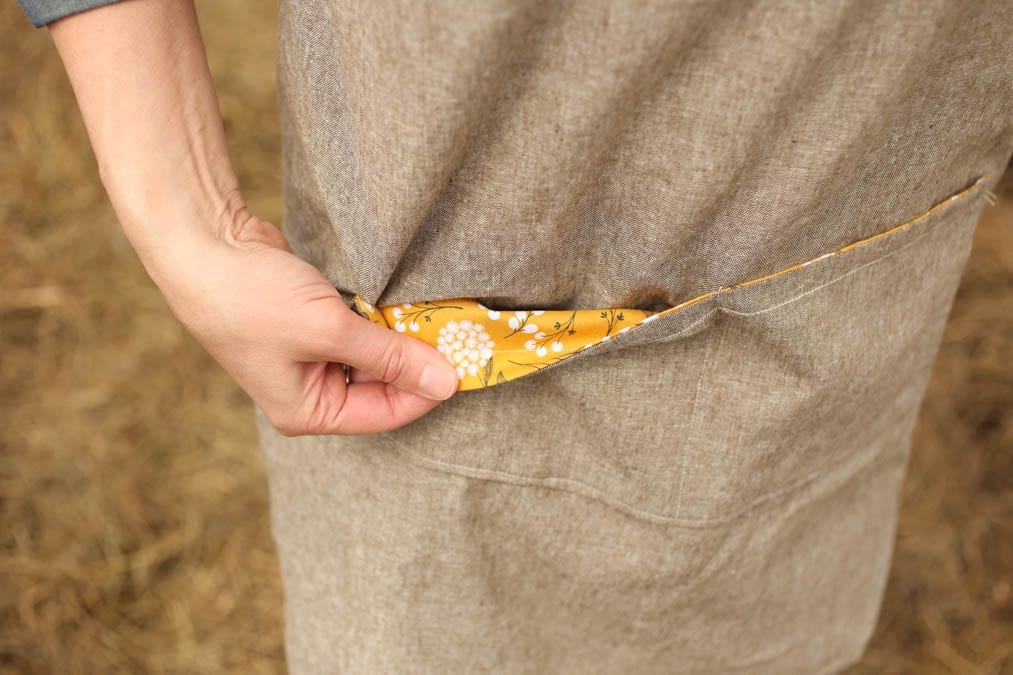
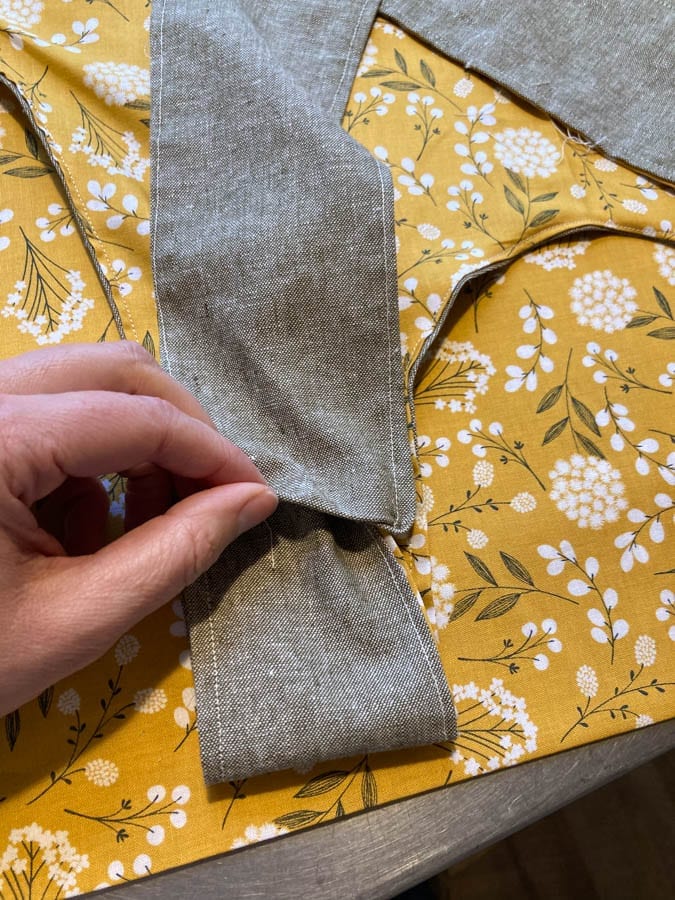
Cross the Straps
Take the straps and cross over so that the bottom left strap reaches up to meet the top right strap and vice versa on the other side.
Nest the Straps
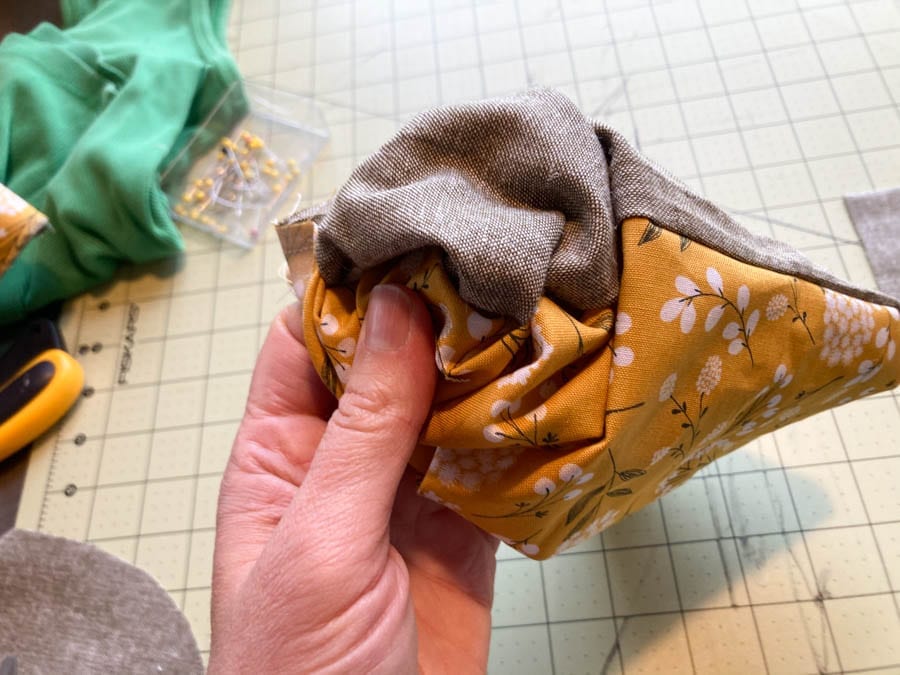
Slide the slightly smaller strap inside the larger one. The edges should be pressed and neat. Now, just stitch along the seam to join the two straps together.


That’s It! Now You Have a Handmade Cross Back Apron!
This cross-back reversible apron is chicken approved! Yes, I always hang my aprons outside on the barn…


A Collection of Cross-Back Pinafore Style Aprons You Can Buy!

Check Out My Shop!
Planners, aprons, pillow covers, and kitchen towels!
Pin and Share this Cross-Back Reversible Apron!


Omgoodness I am going to make one (or more) of these!!! Thanks so much! Using the tank top is brilliant!!!
I hope you make one and that you love it!
This is so beautiful!! (And your pictures are equally beautiful!) Pinned onto multiple boards. I don’t want to forget to make this!
Oh good! I am so glad you like this! Thank you for pinning!
Love this! I was just looking at patterns, now I can make my own!
Yay! I am so glad this inspired you!
Very nice tutorial Jennifer. I love these aprons ❤️
Thank you I’m glad you like it!
I wear a cross back apron every day! I love aprons, and this style really protects my clothes when I clean and cook and garden, too! I only take it off when I’m going someplace or having company (even then it often stays on!). I wrote about my love of aprons on my blog, too!
Thank you for sharing that! I am heading over to your blog now!
I love these cross-back aprons Jenn! I could use one of these for gardening too – thanks so much for the great sewing tutorial! Pinned for when I get the time to sew one!
Yes, I made a gardening apron, but I actually prefer this one!
This is definitely going to become a perfect gift for my DIL who is a new farmer (on a homestead from the early 1900s!).
Yes! What a perfect gift for her!
I love the print you chose! Your tutorial is so clear and easy to follow. I also, want to wear aprons more. Glad to join the April DIY challenge with you!
Me too! Thank you for visiting!
Hi Jenn, I have a question about the apron, when it comes to sewing it together, you indicate to sew it right sides out. Would it be possible to sew it right sides together and then (leaving an opening) turn it so that your seams are enclosed and then just top stitch around you seams. I realize that the pockets might have to be stitched on afterwards. It seems that this would save on pressing a seam all around and then sewing. Just trying to understand, I’m a relatively new sewer and my sister has asked for an apron for Christmas.
Thanks in advance,
Michelle
I would also like to know the answer to this question. 🙂
I thought for sure I had responded to that question a long time ago! Don’t know where the response went. I think that would work just fine! I would still sew the pockets on first so that the stitches are concealed between layers. That’s the best thing about sewing is you can find what works best for you!
Thank you for your clear detailed directions and pictures. I have made chef aprons, but love the look of your apron. Just an FYI, when I needed to make a pattern for the chef apron I used parchment paper, traced an old apron and adjusted the length. For this apron I’ll tape two pieces of parchment paper together, so it’s wide enough. Your use of a tank top to help shape the top was brilliant!
Parchment is a great idea! Thank you for sharing! I hope you enjoy making some for yourself!
I am wish I could post a picture of my apron! It turned out perfect! Thank you so much for the pattern and tutorial!
Can you e-mail it to me? I would love to see it and then maybe I could share it on Instagram or somewhere if you would allow it! I am so happy that it turned out! They are great aprons!
Wow! I was just telling my mom that I wanted to make one of these. I wear an apron often, though like you I have lots of oil stained clothes because I didn’t wear one. Thank you for the tank top idea! Have a blessing day!!
Yay! I hope you love it!