Boston Ferns The Care and Keeping
In this post, I will show you how I care for my Outdoor Boston Ferns. I will give you my tips for buying, potting, and caring for ferns.
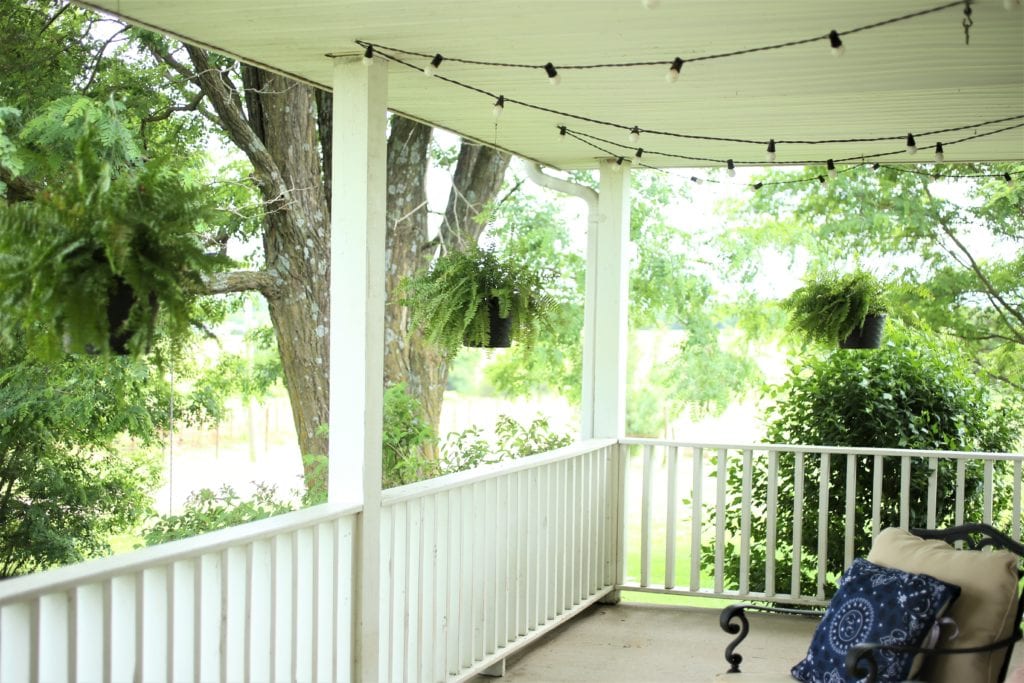
I am a huge fan of front porches. The bigger the better. We have lived in three different houses and two of them have had wrap around porches. I choose a porch over a garage, or other more practical aspects of a home. So, while our home has no storage and very few closets, we do have a front porch! Foolish maybe, but front porch sittin’ is just about as good as it gets.
Boston ferns hanging all around the porch says “Summer” and “relax” and “take it easy.” They just take a plain porch to the next level. Ferns are pretty easy to care for, but you just need a few tips for them to really look their best.
First, a Quick Love Story

So, I would describe myself as frugal. I love to have Boston Ferns on my porch, but I do not like to pay for them! They can be around $12 or $13 dollars most places–multiply that by 7 and you have a pretty large investment. Every year I wait for my local Sutherland’s to have their early-bird sale. From 7a.m. to noon most plants are 50% off and their Boston Ferns are usually $5.99. My husband and I hustle up there and fight the crowds, knocking people over in the mad dash to get to the ferns. (Only a slight exaggeration!)
This year however…they were $7.99! What??? I refused! I will not pay $2 more per fern! So, I told my husband the porch would be bare this year…oh the drama!
A pleasant surprise
So, one day a few weeks ago, my husband came home with a huge smile on his face. He is a pay-full-price-and-get-it-done kind of person, so when he announced that he may have just found the deal of the century I was a bit skeptical. He took my hand and led me to the car, he opened the back door and there were seven ferns! “$2.50 a piece,” he announced! Do you see the love? The moral is, sometimes it pays (punny) to wait it out, and even a full price kind of man can get a bargain now and then!
Now, when you get ferns on clearance for $2.50 a piece, they may at first look a little forlorn. We have bought them at a bargain before…never $2.50, but we have brought home some sad ferns in the past. Don’t worry, within a week they will look much better. At three weeks, they will look pretty good and by one month, they will be lush and green. Mine are near the three week mark, so they are looking pretty good.
#1–Why You Should Re-Pot Your Boston Fern
This is the most important step. When you bring your lovely fern home, you will find that it is likely planted in a pot that is way too small for it. So, no matter how much water or shade or fertilizer you give it, it will never really thrive without being able to spread it’s roots a bit. Also, you will notice that when you water the fern the water will just run right through. The poor fern is root-bound and cannot even get the water you are giving it.
Choose a pot that is at least two inches larger than the one it is in when you buy it. My ferns come in a 10″ 1.5 gallon pot. I transplant them to a 12″ pot, but I don’t know the gallons… I use the same pots for several years, but replace the wire hangers as needed. Also, make sure the pot has some sort of tray at the bottom to help retain the water.
Re-potting tip #1–Finding replacement pots this year proved to be a challenge.
I don’t know what the deal is, but hanging baskets are very hard to find in my area this year! Two of my pots needed to be replaced, and I could not find any that matched, or that were even similar. There are some on Amazon, but they are way more expensive than what I paid for mine! So, if you find pots you like and you know you will use them every year, it may be wise to stock up and think ahead! Also, I like to buy the wire hangers and just replace them every few years when they get too bent to use. These are sturdier than the plastic ones and look nicer too.
Re-potting tip #2–Be prepared to make a mess
This is not my favorite job, and there is not really a neat and tidy way to do this. First, prepare your ferns. I transplant seven at a time, so this can be a bit time consuming. Don’t rush it, just go with the fact that this will take a minute. Take all of the hangers off of your ferns. Get those out of the way so that your ferns can slide out easily.
Next, put a bit of soil in the bottom of your new pot…also leave the hanger off of it at this point. Now, take your boston fern out of the pot and loosen the roots just like we did when we re-potted lavender here. Place the fern in the new pot. I do not put rocks or gravel in the bottom of these pots like I do for lavender.


Now, this is the messy and tedious part. Since the new pot isn’t way bigger than the old one, it is going to take a bit of work to get the dirt down around the ferns roots. I like to use a little cup or shovel to scoop out the new potting soil, and then use my good old hands to pack the dirt all around the roots. Just keep scooping and packing. Remember, you are giving new life to your tired fern by doing this. Now it will have nutrient rich soil to hold moisture as well!


#2 Choose a Shady Location for Your Boston Fern
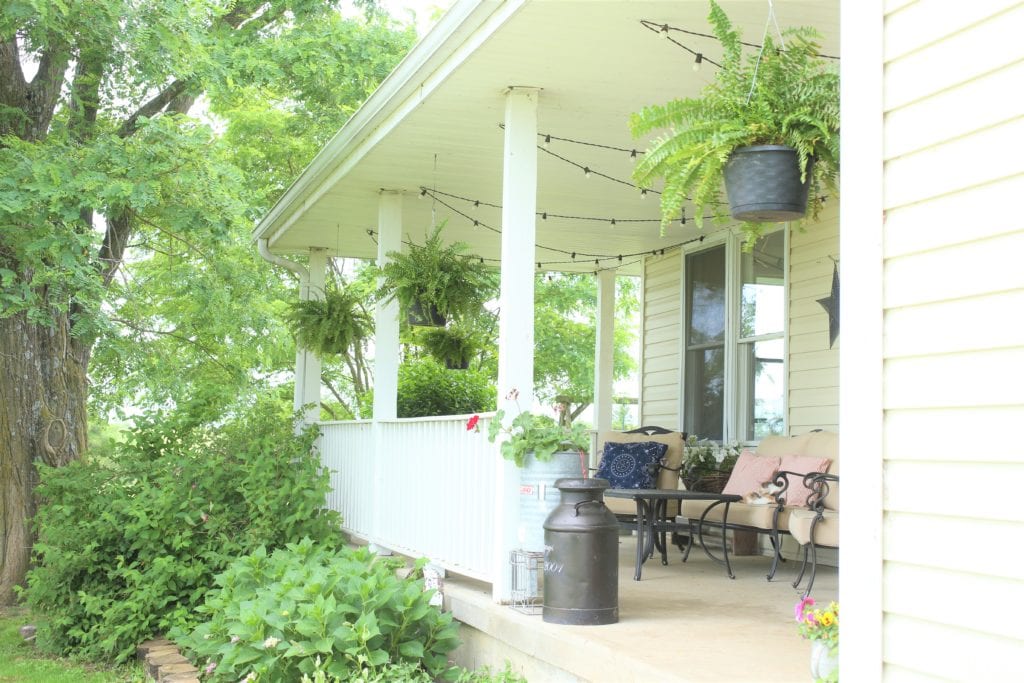
Boston ferns don’t like direct sun. They will quickly show you that they do not like it by turning brown and dropping their fronds (isn’t that a lovely name for leaves? Ferns are so special!).
A porch that gets some morning sun is a fine location, just make sure your fern is shaded from the hot afternoon sun.
#3 How Much Water Do Boston Ferns Need?
Ferns like to have regular water. They also love a nice misting from time to time. Every three days seems to be a good rule of thumb for my climate. In the dog days of Summer however, they may like a drink more often. If there is rain in the forecast, or if it starts to rain, I have the habit of running out and moving all of my ferns to the front yard so they can get a good drenching.
Boston Ferns also like humidity. Not a problem here in Missouri. Misting the fern daily will help with this if you live in a dry climate. This hose nozzle will definitely help with misting.
#4 How Often to Fertilize a Boston Fern
Boston Ferns don’t require lots of fertilizer. However, if you want them to stay nice and green throughout the season, giving them some extra nourishment once a month is a good idea.
#5 What to do with your Boston fern at the end of the season?

I am always a bit sad in the late Fall when I know a frost is coming, but my ferns still look so lush. What to do? Boston Ferns can be kept inside as a houseplant. Just remember that they need humidity. A dry winter home will not be the most welcoming environment for a fern. Keeping the fern in a tray of water and misting regularly will help.
If you have lots of ferns hanging outside, bringing them in for the winter may not be practical. I have tried allowing mine to go dormant in the basement before bringing them out in the Spring. Unfortunately, this did not go well for me. I may have given them too much water over the winter. From what I understand, they don’t need much in their dormant state. You should also prune them way back before putting them in a dark area for Winter. I think I will try again this year and hopefully have some tips for you!
Are you a Gardener or Homesteader?


Thanks for stopping by today! I hope this post helps you to keep your ferns healthy and lush!
Pin for Later!





I love ferns! In NY when money was ever so tight, I would get ferns and the winter bring them in and we all took turns each month taking a shower with the ferns! Waste not! Lol. They do love the humidity. I managed to keep them alive most of the winter. It gave me hope spring was coming!
What a hubby!! That’s sweet.
Great post Jenn❤️
That is great! Showering with the ferns! Thanks for stopping by!
Love this!
We have fern of different varieties growing all over our yard. I think our property was once a (fern) nursery of some sort! I pull it up I clumps and pot it and before the summer is over they are huge! Absolutely the only thing I can grow! LOL, My ferns are in great need of re-potting soon.
Awesome post! Have a great summer!
Yes, my Mother-in-law has ferns all over her yard too. She lives in PA and they have lots of trees around. You have a great summer too!
This gives me the courage to try this at my new home we just bought today! Those ferns still on sale? I’m there if they are!
I am afraid they are gone! Congrats on the new house!
Loved this post! Porches and ferns just go together! One of my ferns is looking a little sad and we haven’t even got into the hot weather yet! I’m going to report it and see if that will help it!
💗👍🏻🌿
Thanks for stopping by Tracey! I hope your fern perks up!
I am a fern lover as well!! Your husband is a gem!! What a sweet thing to do! I also didn’t realize that they should be repotted!! Love learning new things like this and will pass it along to my mother too!
I just saw the prettiest arrangement where they added flowers underneath the fern and made it look like a topiary! Great tips friend! Thank you so much!
Happy day!
KariAnne
They are so pretty! They make the porch look so inviting. We too have a big porch and no garage!
Your porch is gorgeous! I love Boston ferns.
Thank you Jayme!
I love Boston ferns…but we have all full hot sunny spots…so I haven’t had one in a while. Thank you for sharing these tips with us on Farm Fresh Tuesdays…I may just need to get one for a houseplant! 🙂
Yes, they do make a nice houseplant! Thank you for hosting!
Hi Jenn, thanks so much for sharing your Boston fern tips on Tuesday Turn About. I’m happy to say I’m featuring your post this week. Hope you will stop by and link up again!
Thank you so much Michelle!
I always have boston ferns flanking my front door on the porch every summer and they do thrive there. The year my daughter got married, i had 2 on the front porch and 2 on the back patio. When it got cold, I moved them to the basement and they did well there until my daughter’s wedding in mid November. The ferns looked great up front in the church during the ceremony. 🙂
That’s great to know! I bet they looked so lovely at the wedding!