Kids Egg Gathering Apron from Pillowcase
Egg-gathering apron from a pillowcase? If you have a pretty pillowcase why not turn it into a useful apron? It’s a simple project with a little bit of measuring and sewing you can have a sweet egg-gathering apron!
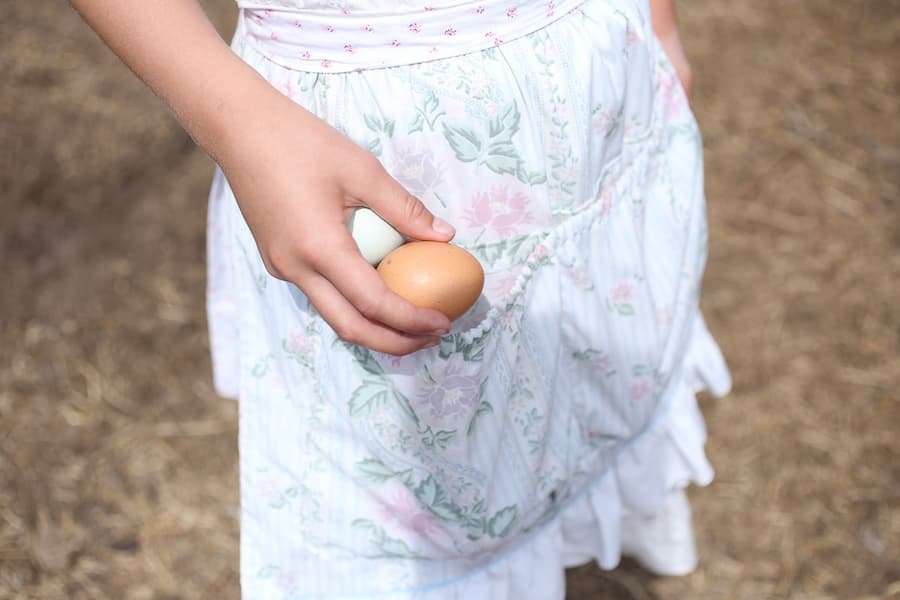
My daughter asked me to make her an egg-gathering apron. We recently got some laying hens that are laying like crazy! She didn’t like carrying the egg basket down to do chores and she found that it was getting heavy to carry back to the house. She believed that an apron would be the answer! I was happy to oblige!
I kind of love aprons! There are several apron tutorials here on the blog and I also have aprons for sale in my shop!

Choose a Pillowcase
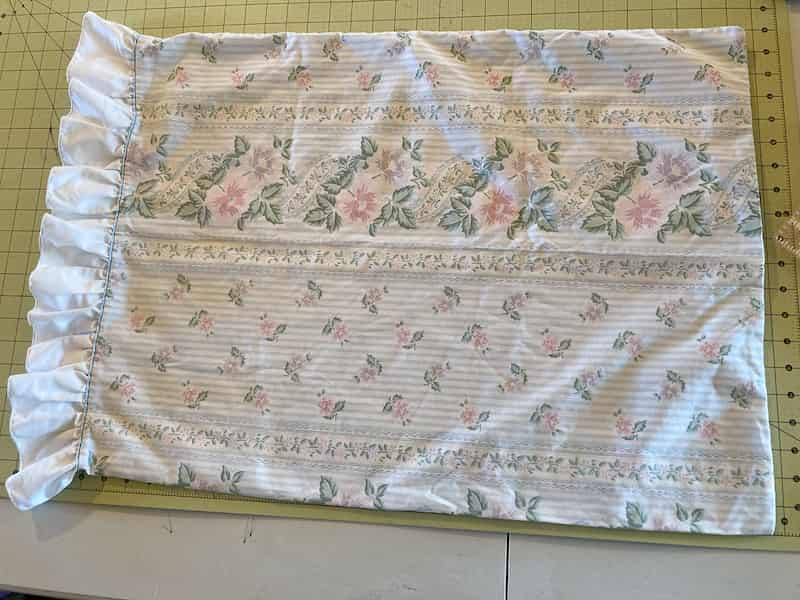
Searching your linen closet or a thrift store would be a great inexpensive or free way to find a lovely pillowcase. I found this pillowcase in my linen closet. I think it was my grandma’s and I know it would make her happy to see me upcycling it into something super useful and cute!
This one is extra special because it had the sweet ruffle detail along the side. It was like it was meant to be an apron all along! I highly recommend finding a pillowcase with a ruffly detail! This makes the kid’s egg-gathering apron so pretty and old-fashioned looking! Of course you could always add one if you can’t fine one with a ruffle already!
This pillowcase was 25″ wide plus the ruffle.
Measure and Cut the Pillowcase
Measure the length that you would like the apron to be. I held it up to my 9-year-old daughter and she told me how long she wanted it. I marked that on the pillowcase and then cut off the excess. This will now become the pocket! I cut off 12″ of the pillowcase.
I left the remaining pillowcase in two layers, this was to avoid any extra cutting and the second layer would hide where the pocket was sewn on the backside.
Cut the Pocket for the Apron
Next, I decided that I wanted the pocket to span most of the apron. I simply used a cup to round the pocket bottoms. I did trim off the sides of the pocket piece so that it wasn’t seamed together. Then I rounded the bottom edges.

Hem the tops of the pocket
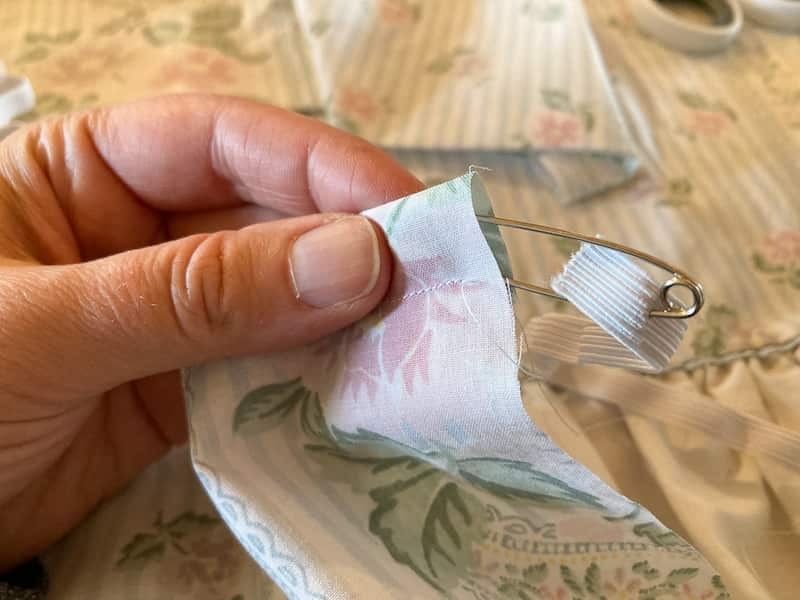
We will be making an entire pocket to add to the apron, it will be a free-standing pocket that we will then sew onto the apron. Fold the fabric down about 1/2″ on each pocket piece. This will be for the seam on the bottom piece and then you will feed some elastic through the top piece. Hem both pieces. Next time I would take the time to fold it over twice and do a neater hem. Using a safety pin, feed the thin elastic through the opening. I used 1/4″ elastic. Cut your elastic just a few inches shorter than the pocket. You don’t want it to pull too tightly.


Assemble the Pocket for the Egg-Gathering Apron
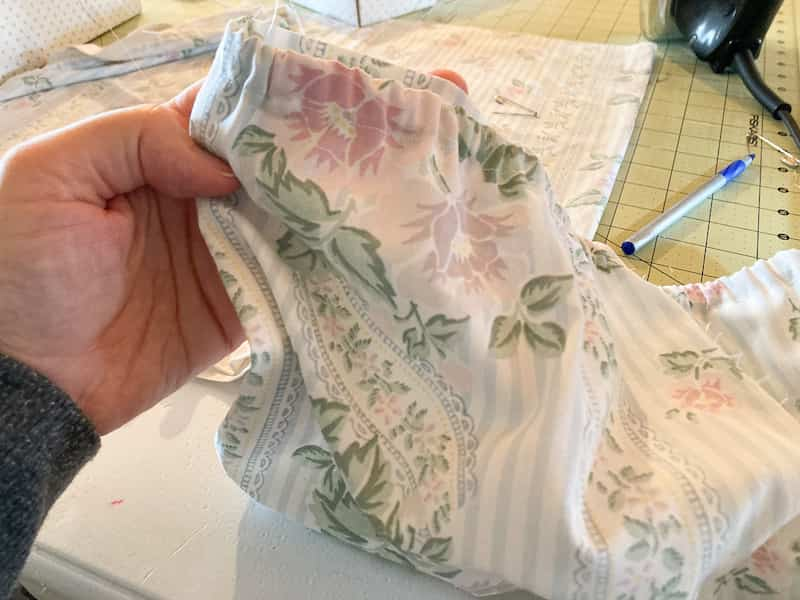
Place the right sides of the pocket together and stitch all around both sides and the bottom. When you stitch along the bottom, create a little pleat right at the center, this will give you room inside your pockets and will allow the top to pucker with the elastic and not pull too tightly. Stitch right along that pleat. Turn it right side out, push out the bottom rounded corners and you now have your pocket!


Stitch along the outside of the pocket and attach it to the top layer of the apron. Find the center of the pocket and stitch right down the middle to make it into two pockets.

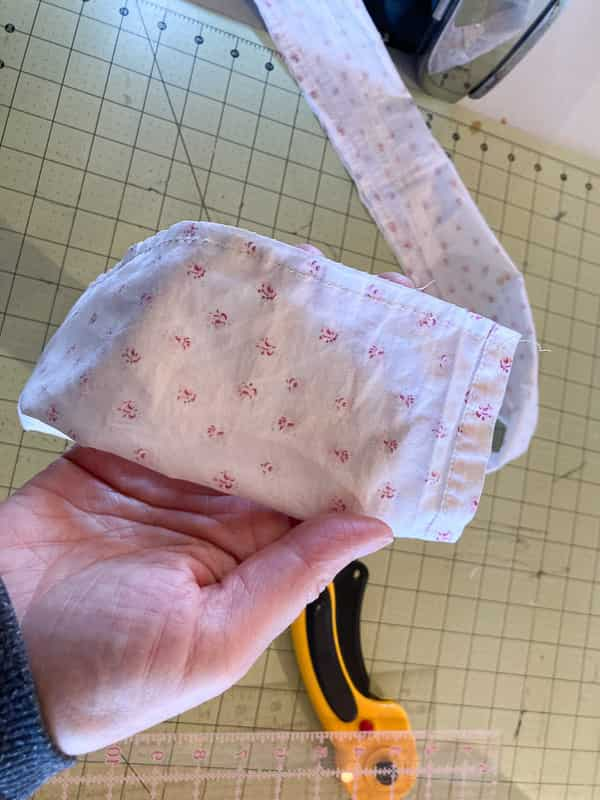
Create a Tie for the Pillowcase Apron
My favorite way to make a tie is to cut a wide strip of fabric this one is 5″ wide and 66″ long. I then fold it in half and stitch along the edge. Next, you turn it right side out and press it flat with the seam at the middle. I used an old sheet for the tie. It coordinated well! I’ve also used these sheets for making a rag rug here.

Attach the Tie to the Apron
Next, you will need to do a basting stitch along the top of the apron and then pull the edge strings and create small pleats for the top of the apron. After that, lay your apron tie out flat and pin the apron to the center and work your way along the edge so that the apron is centered on the tie from the middle and outward.


After you have it pinned in place, fold the top down right at the center of the tie so that the apron is sandwiched between the apron tie. Give it a quick press and then stitch it all along the bottom to attach it to the apron. Next do a top stitch along the tie to make sure it continues to stay neat and flat.
Lastly, you can stitch along the sides of the apron to help it to lay flat as well. I did not stitch along the bottom, but you certainly could right above the ruffle.
Trim off any strings and your apron is finished!


Finished Kid’s Egg-Gathering Apron Size
The tie after being folded over is roughly 1.5″ tall and 64″ long. The apron is 16″ wide and 18″ long. The finished pocket is 15.5″ wide and 8″ tall.